Introduction to Cisco ASA Firewall in Cisco Modeling Labs (CML)
This tutorial provides a comprehensive walkthrough on setting up and configuring a Cisco ASA firewall inside the Cisco Modeling Labs (CML) platform, ideal for students and network engineers learning firewall operations.
Powering On and Accessing CML
- Start by powering on the CML environment.
- Note the IP address provided by CML and enter it into a web browser to access the management interface.
- Log in using your admin credentials.
- If errors occur when adding labs, try logging out and back in or deleting old labs to resolve issues.
Creating the Firewall Lab Topology
- Add a new lab with nodes including Cisco ASA firewall, switches (managed or unmanaged), routers, and computers.
- Rename devices for clarity: e.g., ASA firewall, Switch1, Switch2, R1, R2.
- Connect devices with appropriate links to establish communication paths.
- For a detailed approach on building network topologies, see Designing a Network for XYZ Company: A Step-by-Step Guide.
Powering On and Initializing ASA Firewall
- Power on the ASA firewall node.
- Open the console to monitor boot-up progress; this may take some time.
- Use the default login password:
Cisco1@3for initial access.
Basic ASA Firewall Configuration
Entering Enable Mode
- Type
enableand enter the enable password:Cisco1@3to access privileged EXEC mode.
Changing the Hostname
- Use the command
hostname <name>to rename the firewall for easier identification.
Interface Configuration
- Use
show interface IP briefto view existing interfaces. - Two main interfaces generally present: GigabitEthernet0/0 (outside) and GigabitEthernet0/1 (inside).
- Assign interface roles and IP addresses:
interface GigabitEthernet0/0nameif outside(security level set to 0, indicating untrusted zone)ip address 192.168.2.1 255.255.255.0no shutdownexitinterface GigabitEthernet0/1nameif inside(security level set to 100, indicating trusted zone)ip address 192.168.1.1 255.255.255.0no shutdown
- For foundational network device concepts helpful in understanding these configurations, refer to Complete CCNA 200-301 Course: Network Devices & Fundamentals Explained.
Verifying Interface Configuration
- To view all interfaces:
show interface IP brief - To view specific interface config:
show running-config interface GigabitEthernet0/0 - To filter interface IP details:
show interface GigabitEthernet0/0 IP brief
Saving Configuration
- Save all current configurations with
write memoryto ensure changes persist after reboot.
Summary of Key Commands
enable+ passwordhostname <new_name>- Interface configuration commands:
interface <interface_name>nameif <inside|outside>ip address <IP> <subnet_mask>no shutdown
- Show commands:
show interface IP briefshow running-config interface <interface>
- Save config:
write memory
Conclusion
This session demonstrated the initial setup and configuration of a Cisco ASA firewall in CML, including interface naming, IP assignment, and basic commands needed for firewall management. Future lessons will delve into advanced firewall policies and security settings.
For continued learning, refer to the CML playlist covering detailed Cisco ASA configurations and troubleshooting techniques.
You might also find it helpful to explore Palo Alto Firewall Basics: Key Configuration Techniques for alternative firewall platform insights.
Everyone if you see now we are going to do the CML. Many students are requesting to do the ASA firewall in the CML. So we
are going to do that one. Now let me show. So see here first you need to power on the CML. As I'm using the CML
you can see. So you need to power on the CML. Then you will get one IP here. You need to type that IP in the browser. So
I can open any one browser and I can keep the browser ready. Once we get the IP, we can type that IP in the browser.
So here if you see this is IP 17.133. So let me do 192.168.1733. So I will log and you can see here. Let
me go inside and here we need to write admin and the password whatever we set we need to put that one. So let's me try
to login. So this is a CML. I will add a new lab here. If you see API add this one encounter an expected problem.
Please remove the please report uh problem to the support. They are giving this one. So we can what we can do here.
I log out also. Let me try to log in again. So here I will write admin and then capital A. Whatever the password we
wrote we can we said we need to log in there and let me delete the old lab also. Let's try to fix this issue. Click
the add lab here. Now it is working. Okay. So now I have here what I can do in this one. As we told we are going to
learn the Cisco ESA. Add a node and you can see this is a Cisco ESA. I will take Cisco square here and I will take one uh
switch. This is one switch here or we can take unmanageable switch also. So this one is one switch here. Here you
have unmanageable. So anyhow I taken this one. Let me connect one more here or directly we can connect the router
also. If you want to save the node because this is a free version. We can connect limited device here. Anyhow, let
me take some router. We can take router or anything or computer here. So, I will take the router. This is a basic
topology I'm designing. Let's connect this one. I will change the name here like I will give the firewall or ASA
and this one. I will give the name as a switch one. This is a switch one.
and you go to the this switch and give this name is a switch two and this one I can say this is the R1.
Any name we can give I will give here R1 and here I will give the R2. This is R2.
And we need to connect also. So what I will do? I will connect the cable. Add a link. Just try to add the link from here
to here. From here to here, from here to here, then from here to here.
So we can move little. If you see here in ASA, I think I add the link wrong. So let me delete and I will add again.
I will connect this. So we are using this interface. If you see topology we can make little big or let me do this
way. I will move this here. Okay like this. So this will be good. And if you want we
can zoom in also this one. And now we can power on the device. So let me power on first ASA firewall and we can try to
use. So this power on already and we can take the console. So this is a console of the ASA firewall. Open click here and
this one you can press enter and check this ASA firewall is booting up. We need to wait for some time.
Okay. So what we will do here? We need to wait and then after that we will do the initial configuration in the ASA
firewall. So you need to remember here also the password because uh here in the real world let me show
you also in the real world when you press enter it will go without asking any password but here you have one
password default password we will check now. Okay let it boot up we will do after uh that. So if you see still it is
booting up we need to wait for some time still it is booting up. So now let's see it is uh still booting up. ASAF firewall
is taking time to boot up and here it will be ready. Let's see. So password we need to check because by
default whatever we take we have the nothing no password but here in the Cisco modeling lab we have the password
capital Cisco 1 at the rate three. So we need to verify we need to check that one. So this is a small small video we
are going to prepare for Cisco ASA firewalls how to configure all that stuff in the Cisco modeling lab. So you
will get this video in the CML playlist you can watch there. So see here this is a firewall we can say and now I can
press enter. Let me do the configuration. I will write enable and they are asking me the password here
enable and the password. So remember here password Cisco capital C remaining is small one at the rate three and press
enter. So you can go inside. If you are confused let me write down somewhere here. See here this is a password. I can
write here I can make the bold here this is a password. Let me write down here Cisco. Okay one at the rate three. This
is a password. You need to remember this one. Okay. So when I write the password, we can see we go here inside and here
you can see unlicensed. So here I go inside and I will say would you like to enable this? Uh I will say no I don't
want to do now what we can do first I will change the name of the device. So same thing as we do in the Cisco router
I will write host name and change the name of the device. After that what you need to check if you want to write like
show ip interface brief. This command we are giving in the Cisco router and switch. But here you will get error
because here without IP you need to give you here let me write show I interface IP brief. So here see this command we
are using in the Cisco router and switch. But here in the Cisco firewall you need to write IP after interface
show interface IP brief like this. So when you check you have here the management interface here and you have
internal data you can see these two interface we have giga G0 by0 and we have another one G0 by 1. So these two
interface we can use and we can assign the IP address to these two interface and we can say like maybe this is a
inside zone. This one we can say inside zone outside zone like that we can do. So let me put the label here. This side
we can say inside zone. Okay. inside zone we can say and the another one we can say outside
zone. So this is inside and I will write here outside. So let me write here this is the outside zone we can say.
So I will write here outside zone. Okay. So this we need to configure also in the ASA. So we can configure no
worries. So here I can keep this and here we need to assign the IP and do the configuration. So let's go here.
So what I will do here I will go under the interface. So what interface we have here? I will use that one. Interface
giga you have. So G 0 by0. Okay. This one outside interface we have G 0 by0. So after that I can write name if what
name I need to give inside or outside. So this one we are saying outside. Okay. So we can write here outside
I give this name. So whenever we write outside automatically the security level they will set as a zero. Zero means they
are not going to trust. So after that I can write IP address. And what IP I want to assign. Example
here I am going to use 1926 168 uh 2.1 and give the subnet mask 255.255.255.0
zero and you press enter and write no shirt. Okay. And now I can exit. We have another interface. I will write
interface G0 by 1. And then here I will write here I name if name if inside. Okay. When we set inside automatically
you will have the security level as 100. Here you can see. So now after that what we can do here we can assign the IP
address. Same as we done. I can write here IP address like inside we will use 192 1681.1 give a space 255.255.255.0
and write no shirt here. So we assign the IP address. Okay. If you want to check how you can check if you want to
check the interface here also you can write show instead of writing IP you can write show interface IP brief. Now you
can see we assigned the IP address to these two interface and it is up. So this is a basic configuration we done
and here if you want to check you can write show running configuration interface and press enter
they will show you only interface detail. So this is the command just to check the interface detail. If you want
to check in the Cisco ASA firewall just write show running configuration interface. And we have some more also.
Example, if you want to check only the G0 by0, you can write show running configuration interface G0 by0. It will
show you only G 0 by0 detail. If you want to check G0 by 1, then same command you can write show running configuration
interface G 0 by0. It will show you G 0 by0 detail. What else we can say? You can write like this also. Show interface
interface G0 by 0. Okay. IP brief. This way also we can write show interface. You want if you want to
filter example if you write like this show interface IP brief it will show you all the interface. But you want to check
only particular interface then you can write show interface G0 by0 and after that you can write IP brief. This is
also another command to check particular interface. if you want to check this particular interface. So this is a basic
thing we done here today. What we learn? We learn here how to change the name of the firewall. How we can set the
security and how we can assign the IP address here. Okay. And if you want I can put the label here. I can put here
this site we are assigning IP 192.168.2.1/24. Okay. And the other side we are
assigning the IP. Let me write down here in this site we are using 190 to 168 1.1.1/24
and I can make this bold. Okay. So by seeing this one you will have the idea if you see or I can zoom
out and you can see this is our topology. I done this one and what else I can do here. If I want to save the
configuration I will write write memory. When I write here write memory to save the configuration. So whatever
configuration we done in this video I save here. So I write WR memory. Okay. So with this one we can save the
configuration. This is a basic lab we done. First what we done here we change the name of the firewall. If you want to
see the commands here what I done. See here once we log in they are asking me the password. So I put this one Cisco
one at the rate three. This is the first thing I done. Then I can go in the enable mode. After that I change the
name of the device same like we change in the router Cisco router and Cisco switch. After that with this command we
cannot check the interface status as we can check in the Cisco router and the Cisco switch. But we need to remove IP
from here. You need to put IP in this place like I done here. So with this one you can check the interface detail here.
You can see these are the interface available in this firewall. And after that you can go under that interface.
Example I go here G0 by0 and you need to define this is inside or outside in the Cisco ASA firewall. So I write here name
if outside. So we set the label as a security level outside. So by default they will put the zero. So they will not
trust this region. Then we will assign the IP. Same procedure how we configure the IP inside the Cisco router and write
no shirt. Same thing you will go for another interface. go under the interface write name if inside and you
are defining this interface inside. So they will trust and they will put as a 100 and we can assign the IP address and
with this IP we can check show interface IP brief to check the interface detail and here I shown you some shortcut like
if you want to check only interface detail generally what we are writing we are writing show run so it will show you
all configuration now we don't want to see all configuration then we can write here show run interface so it will show
you all the interface whatever you have that detail only if you want to filter also particular you want to see only
particular one interface like G 0 by0 you can write show running configuration interface G0 by0 you will get only
particular that interface detail and if you want to check for other interface same thing you will write and change
here the interface what you want to see so it will show you that one and this one to check the show ip interface brief
to check that interface detail and to save the what we can say if you want to check show interface G 0 by0 IP brief
with this one you can get the status of that particular interface and if you want to save configuration whatever we
done you can write write memory with that one you can save the configuration as we do in the Cisco router. So we will
end this session now in our next class we are going to learn other configuration what we can do. So now I
can switch off this firewall I can stop this firewall and we will see in our next class. Thank you. Bye.
To start Cisco Modeling Labs, power on your CML environment and note the IP address it provides. Enter this IP into a web browser to access the CML management interface, then log in with your admin credentials. If you encounter errors when adding labs, try logging out and back in or deleting old labs to resolve the issue.
Begin by adding a new lab in CML and include nodes such as a Cisco ASA firewall, switches, routers, and computers. Rename devices for clarity (e.g., ASA firewall, Switch1) and connect them with appropriate link types to establish network communication paths. This setup helps simulate a real-world environment for firewall configuration practice.
Access the ASA firewall console and enter privileged EXEC mode using the enable command with the password Cisco1@3. Use interface configuration commands to set interface roles and IP addresses, for example: configure GigabitEthernet0/0 as outside with IP 192.168.2.1/24 and GigabitEthernet0/1 as inside with IP 192.168.1.1/24. Remember to enable the interfaces with no shutdown.
Use show interface IP brief to review all interface statuses and IP assignments. For detailed settings on a specific interface, such as GigabitEthernet0/0, use show running-config interface GigabitEthernet0/0. Save your changes permanently with the command write memory so configurations persist after a reboot.
The default login and enable password for initial access to the ASA firewall in CML is Cisco1@3. To change the firewall hostname for easier management, enter global configuration mode and use the command hostname <new_name>, replacing <new_name> with your desired device name.
If you encounter errors when adding new labs or nodes in Cisco Modeling Labs, log out of the management interface and log back in to refresh your session. Additionally, consider deleting any old or unused labs that might cause conflicts. These steps typically resolve common workspace errors.
After mastering basic setup, explore the CML playlist focused on detailed Cisco ASA configurations and troubleshooting techniques. For alternative firewall perspectives, refer to tutorials like 'Palo Alto Firewall Basics: Key Configuration Techniques.' These resources will deepen your understanding of firewall security policies and advanced management.
Heads up!
This summary and transcript were automatically generated using AI with the Free YouTube Transcript Summary Tool by LunaNotes.
Generate a summary for freeRelated Summaries
Palo Alto Firewall Basics: Key Configuration Techniques
Learn essential configuration techniques and features for managing Palo Alto Firewalls effectively.
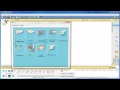
How to Use Cisco Packet Tracer for Network Simulation
Learn how to set up and configure a simple network using Cisco Packet Tracer with our step-by-step guide.
Complete CCNA 200-301 Course: Network Devices & Fundamentals Explained
This introductory CCNA course video covers essential network devices including routers, switches, firewalls, servers, and clients. Learn their roles in building networks, client-server relationships, and how to prepare for the CCNA 200-301 exam with practical labs, quizzes, and flashcards.
Mastering Packet Tracer: Step-by-Step Guide to Setting Up a Network
Learn to set up and configure a simple network using Packet Tracer in this comprehensive tutorial.
Comprehensive Free CCNA Course Introduction: Networking Basics Explained
Discover the fundamentals of networking through a free CCNA course introduction sponsored by Boson Software. Learn how devices like switches, routers, firewalls, and wireless access points enable communication across networks, from your home setup to the vast internet. Gain insights into the CCNA certification path and how it can kickstart your career as a network engineer.
Most Viewed Summaries

A Comprehensive Guide to Using Stable Diffusion Forge UI
Explore the Stable Diffusion Forge UI, customizable settings, models, and more to enhance your image generation experience.

Kolonyalismo at Imperyalismo: Ang Kasaysayan ng Pagsakop sa Pilipinas
Tuklasin ang kasaysayan ng kolonyalismo at imperyalismo sa Pilipinas sa pamamagitan ni Ferdinand Magellan.

Mastering Inpainting with Stable Diffusion: Fix Mistakes and Enhance Your Images
Learn to fix mistakes and enhance images with Stable Diffusion's inpainting features effectively.

Pamamaraan at Patakarang Kolonyal ng mga Espanyol sa Pilipinas
Tuklasin ang mga pamamaraan at patakaran ng mga Espanyol sa Pilipinas, at ang epekto nito sa mga Pilipino.

How to Install and Configure Forge: A New Stable Diffusion Web UI
Learn to install and configure the new Forge web UI for Stable Diffusion, with tips on models and settings.

If you found this summary useful, consider buying us a coffee. It would help us a lot!