Download Subtitles for FastAPI React B2B SaaS Project Tutorial

FastAPI + React B2B SaaS Full Project Build - Orgs, Users, Billing, Roles & More...
Tech With Tim
SRT - Most compatible format for video players (VLC, media players, video editors)
VTT - Web Video Text Tracks for HTML5 video and browsers
TXT - Plain text with timestamps for easy reading and editing
Scroll to view all subtitles
In this video, I'll give you a full
tutorial on how to build a B-2B SAS
application that includes organizations,
multiple team members, billing,
subscriptions, permissions, roles, and
everything you would need to create a
SAS app. We're going to be doing this
using Python, specifically with fast API
for the back end, and then with React
and JavaScript for the front end. We're
also going to be using Clerk for
handling all of the complex billing and
organization related features as well as
the authentication like signing in,
signing out, etc. This will be a long
project with a lot of coding. So, for
that reason, I've included all of the
code that's written in this video linked
in the description. You can find a
GitHub repository in case you need to
copy anything or you prefer to follow
along that way. Also worth noting that
this video is not designed for
beginners. While I will explain to you
everything that I'm doing and the reason
for the decisions that I have, I'm not
going to be going over the fundamentals
of the frameworks or the language. So, I
won't be teaching you fast API or
teaching you React. This is more about
how you assemble all of the things, you
know, into a large complex project that
will act as a really solid base if you
wanted to build something like a B2B
SAS. Anyways, with that in mind, that's
all I had to go through in the intro.
What I'm going to do now is give you a
quick demo of the project and then we'll
get into coding it. So let's get
started. All right. So let's get started
here with a quick demo of the finished
application. Now we're going to be
building a teambased taskboard. So think
of it something like notion or a sauna
obviously with some simplified features.
So you can see I have a simple kind of
landing page here and I have the ability
to view the pricing which requires me to
sign in or to sign in or sign up. So
what I'll do now is I'll sign in. You'll
notice that what we're using to sign
into this is Clerk. Now, Clerk has
kindly sponsored this video, but they
are completely free. You do not need to
pay to use them. And they are the
easiest way to set up authentication as
well as things like organization,
billing, all of that stuff that you're
going to see in this video, which is
precisely why I partnered with them and
why we're going to use them. So, you can
see it gives me a nice email address
field here. Let me sign in and then I'll
be right back and show you what the app
looks like. Okay, so I was able to sign
in here and you'll notice right away
that the first thing I see is the
current organization that I'm inside of.
So I have this new org test. I also have
this hello world organization and I have
the ability to create another new
organization by simply pressing this
button right here. Now if I go to my
dashboard, you'll notice it's going to
start loading my different tasks. Right
now we don't have any. Shows me we have
two members in this organization. If I
want to make a new task, I can go like
test, you know, this or something, put
it in the to-do category, and you can
see that it's here. And then if I want
to change its category, I can simply
just swap it. And you see that it moves
right over. Now, the interesting thing
is that if I change over to my Hello
World organization, you'll notice that I
now see some different tasks popping up
in this board because the tasks that I
have are defined per organization. Now,
what I can also do is click on the
pricing. You'll see that we have some
pricing tiers here. So, we have a free
tier and then we have a pro tier. And
the way that I've set this up is that if
you want to have more than two members
in your organization, you can use the
pro tier, which I just put out $1 per
month, but you could set this to any
price that you want. And if you have
less than that, so two or less members,
then you can use the free tier. Now, the
way that you manage the members is you
go to manage with inside of your
organization. You go to members, and you
can see the various members that appear
here, and you can set the roles for
those members. So, for example, you can
make them an editor, a member, an admin.
I'll talk about all of that in this
video. But you can see that this really
is kind of like a B2B SAS setup where
you have billing, you have members, you
have organizations, you have
subscriptions, right? $1 per month. We
have kind of data that is shared between
different teams. We have different roles
for members. That's what I'm trying to
show you in this video. With that said,
let's hop over to the code editor, start
writing some code, and building this
project. So I'm inside my code editor
here and what I've done is I've just
opened a new folder called B2B SAS on my
desktop. So open any folder in any code
editor that you want and you'll notice
that for this video I'm going to be
using PyCharm. Now like I said you can
use whatever you like but typically I
recommend PyCharm for large Pythonbased
applications. In this case a lot of the
work is going to be in fast API. PyCharm
is specifically designed for working
with frameworks like that. Gives us
really good typins as well as
recommendations. Has a lot of great
features. So, I would recommend using
it. Now, if you do want to use PyCharm
and you want to access their Pro
subscription, try it for free and see if
you like it, you can do that from the
link in the description. I do actually
have a long-term partnership with them.
So, again, if you click that link below,
you'll be able to test it out and use it
completely for free and see if you like
it. Anyways, with that said, let's get
into the setup here. What I'm going to
start doing is setting up two folders.
One for my backend and one for my front
end. So, I'm going to open up my
terminal here. I'm going to go into my
B2B SAS application and I'm just going
to make one folder here. So let's go new
folder. Let's simply call that backend.
Then let's make another folder.
Actually, we'll do that just from the
command line. That will be our front
end. So let's create our front end. In
order to do that, you're going to need
NodeJS installed on your computer. So
make sure you have that installed
because we're going to be using React.
And we're going to type npm create vit
at latest like that. And then we're just
going to simply put front it. Now when
we do that, it should create a React
application for us if we select the
correct framework. So I'm going to
select React here. I'm just going to use
JavaScript. I'm not going to use
TypeScript for this particular project,
but you could if you want to. I'm going
to go no for roll down V. And I'm going
to say install with mpm and start now.
Yes. And it's going to start installing
and creating this front-end folder for
me. So this is the setup for the front
end. Then we're going to set up the back
end. We're actually going to write the
entire backend first. We're going to
understand the architecture of our
application and then we're going to
start building the front end, the UI and
kind of connecting all of the pieces
together. Okay, so you can see our front
end is running. If I click on it, you
know, this is kind of the default dummy
front end that you get when you create
the React application. I'm just going to
shut this down by hitting C. I'm going
to CD into my backend directory and I'm
going to start setting up the code that
I need here. So for this project, I'm
going to use UV. So I'm going to type UV
init and then dot to create a new UV
project inside of this backend
directory. You can see when I do that it
creates five files here. We can delete
this main file because we don't need
this one for right now. Now if you're
unfamiliar with UV, I'll leave a video
on screen that explains how it works,
but essentially it's a better version of
pip. You can install it and then you can
just use the UV command like I am here.
All right. So for our particular backend
project here, we're going to need a few
different Python backend frameworks,
right? Or Python modules. So, what we're
going to do is type uv add and we're
going to add the fast API module because
of course we're using fast API for our
backend API. We're going to install
uicorn. This is the web server that will
run our backend API. We're going to
install SQL Alchemy. This is what's
going to be used for connecting to the
database. Then we're going to use
Python.env. This is for loading
environment variable kind of
configurations. Then we're going to use
pi JWT. This is for verifying JWT
tokens. We're going to bring in the
Clerk backend API. This is the Python
package for Clerk that allows us to use
Clerk on the backend for handling all of
our authentication. We'll talk more
about that later. And we're going to
bring in SVIX. This is what we're going
to use to actually validate a web hook
that we're going to get from Clerk later
on, but for now, let's install all of
those. Okay. So, you're going to see
that that then creates the virtual
environment for us, installs everything.
and we get this VNV folder and now we're
good to go and start setting up our
backend. So what I'm going to do to
begin so going to make a new file and
I'm going to call this env. This is
where we're going to put some
environment variables that we need for
the project. Now for the env file I'm
just going to put in the variables and
then we'll grab the values that we need
later. So first things first we're going
to type clerk secret_key.
We're then going to type
clerk_publishable_key.
Then we're going to type clerk under
undersc sorry jwks
URL. Then we're going to have the
database URL which we can actually fill
in right now. And for the database we're
going to use a local SQL light database,
but you could use anything that you
want. So, I'm going to type SQLite like
that and then colon three forward
slashes dot slash and then taskboard.
DB, which is going to create a database
called taskboard for us where we store
all of the information. We then are
going to have the frontend URL and we're
going to make this equal to http/lohost
and then port 5173 which is where our
react application is going to run. And
we're going to have the clerk_web hook
secret. And we're actually going to put
this up top because that is one of the
clerk values. So we might as well just
keep them all together. Okay. So we're
going to look at all these values later
on. But like I mentioned, for all of the
authentication, all of the login, all of
the organization, billing,
subscriptions, we're going to use a free
framework or a free tool, I guess,
called clerk. Okay, so that's why I'm
putting in the variables here. We're
going to create that clerk. We're going
to create that clerk account in 1 minute
after I start stubbing the API and then
you'll see why we're using this and why
we need this these particular values.
Sorry. Okay. So for our API, what I want
to start by doing is just creating the
different directories and files that
we're going to need so that we can start
to kind of understand the architecture
and how things are going to be set up.
Then after that, we'll start actually
writing the code and going into the
individual files. So for now, inside of
our backend folder, we're going to make
a new file and we're going to call this
start. py. This is going to be the entry
point for our application, the file that
we run to effectively run the app. We're
then going to make a folder here. So,
new directory called app. And this is
where all of the code for our
application is going to live. Now,
inside of app, we're going to make a few
new folders. So, we're going to have one
folder, and this is going to be called
API. This is for all of the API routes.
We're then going to have another folder.
This is going to be called core for the
core functionality essentially. Another
new directory. This is going to be
called models for our database models
and then another directory and this is
going to be schemas. Now the schemas are
going to be used to essentially validate
data. Then inside of the app directory
we're going to make a new file. This
file is going to be called main.py.
Okay. And then we'll just go ahead and
press cancel there. So what we have now
is app. We have four folders. API core
models schema. We have our main.py. And
now what we're going to do is start
writing the different files that are
going to go inside of these folders. Now
I'm not going to write all of the code,
but we're just going to write the file
names so that at least we know what
we're going to have and how the app is
kind of going to be structured. So from
API, we're going to make a new Python
file. And this is going to be tasks.
py for handling all of the API routes
related to our tasks. We're then going
to make another new file and this one is
going to be called web hooks. py. Later
we'll discuss what a web hook is, but
essentially this is going to be for all
of the endpoints to receive data from
clerk. So when some event happens like
we create a new organization or we
subscribe to a particular billing plan,
we can get that information and handle
it inside of our app. We're then going
to have core. So inside of core, we're
going to make a few new files. So here
we're going to have a file called o. py
for handling authentication. We're going
to have another new file. This is going
to be called clerk. py. Okay, this going
to be a lot of files. Just bear with me
and then we'll start actually writing
them out. We're going to have another
one called config. py for all of the
settings for our application and we're
going to have another one called
database.py
for you guessed it handling the
database. Now we're going to go inside
of models for our database models. These
are going to be pretty easy. We're just
going to have one called task. py and
then we'll write the model directly
inside of there. And then for our
schema, same thing. We're going to make
a new file and this is going to be
called task. py. Okay. So, quickly pause
the video, have a look at all of the
files that we've created. Make sure that
your app looks the same. And this is
just going to make your life easier.
Sorry, as we continue that all of the
files are already created. Okay, so now
that all of those files are created,
we're going to start grabbing some of
the credentials that we need to store
inside of this environment variable
file. Okay, so we're going to go to our
browser and I'm going to quickly explain
to you why we're using Clerk and how to
create an account here. So, like I said,
Clerk allows you to essentially manage
all of the users, authentication,
organizations, billing, subscription,
etc. for your application. So, it has
pre-built components like the ones you
saw right here for things like signup,
signin, user button, user profile, all
of the ones you actually already saw in
the app that I demoed to you. Things
like switching the organization, you
know, creating the organization, looking
at a profile of the organization. So, it
just makes our life as a developer
significantly easier. And again, the
best part is this is free and it's
actually very widely used. You've
probably seen these UIs in a lot of
applications and large SAS. Okay, so in
order to use Clerk, what we need to do
is just create a free account here. I'll
leave a link in the description where
you can make that account. Once you do
that, simply go to your dashboard and
we're going to create a new Clerk
project. So if you just go into your
workspace, you go here and you just go
create application, it will allow you to
give the application a name. So, in this
case, I'm just going to call this, you
know, B2B
task manager or something. Or let's just
go like SAS task manager maybe. Okay.
And you'll notice that you can enable or
disable a ton of different sign-in
methods. So, I'm just going to leave
email for now, but you could enable
Google Signin, Facebook signin, you
could enable, you know, all of these
signins at once, right? And this is the
benefit of using Clerk is that if you
ever want to change the authentication
methods, you just directly do it from
this nice UI. You don't have to do a ton
of setup. It's very easy to do it. So
even like you can sign in with notion.
Okay. So we're going to go with just
email for now. We're going to press on
create application. This is going to
make a new clerk app for us. Now there's
going to be a lot of instructions here
that explain to you how to add this to
your front end. We will do that later
when we start setting up the front end.
But for now, what we're going to do is
go to this configure button and start
grabbing some of the keys that we need
for our environment variable file. Now,
you'll also notice that there's a ton of
settings here that you can mess with and
play with. For now, we'll just leave it
as it is. Okay. So, we're going to go
down here to where it says API keys from
the settings, and we're going to grab a
few of the keys that are here. So, first
one is the publishable key, otherwise
known as the public key. We're just
going to copy that, and we're going to
put that into our environment variable
file where it says publishable key. So,
let's paste that. The next one is the
secret key. So, I'm just going to copy
that. And same thing, I'm going to paste
that into the clerk secret key variable.
We then need the JWKS URL. We're going
to find that from the right hand side
here where it says JWKS URL. Same thing.
We're going to copy that and just paste
that right there. And then lastly, we
have the clerk web hook secret. We're
not going to have that right now. So,
we'll just put an equal sign and we'll
fill that value in later when we get to
the web hook. Okay. So, now we have the
values that we need in our environment
variable file. Again, we'll go back to
clerk later on, but for now, we're going
to start filling in some of the Python
files that you see here. So, for now,
where we'll start is inside of this core
folder. We're going to go into config.
py, and we're going to start writing the
code to load in essentially all of the
settings that we need for this app. So,
we're going to start by saying import
os. We're then going to say from.env
import load_.env.
I'm just going to configure my
interpreter here so we don't get those
errors. Okay. So now we're going to type
load.env. What this is going to do is
load this environment variable file for
us so we can access some of the values
inside of it. We're then going to create
a class called config. This is standard
in fast API to store all of your
settings and variables in one class. And
we're simply going to write a mapping
from our environment variable files or
variables sorry two variables inside of
the class. So we're going to say clerk
secret key. We're going to say this is
of type string is equal to os.get get
env. And then this is going to be the
clerk secret key or an empty string if
for some reason that doesn't exist.
Next, we're going to get the clerk
publishable key. So, we're going to say
clerk, if we can type this in capitals,
underscore publishable,
okay, underscore key. And then this is
of type string in lowercase. And this is
going to be equal to os.get env. And
then the clerk publishable key. And
again, an empty string. We then are
going to have the clerk underscore web
hook
secret and this is going to be a string
which is equal to the os.get env and
then the clerk web hook secret and again
empty string. We then are going to have
the clerk_jwks
url same thing string is equal to os.get
enviable clerk jwks URL. We then are
going to have the database
URL which is a string. Same thing equal
to os.get env database URL. We then have
the frontend URL. So front end URL
string is equal to os.get env frontend
URL. And then we're going to have two
variables that we're going to define
oursel. The first is going to be the
free tier_membership
limit. This time it's going to be an int
which is equal to two. And then we're
going to have the procore tier
membership limit which is going to be
equal to zero which stands for
unlimited. Now what I'm doing is just
putting two values here that we'll need
to use later to essentially define okay
how many members can you have in a free
plan? How many can you have in a pro
plan that is stored in here and we're
not hard coding in multiple places in
our app. We're then going to go and say
settings is equal to config like that so
that we have access to all of
effectively the settings for our
application. Okay, so that is it for the
config.py file. Now we're going to go
and just write the database connection.
So from database we're going to say from
SQL alchemy import create engine. We're
going to say from SQL alchemy and then
this is going to be
import the session maker and the
declarative base. We're then going to
say from app.core.config
we're going to import the settings like
so. Okay. We're then going to continue
and we're going to say engine is equal
to create underscore engine and we're
going to say settings dot and this is
going to be the database
URL is going to be essentially how we're
creating the database or what the URL is
we're using for that particular
database. And then we're going to say
the connect arguments is equal to a
dictionary and we're going to say check
same thread and then is equal to false.
I'm not going to explain this too much
in depth, but it's just going to make
sure that we're able to run the database
successfully and we don't have any
problem with it running inside of the
same thread as something else. We're
then going to say session local is equal
to the session maker and we're going to
say auto commit is equal to false. We're
going to say auto flush is equal to
false as well. And we're going to bind
this to our engine. Now, I know a lot of
this will look a little bit confusing,
but this is very standard when working
with fast API to be able to connect to a
SQLite database. We're then going to say
base is equal to declarative base. And
what we're going to do is say define get
database and we're going to say database
is equal to session local. When we call
this, it's essentially going to bind to
the database engine. It's going to
create the database if it doesn't
already exist. If it does exist, it's
simply just going to yield it to us.
We're then going to say try and we're
going to say like this yield and we got
to spell yield correctly the database
and we're going to say finally. So why
is this not working like this finally we
are going to say db.close.
Okay. So this is all we need for the
database. What this is doing is
essentially just creating a database
session and then we have this function
where when we want to access the
database we just call it. it yields the
database to us and if there's any issues
then it just closes the database and
make sure that it saves successfully.
Okay, so let's continue here and let's
now go into the clerk.py file and let's
write this to connect to clerk. This is
super straightforward. What we're going
to do is say from clerk_backend
api import clerk and we're then going to
say from app.core
config.
Okay, if we spell that correctly, import
settings. And then we're going to say
clerk is equal to clerk. And we're going
to say the bearer off is equal to
settings. clerk.
Okay, let me just spell this correctly.
clerk secret_key.
Now, the reason why we need to set up
some stuff related to clerk here in the
back end is that clerk is going to
handle all of our authentication
automatically for us in the front end.
Essentially, we can just bring in a
clerk component and it will allow the
user to sign in, sign out, handle the
organizations, and it will just do all
of the O. However, we only want
authenticated users to be able to send
requests to our Python backend because
our backend is going to handle things
like creating the tasks, setting where
the tasks are, maybe deleting a task.
So, what we want to do is ensure that
only users that have the right
permissions to handle those tasks are
able to do so. So what we're going to do
is from our front end, we're going to
include the clerk user data to a request
to our backend and our backend is going
to verify that this user is who they say
they are by using this clerk package. So
essentially we're going to go to clerk
and we're going to say hey clerk is this
actually one of the users who signed
into our app. Clerk is going to say yes
or no. And then based on that
information we can kind of gate what
that user is able to do in our backend
application. It'll make more sense later
on, but that's kind of the basics of why
we're setting up Clerk like we are. So,
with that in mind, let's actually go
back to Clerk and I'm going to start
setting up some of the things that we
need in order to make this
authentication work. So, from Clerk,
we're going to go to organizations here
and we're going to go to settings. Now,
what we're going to do is enable
organizations for our app. We're going
to turn off allow personal accounts and
just enable this. Now, effectively what
we're doing here when we enable
organizations is we're allowing users to
create organizations and invite other
members to them. This is very common in
something like a B2B software as a
service where one person creates the
org, they invite different members and
maybe you pay per member, right? Or you
have like a certain number of seats and
you upgrade to another plan to unlock
more seats. Clerk allows you to do that
and that's kind of what we're enabling
right now. So, what we're going to do is
we're going to set the limited
membership to two right now and make
that saved. The reason for that is that
I want to limit any new organizations or
free organizations to just have two
members and then force them to pay to
upgrade their organization in order to
have unlimited seats. Okay. Now, we can
scroll down here. There's a few other
things that we can set. For example, the
default role for new members, the
creators initial role in the
organization, allow members to delete
organizations. Right? There's a bunch of
stuff that we can do here. And for now,
we'll kind of leave it as is. We also
could turn off allow user create
organization so that you had to manually
create an organization yourself as the
app creator or admin in order for
someone to join that or all right. So,
next thing though, we're going to go to
roles and permissions. Within
organizations, you can have various
different roles, right? Viewer, editor,
admin, you know, content manager, sales
manager. You've probably seen that
before if you've used any kind of SAS.
So notice that we have admin currently,
right? And we can just kind of describe
what the admin can do. We have member,
right? And then we can create our own
rule. So for this particular app,
because we're going to have kind of this
task board, I want to create a new uh
role here called editor. So I'm going to
give this role editor. See the key is
editor. I'm going to say a user who can
edit tasks. Cool. And I'm going to go
ahead and I'm going to save that. Now
with this role, we can just check if a
user is admin, editor or member. But we
can even get more specific and we can
add particular permissions per each
role. So what I can do here is go to
features. From features, I can press add
feature. This particular feature I'm
going to call is task. Okay? Or let's
call it tasks actually. And I'm going to
say task in the task board.
And what I'm going to do is start
setting some permissions that I want to
be able to set for particular users. So
I'm going to go create permission. For
the first permission, let's call this
create. We're going to say can create
tasks. And we're going to go ahead and
create that. And you can see this one
permission has now been created. Let's
make another one. We're going to call
delete. Can delete tasks.
Let's make another one. Let's call this
view. Can view tasks.
Okay. And let's make another one and
call it edit and say can edit tasks.
Okay. So now we have four permissions.
Create, delete, view, and edit. Those
are within the feature of tasks. We're
going to go ahead and save that. Go out
of here. And you'll see now that we have
this tasks feature created. So now if we
go back to our organizations, we go to
roles and permissions. We can go to the
admin for example, and you'll see the
permissions are now appearing. and we
can enable all of them for the admin.
Okay, let's go ahead and save that. Now,
let's go back to the editor. Same thing
for the editor. Let's allow them to do
all of this. Okay, so save. And for the
member, let's just allow them to view.
So, they cannot edit, delete, or create,
but they can view the tasks in the
taskboard. Cool. So, there you go. We
just added a few different roles. We set
up the permissions here and now we can
start using these directly from our code
whenever someone signs in with their
clerk account so we know what
permissions they actually have access
to. However, before we do that, I want
to start setting up the billing and the
subscription as well while we're on this
page. So, I'm going to go to billing and
I'm going to go to settings. Now, from
here, what I'm going to do is enable
organization billing and press on save.
Now, when I do that, it's going to give
me a few other settings like allow me to
connect my Stripe account or to directly
use the clerk payment gateway. Now, if
you were in production, this would
become more important for now because
we're just testing in development. It
doesn't really matter which one you use
here. And we'll be able to just test
with kind of like a fake credit card,
which you'll see in a second when we
talk about these kind of different plans
and upgrading to pro and all of that
kind of stuff. Now, what you also see
here is that it shows me plans. So, it
says create plan. I can also just go to
subscription plans here and I can start
creating various different plans for
organizations or for individual users.
So, what I'm going to do for now is I'm
going to create a new organization plan.
I'm going to call this pro tier like
that. And I'm just going to write a
description and say unlimited
seats in the organization.
Okay, like that. And then for the fee,
I'll just make it $1. You can make it
literally anything that you want. You
could enable a free trial, make it
publicly available, add various features
to this particular plan. For example,
you could add, you know, the tasks
feature. So maybe you can actually
unlock different features with different
plans. In my case, I'm not doing that,
but maybe we have some, you know, AI
feature, something that you only get
access to if you're in the pro plan.
Then you could make that a feature,
enable it directly in clerk, and then
have it actually one of the things
associated with this plan, and your code
can then check that and see if the user
or the organization has that particular
feature. This is super powerful. That's
why I'm using it. But you can see for
now I just created this new plan. Now we
have the free plan, sorry, and the
protier plan. And later I'll show you
how we can display that. And notice it's
actually kind of showing it to us
already by using this pricing table
component in React and using this method
and kind of protect to protect certain
features based on what plan the
organization or the user has. Okay, so
that's pretty much all I wanted to do
for now. I will quickly mention to you
that everything you see inside of clerk
you can customize, you can change.
There's all kinds of other stuff you can
look at here. For now though, we'll
leave this as is and we're going to go
back to our code and we're going to
start writing this off module which now
hopefully should make a little bit more
sense because we just enabled those kind
of permissions inside of clerk. All
right, so what we're going to do for our
off here is we're going to start by
importing httpx.
We're then going to say from fast API
import depends HTTP
exception if we can spell exception
correctly request.
Okay. And status. We're then going to
say from the clerk backend API.curity
import the authentication request
options. We're then going to say from
app.core.config
import settings. and we're going to say
from app.core.clerk
import clerk. Okay. All right. So now we
have the imports that we need and in
this particular file we're going to
handle all of the authentication and
essentially understanding if a
particular user has the ability to edit
a task, delete a task, etc. Now
effectively what's going to happen is
when someone signs into our front end,
like I mentioned, they're going to be
using clerk. From our front end, we're
going to include the user's clerk
account details, which includes a JWT
token, which is essentially their
identity as the user in our app. And
it's going to be sent to our back end.
So front end is going to send request to
the back end. Okay? And this is going to
include a JWT token from clerk. Now,
what we're going to do on the back end
is the back end is going to authenticate
this token. When we do that, we're going
to get the user details from clerk and
check the user's permissions. Okay, so
this is effectively what this file is
going to do. We're receiving a request
from the front end that includes some
details about the signedin user. Our
backend is going to authenticate these
details are valid. We're going to get
the details from clerk about this
particular user and we're going to check
their permissions to see, okay, are they
a member? Are they an editor? Are they
an admin? What do they actually have the
ability to do? So I'm going to make a
class here called o user.
Inside of here I'm going to say define
innit and I'm going to take in self a
user ID which is a string and org id
which is also a string and org
permissions like this which is a list.
Then what I'm going to do is say self do
user ID is user ID self.org ID is or ID
and self.org org permissions. I'll spell
this correctly. Our org permissions.
Then I'm going to say define has
underscore permission. We're going to
take in self and then a permission
which is a string and we're going to
return a boolean. We're then going to
say return
permission in self.org permissions. Now,
this is simply just going to check if
this user has a particular permission
inside of this permissions list. That's
because whenever we check the user in
clerk, it's going to give us a list of
permissions that user has. Those
permissions are going to include the
ones that we just created like can they
edit a task, can they delete a task,
etc. So, we're going to check those
essentially and if we have them, then
we're going to tell the backend or
whatever function, okay, yes, they can
actually do that particular task. So now
I'm going to create a few properties. So
I'm going to say app property define can
view. Okay, this is going to take in
self. It's going to return a boolean and
we're going to return self.permission
and then we're going to say org colon
tasks colon view. So the way that the
permissions are set up inside of clerk
is that the particular permission that
we created like view, create, delete,
edit is associated with some feature. In
this case, the feature is tasks and that
feature is associated with an
organization. So we're saying or tasks
view. We're checking in this particular
organization in the tasks feature, do we
have the view permission? So I'm going
to copy this now uh this method and
we're going to write it for all of the
different properties that we have. So,
as well as can view, we're going to have
can create. And we just change this to
create.
Same thing for can delete. Change this
to delete. And then what is the last one
that we have? So, we have view, create,
delete, and then we're going to have
edit. And then simply change this to
edit. And that's it. We now have these
four different properties in this class.
And I can use this O class to determine
if a user has a particular permission.
Okay. Okay, so now we're going to write
a few functions that essentially takes
the data that our front end sends to the
back end and sends it to clerk to
validate this data and make sure the
user is who they say they are. So we're
going to write a function called
convert_2_http
request. Okay. Now inside of here, what
we're going to do is have a fast API
request which is of type request. And
this is going to return an httpx dot
request. Now inside of this function,
I'm going to go return httpx
dot request and I'm going to have the
method which is equal to fast API
request do method. I want to have the
URL which is equal to fast API request
URL. And we're just going to convert
this into a string. And we're going to
have headers which is equal to a
dictionary. And this is going to be the
fast API request dot headers. Now,
effectively all we're doing here is
we're just taking the fast API request
object and we're converting this into an
HTTPX request object. Just a different
request object that's going to be used
directly with the clerk module. Now,
we're going to have another function.
This is going to be async define and
this is going to be get_currencore
user. This is going to take in a request
which is a fast API request and it's
going to return an authenticated user.
Okay. And let's spell request correctly
here. Awesome. So from this function,
what we're going to do is we're going to
say httpx
request is equal to convert to httpx
request and then we're going to pass
this fast API request. So we just take
the request convert it into this httpx
one. We're then going to say the
request_state
is equal to clerk.auuthenticate
request and we're going to pass the http
request. Okay. As well as the
authenticate request options and we're
going to say the authorized parties is
equal to and this is going to be
settings dotfrontend
URL. All right. So effectively what this
is saying is okay get the data from this
HTTP request authenticate it with clerk
and also just make sure that we're only
going to authenticate ones that come
from our front-end URL. We're then going
to say if not request_state
is
signed in. Okay, because what's going to
happen now is this request state is
going to give us a bunch of information
about the user. What's their username?
Are they signed in? are they signed out?
Have they created an account? Etc., etc.
So, if they're not signed in, then we're
going to raise an HTTP exception and
we're going to say the status_code
is equal to status.http_41
unauthorized and we're going to say
detail is equal to not authenticated.
Okay, so that's going to check if the
particular user is signed in. Then we're
going to say claims
are equal to request_state
dotp payload. We're going to say the
user ID
is equal to claims.get
and then sub. Now what's going to happen
effectively is that when clerk
authenticates this request, right? And
it kind of pulls out the information
from this JWT token, it's going to
include something called a payload. Now,
in the payload, we're going to have some
information like the sub, which is
actually the user's ID in clerk, as well
as the organization ID that they're
inside of and things like their
permissions. So, we're going to get that
information so we can then use that from
our backend. So, we're going to say the
org ID is equal to claims.get and then
or
ID. We're going to say, let's get out of
this parenthesy here. Okay, go back.
that the org
permissions are equal to claims.get and
we're going to get permissions
or we're going to get claims.get
and then org
permissions
or this because it could be stored under
permissions or permissions or if we
don't have either of those then we're
just going to have an empty list because
we have no permissions. We're then going
to say if not user id then same thing
we're just going to raise this error
because if we don't have a user ID that
means there's some error and the user is
probably not signed in. We're also going
to say if not and this is going to be
org ID. So if they're not a part of some
kind of organization then what we're
going to do is we're going to return a
400. So we're going to say 400 bad
request and we're going to say no
organization selected.
Okay, because they need to select some
particular or organization. Sorry. And
then if all of that is good, we're going
to return an O user and we're going to
pass to the O user the user ID which is
equal to the user ID, the org ID which
is equal to the org ID and the org
permissions which is equal to the org
permissions. So effectively we're saying
this function will get us the current
user from clerk. We're going to convert
the request. We're going to authenticate
with clerk. We're going to check if
they're signed in. If they are, we're
going to get information like their user
ID, the org ID, and the permissions they
have. If for some reason they don't have
that data, there's some kind of error.
So, we'll return that. Otherwise, we
will return the authorized user. Now,
just from this file, we're going to
create a few more functions as well,
which are going to act as helper
functions to essentially gate access to
particular functionality. Bear with me.
These are going to be pretty simple once
we write the first one. The first one is
going to be called require view. This is
a function we're going to use to require
the view permission from a particular
user. So we're going to say user and
then this is going to be off user equals
depends and then this is going to depend
on the function get current user. Okay,
we're not going to call the function.
We're just going to write its name.
We're then going to say this will return
an o user. And what we're going to do
from here is we're going to say if not
and then user.can_view
then we're going to raise an HTTP
exception. And inside of here, we're
going to have a status code which is
equal to status.http_43,
okay, underscore forbidden, saying you
don't have this permission. We're then
going to say detail and we're going to
say the view
permission required. Okay, pretty
straightforward. Then down here, we're
going to return the user. Now, we're
going to copy this function and we're
going to have this for every permission.
So rather than now require view, we're
going to have require create. We're
going to change this to can create.
We're then going to have create
permission required.
Okay. Then we're going to do the same
thing except rather than require create,
we're going to say required delete.
We're going to change this to be delete.
We're going to change this to say delete
permission required. Okay. Now let's go
down here. rather than require view this
is going to be require edit we're going
to change this to say can edit and then
same thing edit permission required okay
that's all that we need the reason why
I'm writing these four functions is
we're going to use these as what's
called a dependency injection in a
minute in fast API so that if a user
wants to for example create a new task
we just call this function it will then
get the current user and see if the user
is actually able to create the task or
not that's why we have that inside of
this O file. So, I know that was kind of
complicated. That was a lot of code, but
now we've handled the core work for our
API and we're going to start working on
the database. Then we'll write the
backend API routes and then we're done
with the API. We can test it and then we
can move on to the front end. So, let's
close all of this for now. Again, we
have kind of the off stuff handled,
which is the most complicated. And what
we're going to do is start writing our
database models. So, the only database
model that we're going to have here is
simply to represent a task, right? And a
task can be in different stages. So like
pending, started, completed. That's kind
of how we'll set it up, but you can make
this more complicated if you want. So
from this task file inside of models,
I'm going to define what a task looks
like. So I'm going to import UU ID,
which will allow us to create a unique
ID. I'm going to say from datetime,
import date time. I'm then going to say
from SQL Alchemy. Okay. and then import
column
string text datetime and enum. And by
the way, if you're getting lost here,
all of this code will be available from
the link in the description. I should
have mentioned that earlier. Now, let's
continue. I'm going to say import enum.
And I'm going to say from app.core
database
import base. Okay, we're then going to
say class task
status and this is going to be string,
enum enum. And we're just going to make
a simple enum in Python. So we're going
to have pending which is equal to
pending in lowercase.
We're then going to have started which
is equal to started in lowercase and
we're going to have completed.
Okay, which is equal to completed in
lowercase as well. So this is just the
status for a particular task. You can
have more, but we're just going to have
pending started completed. Then we're
going to have class task. This is going
to inherit from base. And what we're
going to do is just define the table
name. So underscore table named_.
Okay. And this is going to be equal to
tasks.
Then we're going to define all of
different data that's going to be stored
on this task. So the first is going to
be the ID.
So we're going to have id column this is
going to be string primary key true and
then the default is going to be lambda
and then string uyu IDU ID4. What this
is going to do is just by default create
a new unique ID for all of the tasks
automatically for us. Next we're going
to have a title of the task. This is
also going to be column. It's going to
be of type string. Now we're going to
put 255 to limit the length to 255
characters. And we're going to say
nullable is equal to false. Meaning this
cannot be empty. We're then going to say
description. This is going to be column.
We'll just make it text because it can
be long. But this time we're going to
say knowable is equal to true because it
can be empty. We're then going to say
status is equal to column. This is going
to be of type enum with the task status.
The default is going to be task
status.pending and nable is going to be
false. This cannot be empty. Then we're
going to have the org ID because every
task needs to belong to some org. So
we're going to say column
string and then we're going to say
nullable is equal to false and we're
going to say index is equal to true so
that we can look up values based on this
column very quickly to find all of the
tasks for a particular organization.
We're then going to have created by and
this is going to be the user who created
this. So this is going to be column and
then string and then nullable
is equal to false. We're then going to
have created at and this is going to be
column datetime and we're going to say
nullable is equal to false or actually
we don't need that. We're just going to
say default okay default is equal to
datetime doc now and then we're going to
have updated at and this is going to be
column and same thing datetime and then
default is going to be datetime.
now. Okay, perfect. So, what this is
going to do is it is going to
essentially just define the table schema
for our task. So, we have an ID, title,
description, status, the or this task
belongs to, who it was created by, when
it was created at, and when it was
updated at. That's all of the
information that we need to store about
any given task. Now that we have that,
we're going to go into schemas and we're
going to write essentially the data
validation for creating a task, updating
a task, and getting a task so that we
have the correct types in our fast API
application. So what we're going to do
is we're going to say from datetime
import datetime. We're going to say from
paidantic import the base model. We're
going to say from typing
import optional. Okay. Okay. And we're
going to say from app domodels.task.
Okay. The one we just created imports
the task status. Now what we're about to
create and let's go back to here is
something called schemas. Schemas are
essentially Python classes that use
Pantic to help us validate information
that gets sent to or returned from our
API. So if someone wants to create a
task, for example, they need to pass a
title, a description, a status. That's
what we're defining here and that we'll
use in just one minute. So we're going
to say class task create. This is going
to be the schema that's going to be used
when someone wants to create a task.
It's going to inherit from the base
model. We're going to say title string.
We're going to say description and this
is going to be optional.
Okay. And then string. We're going to
say status and this is going to be task
status. And then is equal to task status
dot
pending. Okay, so that's kind of the
default when they create a task is that
it will go inside of pending. So now if
a user wants to create a task, they need
to pass this information effectively,
which we'll use in a minute. Next, we're
going to have the task update. Now this
is going to be pretty much the same
thing as the other one except all of the
fields are going to be optional. So
we're going to say title and then
optional string, okay, is equal to none.
Then we're going to say description and
same thing. This is an optional string
is equal to none and the status okay
optional task status equal to none. So
if you want to update the task you can
pass any or none of these different
combinations of values it will update
based on the ones that you pass. Right?
Then we're going to have class task
status update. Okay. So if this is just
for updating the status and we're going
to take in the status and the task
status like so. And then lastly, we're
going to have the class task response.
Now, the reason why we write a task
response model or schema is because
sometimes we don't want to include all
of the information that's in our
database when we return information
about data in the database. So, in this
case, we're kind of writing a slim
version of a task that we'll return to
the front end that might hide any of the
sensitive data that we don't want to
return. So, we're going to say ID int.
We're gonna say title string. We're
going to say description.
Okay. And this is going to be optional
string. We don't need to make this equal
to none, just optional. Then we're going
to say status is going to be the task
status. We're going to say the org
ID is a string. We're going to say
created_by
is a string. We're going to say created
at is a date time object. Let's go
created and spell that correctly by the
way. And let's go updated at updated at
date time. And then we're going to say
class config. And we're going to say
from underscore attributes equals true.
Which means this will automatically
create this response class based on the
attributes of another class which you
will see in a minute. Okay. So that's
the schema. Again, we're going to use
this in a second where it will make a
little bit more sense. Now what we're
going to do is we're going to go to our
tasks.py PI file inside of the API and
we're going to start using all of the
code that we just wrote to define the
endpoints or kind of the routes of our
API for the different operations related
to our tasks. So we're going to say from
fast API import the API router
the depends the HTTP exception and the
status. We're then going to say from SQL
alchemy
import session we're going to say from
typing import the list we're going to
say from app.core
do database
okay we're going to import the get
database we're going to say from
app.core core.
import the get_curren
underscore user. We're going to import
require view
require create. So all these functions
that we wrote require delete and require
edit. Okay, I know you can't see that,
but I wrote require edit. All right,
then we're going to say from app
domodels.task
import the task model. And we're going
to say from app.s schemas.task
imports the task create the task update
the task status update and the task
response. Okay. So that's all of our
imports. Now what we're going to do is
we're going to create our router. So
we're going to say router is equal to
API router. The prefix is going to be
/appi/tasks.
And then we're going to say tags is
equal to tasks. What we're effectively
doing here is saying, okay, all of the
endpoints I'm about to write here are
going to be prefixed with API/tasks.
So if I have an API here like
slashcreate, I would go to /
API/task/create.
And also, let me just quickly fix this
because this needs to be inside of a
list for the tax. All right, so now
we're going to say at routouter.get,
get we're going to put just an empty
string for now which means if you go to
this exact route what we're going to do
is we're going to specify the response
model which is going to be equal to a
list of task response and what we're
going to do is return all of the tasks
that are in the current users
organization. So we're going to say
define and this is going to be list
tasks. We're going to take in the user.
So we're going to say user off user
equals depends and then require view. So
what's going to happen now is we're
saying okay and we need to make this a
capital story. We're going to depend on
this require view function. So we're
going to call the require view function
and if that doesn't give us back an
authenticated user it means we don't
have the ability to actually view these
tasks. So then we'll just raise an
exception. Right? If we do get the
authenticated user, then we're good to
go and we can view them. We're then
going to say DB session is equal to
depends and then get database. So we
need the database as well as the
permission to view in order to run this
function. We're then going to say tasks
is equal to DB doquery.
We're going to query the task and we're
going to say dot filter. Then we're
going to say task.org
ID is equal to user.org org id. Okay.
And then dotall.
So what this is going to do is it's just
going to filter and it's going to make
sure that the user's organization ID
matches the tasks organization ID. If it
does, then we will return those
particular tasks because those are the
tasks that this user is currently in the
organization of. Uh I think that makes
sense why I said that, but hopefully you
get the idea. Okay. Next, we're going to
write something very similar except this
time it's going to be to create a task.
So, I'm going to copy this and I'm just
going to start changing some things. So,
rather than router.get, we're going to
change this to router.post, which means
you need to send a post request to this
particular endpoint. Now, for this
endpoint, we don't need to change it. We
can actually just leave it as this
because if you send a get, we'll list
the tasks. If you send a post, we will
create the task. Now, rather than the
response model being a list this time,
it's just going to be one individual
task. And similarly to before, we're
going to take in the user, except this
time it's going to be require create.
We're going to take in the session
because we need the database. But before
that, we're also going to take in the
task data, which is going to be from
task create schema that we wrote
earlier. Now, let's actually just clean
up this function a little bit so it's
easier to read. So, let's put our
dependencies on separate lines and then
go like this and start writing the rest
of the function. Okay. So similarly to
before again we're getting the user
we're getting the database but now this
time we're taking in the data from this
schema. Let's have a look at it. Right?
So we need the title description and
status in order to create the task. What
we're going to do now is just create the
task. So we're going to say task is
equal to task. We're going to say title
is equal to the task data.title.
We're going to say the description is
equal to the task data.escription.
We're going to say the status is the
task data status. We're going to say the
org ID is the user.org ID and created by
is going to be equal to and this is the
user do user id. Okay, so that now
creates a task. And by the way, the
reason why I don't need to check if any
of these values exist is because fast
API automatically does that for us by
using that schema we created. So when I
put this in here as a requirement for
this endpoint, fast API checks, okay,
this schema, did you pass all of this
correct data? And if you didn't, it
automatically returns an error message
to the user. Okay, so let's continue
here. We're now going to say db.add
the task. So after you create the task,
you need to add it to kind of the
staging area for the database. We're
then going to say db.comit.
When we say db.comit, this is actually
going to save it to the database. And
then we can type db.refresh. refresh
this task and return the task. And what
refreshing does is it checks the
database and kind of repopulates this
object with any new values that were
created. So for example, when I create
this task here, I didn't set the ID for
it. I didn't set the created at time or
the update at time. But when I refresh
here, because I added that to the
database and the database will
automatically make that for us, it adds
those values back to this object. and
then we can return it with all of the
populated kind of hydrated values.
Hopefully that makes sense. Now let's go
and start writing a few more endpoints
that we need. So the next one we need is
going to be to get a particular task. So
we're going to say router.get
and we're going to type slash and then
task ID because this is going to be a
dynamic path. We're going to say the
response
model is equal to the task response.
We're then going to say define get task.
We're going to take in the task
id which is a string which is going to
match with what's in this path parameter
right here. We're then going to take in
the user right which is the off user
equals depends and then this time it's
going to be require view because we're
viewing a particular task. And then same
thing db session okay autocomplete come
on is equal to depends get database. And
let's clean this up again like we did
before so that we can read these values
a little bit easier. Okay. And now let's
start writing this function. So what
we're going to do to get a particular
task is we're going to say db.query
task. Okay. And we're going to filter
the task. ID is equal to task ID. And
the task.org ID is equal to the user.org
org ID to make sure that both these
things match because sure you can know
the task ID but it needs to be the task
that's in this particular organization.
Now we do dot first which just gives us
the first response if it exists. Now if
it doesn't exist we're going to say if
not task then we can just return a 404.
So we can say raise HTTP exception.
Okay. Now let's go back here. This is
going to be status code is equal to
status.http_45. http_44
not found and then we can say detail is
equal to task not found and then if
that's not the case so if we did find
the task we can simply return it okay
and let's add a space there so we get
rid of that highlight okay so that is
getting one particular task now let's go
to updating a task okay so to update a
task we're going to say at routouterput
we're going to go slash and then same
thing we're going to take the task ID
and there's response model will be the
task response. I'm doing putut because
that means we're updating if you send a
put request and we're going to call this
define update task. Now for the
parameters, we're going to take in the
task ID which matches this. We're also
going to take in the task data which is
going to be the task update schema.
We're then going to have the user,
right? And we're also going to have the
database like so. Okay. So now that we
have all of those, we're going to try to
find the task, right? And we're also
going to make sure, sorry, that we have
the requireedit permission. So let's
make sure that it says require edit in
the depends right there. Okay, so first
things first, let's try to find the
task. So let's just copy what we found
here. The task needs to exist in order
for us to edit it. So that's the first
thing that we're doing. Now, similarly
to before, we can actually just copy
this right here and paste it because if
the task doesn't exist, well, we cannot
edit it. Now, what we're going to do is
say if the task data.title title is not
none. Then what we're going to do is say
task.title is equal to task data.title.
Now we're going to do the exact same
thing for the description. So we're
going to say if the task data.escription
is not none, then task.escription is
equal to the task data.escription. And
we're going to say if the task
status, okay, or sorry, task data.status
is not none, then same thing, the task
status will be equal to the task data.
status. So we're essentially checking
the update data saying okay well if the
update data is not none then we will
actually update this current task with
that information and then we can just
type db.comit which will save that
information. We can then refresh this
right from the database. We can refresh
the task and we can return the task and
that will be the update function. Now
the last function we need is simply to
delete a task. So it's going to be very
similar to what we did before. In fact
let's copy everything we have here.
Let's come down. Let's paste that. Let's
change this to router.delete.
Let's make sure they have the required
delete permission. We'll remove the task
data. We don't need that. We'll try to
find the task. We'll make sure the task
exists. And if it does, we can just
delete it. So, db.delete task. And then
we can say db.comit to save that in the
database. And then we can just return
none. And for the response model, we're
just going to change this to actually
remove it. And we're going to say
status_code
is equal to status.http_204
no content because when you delete
something, well, there's nothing really
for us to return. So, we're just
returning none, right? Find the task if
it exists, delete it if we have the
right permission to do that. And then
we're good to go. Perfect. So, that is
it for the tasks API. Okay, this allows
us to get the task. I also realized that
sorry this needs to be called create
task. So it doesn't have the same
function name as list task but okay get
all the tasks create a task get one
individual task and then same thing here
delete a task. I forgot to change the
name and now we have pretty much all of
the functionality that we need for
handling the various different tasks.
The last thing we need to do is
essentially hook this up to actually
start running the API. Add kind of all
of the configuration and then we can
test it. So let's quickly write that. So
we're going to go to this main.py PI
file now that we've written all of these
individual files and we're going to say
from fast API import with some
capitalization fast API. We're also
going to say from fast API dom
middleware docores
import the course middleware. We're then
going to say from app.core.config
import and this is going to be settings.
We're then going to say from
app.core.database
database import the engine and the base
and we're going to say from appi
import tasks like that. Now what we're
going to do is we're going to say base
dot metadata okay metadata
create_all
and we're going to say bind is equal to
engine. What this is going to do is it's
going to look for all of the different
models that we've defined in our
database and create them if they don't
already exist in the database. We're
then going to say app is equal to fast
API. We're going to say the title of the
app is equal to and let's go taskboard
API. We can give it a description.
So we can just say you know B2B task
board app.
Okay. And then we can go version and we
don't need to put this here, but I'm
just going to put version 1.0.0.
Okay. Then I'm going to say app dot and
this is going to be add middleware. And
I'm going to add the corores middleware.
Now corores stands for cross origin
resource sharing. This is going to allow
us to have the API be called from a
different domain or a different resource
essentially or origin sorry. So I'm
going to allow this to be called from
our front end. So I'm going to say allow
origins equal to settings dot frontend
URL to make sure our front end is able
to actually call this. I'm then going to
say allow credentials true so we can
pass our authorization tokens. I'm going
to say allow method star. So allow
everything and allow header star to
allow all of the various headers. Okay.
I'm then going to say at app.include
router
and I'm going to include the tasks.outer
which is the API router that we just
wrote here. So we just connecting this
to our main fast API application. And
then I'm going to say uh actually I
think that's it. That's all that we need
from this particular file. Okay. Now I'm
going to quickly go to my start. py file
because this is the entry point of my
app. I'm going to import uicorn and I'm
going to say if underscore named
equals and this is going to be
underscore main
then uicorn.r
run and I'm going to run like this app.
App say host is equal to 0.0.0.0 zero
and port is equal to 8,000 and reload is
equal to true because we're doing this
in debug mode. Now, what this is going
to do is it's going to look for this app
folder. It's going to look for this main
file. It's going to look inside the main
file for an app called app and it's
going to run it using Unicorn. It's
going to run it on localhost, which is
this right here on port 8000. So, now we
should be good to actually run the API
and see if it works. So, what we can do
is make sure we're in the backend
folder. We can type uv run start.p py
and we should see that the API starts
running. If the API is running that's
good. Uh however it's giving me some
error saying no module named backend. Uh
so let me quickly check why I'm getting
that. Okay so I just had to make a fix
here inside this file I had from
backend.app.core.
I just need to change this to say from
app.core.
But actually I think that I should have
just put this import up here. So O user
like that. that. So, I'm just going to
remove this from here. Have the O user
imported from that. And now, if I save
this and run it, it looks like we're all
good. The application is started up and
we're no longer getting that error. So,
the API should be functioning. Now,
we're not able to really test this until
we actually have a clerk account and
we've signed into our front end.
Fortunately, that's pretty easy to do.
So now what we'll do is we'll leave the
back end running because pretty much all
of the functionality is done and we can
start working on the front end where we
actually sign in users, write the UI and
then send the requests to our backend
where they're authenticated by clerk. So
we're now moving on to the front end.
Now for the front end we're going to
change directories in our terminal into
the front end directory. You'll see it
looks something like this. What we're
going to do from here is just install a
few npm packages that we need
specifically for clerk again for
handling all of the authentication and
then for react router DOM for routing
between different pages. So we're going
to type npm i and then this is going to
be at clerk slash clerk and then dash
react and then beside this we're going
to install react dash router-d.
So, let's go ahead and install that and
wait for that to finish. Okay, so all of
that has been installed. I'm now going
to close the terminal and I'm going to
go into my front-end directory. Now, for
this project, I am not going to write
all of the CSS completely from scratch
because there is a ton of it and it's
just a huge waste of time for me to do
that on the video. Uh, you know,
truthfully speaking, most of the CSS was
just generated with AI anyways. So, what
I'm going to allow you guys to do is
just download all of the CSS and just
bring it into your project and then
write all of the components manually if
you want to follow along with me so that
you don't have to go through all of this
tedious, you know, hundreds, actually
probably close to a thousand lines of
CSS. So, what I'm doing is I'm linking
all of the code in the description via
GitHub. If you go to that repo, you go
to front end, you go to source, you go
to styles, you'll see all of the styles
are organized by pages. So, badges,
cards, canband, layout, all of this kind
of stuff. So, you can click into them
and you can view all of the different
CSS styles and just drag them right into
your project, which is where I'm
starting. All of the CSS is already
here. Again, I'm not going to write any
of it. It's just already inside of the
project. Now, same thing with this
index.css file. What I've done is I've
just imported all of the individual
styles from this styles folder inside of
this index.css file. So, just make sure
you were aware of that. Now, what we're
going to do now that we have all of the
styles is we're going to actually start
setting up the clerk authentication.
Then, we're going to start writing all
of the pages that we need. So, for now,
I'm just going to delete this assets
folder because I don't need it. So,
let's get rid of this. Okay. And we're
going to go back to Clerk and I'm going
to show you how we can set this up on
the front end. All right. So, from
Clerk, we're going to go to overview.
We're going to select React and it's
going to show us here exactly how we can
set up Clerk. So what we need to do is
install the React package which we
already did and we need to create av
file where we put in this clerk vit
publishable key or vit clerk publishable
key. So we're going to go back to our
code. We're going to go inside of front
end. We're going to make a new file
called env. And we're just going to
paste this in here. Vit clerk
publishable key. Okay, perfect. So we've
got that in. Now let's go to the next
step. And it's telling us that what we
need to do is we need to import this
inside of our main.tsx tsx file where we
have the clerk publishable key. So, let
me copy these two variables right here.
And let's go ahead and do that. Okay.
So, we're going to go to main.jsx.
Now, from here, I'm just going to copy
in these two variables. So, the
publishable key like that. And I'm just
going to change a few things here
because I need to essentially wrap my
app in the clerk provider component, but
I also need to wrap it in my browser
router so I can do the uh what do you
call it? uh kind of routing or page
routing. So from here I'm going to say
import and then this is going to be the
clerk provider. Okay, from and this is
going to be at clerk slash clerk-react.
I'm then going to import the browser
router
from and this is going to be react-rower
DOM. Okay. Now for my app, I'm going to
wrap this in the clerk provider. For the
clerk provider, we're going to provide
our publishable key, which is stored in
the variable publishable key. Okay? And
then we're going to put our app directly
inside of here. Now, around that, we're
also going to wrap, let's just close
this, the browser router. So, we're
going to say browser router like that.
Okay? And again, inside of the browser
router, we're going to put our app.
Okay. So, now we should be good from the
main.js. JSX. So what we're doing is
we're just wrapping the app in the clerk
provider and the browser router so we
get access to the clerk settings or the
clerk configuration as well as the React
router DOM features. Okay. Now what
we're going to do is go inside of
app.jsx.
From here we're just going to clear
everything that is inside of this app
component. We're also going to remove
the import of app.css because I've
deleted that. We're going to remove the
imports of the React logo and the Vit
logo. And even same thing with use
state. We actually don't need that. And
we're going to start setting this up to
actually handle the routing for our
application. Now, before I can do all of
the routing, I do need to have the
different pages that I will be routing
to. So, what I'm going to do is just
stub those pages in my front end. So,
from source, I'm going to make a new
folder. So, let's go new directory like
this, and we're going to call it pages.
Now, inside of pages, we're just going
to create some empty pages that we can
route to. So, the first page we're going
to have, so let's make a new file is
going to be the dashboard.
Okay? And then page.jsx.
Now, for this, all we're going to do is
we are just going to write a really
simple component. So, we're just going
to say function
dashboard like so. And actually, this
can be dashboard page. And then we're
just going to return an empty fragment.
Okay? And then we're going to say export
default
the dashboard page like so. Okay. Now we
can just copy that and let's go to the
next page. Now for the next page, this
is going to be the homepage. So let's
just go homepage.jsx.
Okay. And then we can just change this
from dashboard page to say homepage
like so. Now let's have another page. So
let's go new file. This is going to be
the pricing page. So pricing page.jsx.
Same thing. Just change this to say
pricing
and
pricing. Perfect. Now we have two more
pages. I believe we're gonna have the
sign in and the sign up page. So we're
going to say sign up.jsx.
Same thing. Just change this to be the
sign up page and the sign up page. And
then let's go a new one. So new page.
And this is going to be the signin
page.jsx.
And from here, sign in. Like that. And
sign in. Okay. So, those are our five
pages. Let me just close all of those.
Now, what we're going to do is go to app
and we're going to start setting up the
router to route between these different
pages. So, once we write them, they're
already showing up. So at the top of our
file, we're going to say import and then
route and router or sorry not router
route from and this is going to be react
dash router-dom.
Okay, that's the first import. Then
we're going to say import signed in
signed out and redirect to signin from
at clerk/clerk-react.
This allows us to essentially gate pages
so that if you're signed in, we show you
something. If we're signed out, we show
you something else. We're then going to
import the homepage. Okay, we are then
going to import the signin page. Okay,
so let's do that. Then we're going to
import the sign up page. Then we're
going to import the dashboard page. And
then I think the last one we need is the
pricing page. So let's import the
pricing page like that. Now we're going
to create a very simple protected route
function. So we're going to say
function. And this is going to be
protected route like so. And we're just
going to take in some children. And what
we're going to do is we're going to
return a react fragment. And inside
here, we are going to say if you are
signed in, then we will simply show the
children of the protected route.
Otherwise, if you are signed out, then
what we're going to show is the redirect
to sign in. Okay. So, all this is going
to do is redirect to the sign-in page if
you are not signed in. That's it. Very
easy. Now, from our app, what we're
going to do is we're just going to
define the different routes. So, if
you've never used React Route or DOM,
all we're doing here is we're saying,
okay, these are all of the different
pages that you could access. So, like
/home/signin slign out. That's all we're
putting here. And then when you go to
one of those routes, it will just render
the component that we wrote, which is
one of these pages. So, we're going to
say routes. Now, we're going to make a
route here. For the first route, we're
just going to say path is equal to
slash. Okay, so that's it. So that's it
for that. Now, inside of this route,
we're going to have a bunch of other
nested routes. So we're going to say
route index. Index is the default one.
And we're going to say element is equal
to and then this is going to be the
homepage.
Okay, so let's close the component like
that. And then for the route, we
actually don't need to close the route.
We can just make it self-encclosed. Then
we're going to have another route. Now
for this route we're going to say path
is equal to sign-in slash and then
asterisk and then we're going to say the
element is equal to and this is going to
be the signin page like so. Then we're
going to have another route. Okay. So
let's just do actually the exact same
thing that we did here. And let's change
this to be sign up. And then you guessed
it. This is just going to change to sign
up. Then let's copy that again for the
next route. Let's change this to be
slpricing.
Okay, so that's going to be the pricing
page. For the element, this is going to
be the pricing page. And then we can
have the dashboard. So for the
dashboard, we're going to say route.
We're going to say the path is equal to
dashboard. Then beneath here, we're
going to say the element is equal to and
for the element this time it's going to
be the protected route. Okay, so
protected route and inside of the
protected route we are going to have the
dashboard page. So essentially what
we're saying is okay, if you are signed
in, we'll allow you to access the
dashboard. If you're not signed in,
we're not going to let you access the
dashboard. So that's why we're using
this protected route component. For all
of the other pages, you can access them
even if you're not signed in. That's
fine. Okay, now that's it for kind of
handling the routing. Now, if we run
this and we go to these different pages,
you'll see that it will actually just
render those pages. although they won't
look any different because we don't have
anything different in those components.
But we can actually test it for now
because we can test for example the
protected rept. So let's open this up.
Let's go npm rundev. Okay, it should run
that for us. Let's open up our front
end. Okay, you notice this is kind of
the homepage. And if I go to slash
dashboard for example, you'll see that
it should redirect me. And you see it
redirects me to the sign-in page here
with clerk where it asks me to sign into
my account because I am not already
signed in. Okay, let's go back now.
Let's try to go to slashs signup or
something. And you can see we can just
go to that route. But if we try to go to
the protected one, then it brings me to
the signin page. Awesome. So that is
running. Now what we're going to do is
we're going to start building kind of
like the navbar which allows us to sign
in and sign out, see if we're signed in,
navigate between the different pages,
and then we'll start building the
various other components. So we're now
going to make another folder inside of
src. So, new folder, call this
components. And for the components,
we're going to start by creating a
layout component, which is going to
always be on the screen, which is going
to act kind of like a navbar. So, I'm
going to say layout.jsx.
Now, inside of here, I'm going to import
outlet as well as link from okay, and
this is going to be react router DOM.
Then I'm going to say import and this is
going to be signed in
signed out user button. The user button
is kind of like the profile button. Then
we're going to have the organization
if we can spell spell this correctly. Uh
switcher as well as use organization
from at clerk/clerk-
react. And for some reason it's giving
me an error here. It says it's defined
but never used. Okay, that's fine. So we
will use it later. Then we are going to
define the function. So we're going to
say function layout like so. We're going
to say const
organization.
Okay. And this is going to be equal to
use organization. And we're just going
to put this inside of braces. So we can
grab the organization. We're then going
to say return. And we're going to start
building this layout component. Again,
the way that the layout works is that
we're effectively just going to have
this always be on the screen where we're
kind of showing this like navbar at the
top of the page. So for this div, we're
going to have class name equal to
layout. We're then going to have another
div. So let's add this here. We're going
to say class name is equal to and this
is going to be nav. We're then going to
have another div. If you can't tell,
right now we're building the navbar.
We're going to say class name is equal
to nav dash container. We're then going
to have a link. So we're going to say
link and then this is going to be two
equals slash so to the homepage. And
we're going to say class name is equal
to nav- logo. And for this we're going
to put the name. So we're going to say
taskboard. If you press this it will
just bring you to the homepage. Now
beneath that we're going to have another
div. This is going to be class name
equal to nav-links where we'll have the
different links that you can navigate
between. So the first link, let's put
this here is going to go to and we're
going to go to the pricing page. Okay,
so is it going to be slashp pricing?
Yeah, it needs to be slashpricing. The
class name will be equal to nav-link.
And then here we can simply say pricing.
Okay, now we're going to have some
dynamic things. So, we're going to say
signed out. So, if you're signed out,
then we'll show you the ability to sign
in or to sign up. So, we're going to
have a link. Okay? And we're going to
say two is equal to and then same thing.
This is going to be slash sign-in.
Then, we're going to have class name
is equal to nav-link.
And you guess what this one is going to
say? It is sign in. Then, let's copy it.
And directly below that, we're going to
have the sign up. and just change this
to sign up. Okay, that's it. So, if
you're signed out, we'll show you this.
However, if you're signed in, then we're
going to show you your organization as
well as your profile. So, to show the
organization, we're going to say
organization switcher. This is a
component that comes directly from
clerk. And there's a bunch of settings
that we can pass here to change the
styling, which is what I'm going to do.
So, first I'm going to say hide
personal. Then I'm going to say after
okay and this is going to be create
organization
URL is equal to dashboard
then I am going to say after select
okay let's spell this correctly
organization
URL is equal to the dashboard as well
then I'm going to say create
organization
mode is equal to modal. So this means
it's going to pop up as like a popup on
screen rather than be a separate page
that we navigate to. And then we can
override the appearance which I'm just
going to quickly change because we need
to change it from kind of light mode to
dark mode. So we're going to say
elements and then here we're going to
say use or not use user preview main
identifier
text
personal workspace.
I know this is a lot of code but this is
how I change the color is going to be
color and then white like that. Again it
looks like we spelled identifier
correctly. So incorrectly sorry. So let
me just fix that. Okay. Now after that
one we're going to have organization
preview main identifier_ganization
switcher
trigger is and let's spell trigger
correctly and then same thing I always
keep spelling identifier incorrectly is
going to be color-white.
Okay. Again, I just need to change this
from light mode effectively where the
text is going to be black to dark mode
where the text will be white. Okay. So,
that's it for the organization switcher.
Kind of annoying to do that override,
but that is just one thing we need to
do. And then I'm going to say, okay, if
you're currently in an organization, so
let's spell organization correctly. So,
we're going to say organization and and
then we're going to have a link. And the
link is going to say to equals and then
slash dashboard. Okay. and class name
is equal to nav-link
and then here we're just going to say
dashboard like that. Okay. So the idea
here is that a user might be signed in
but they might not yet be a part of an
organization. So if they're not a part
of an organization well I can't show
them the dashboard because the dashboard
only exists per organization. So that's
kind of what we're talking about here in
this signed component. Now if they're
not signed in of course they're not in a
uh what do you call organization cuz
well they're not signed in. So we'll
just show them this to sign in or to
sign up. Okay. Then we need to export
this. So export default layout. And I
think we are all good. Now the only
thing is that we need to render this
outlet and we also need to display the
user button which I forgot. So let's
quickly do that. So out so inside but at
the end of this signin container we're
going to put the user button which is
just going to show the user's profile.
And then down here in the end of this
div, we're going to say main and we're
going to put outlet.
Okay. Now, what this is going to do is
it's going to take whatever should be
showing in the page that we're
navigating to and just put it inside of
here. So, effectively the way the layout
works is that we're just rendering the
page inside of this outlet. Everything
else is just static and always stays on
screen. So, this layout is always
visible based on what's happening here.
and then we show whatever else kind of
the content that the current screen is
showing inside of this out. Hopefully
that makes sense. So now what we need to
do is just import layout from here. So
we're just going to say import layout
from and this is going to be components.
So I think it's dot /components/
layout like that. And then we're going
to go to our route like this and we're
going to say the element is equal to
layout. Cool. So now if we do that and
we go back here, we should see the
navbar popping up. And you can see that
we have pricing, sign in, sign up. And
for some reason the styling is not
working 100%. So I'll have a look at
that in one second. Um, but that is a
good start. Okay. Okay, so I was just
having a look at the styling and I
noticed some issues right in terms of
how the styling was here. So I just
realized I made a few errors when I was
building this layout where first for
this link I actually needed to remove
the nav link that was here before and
change it to this btn btn- primary and I
need to take all of this and just put it
one div up. So essentially after the
pricing it goes inside of here. Okay. So
that it's in this nav links div which it
wasn't in before. Okay. And let's just
fix this a bit so that it is all inside
of here correctly. Let's fix the
indentation. And you can see now that
it's inside of this nav links div. So
now if I come back you can see that it's
properly on the right hand side of the
screen which is what I was looking for
before. Okay. So now the layout
component is finished. And what I want
to do is start writing the sign in and
sign up page. So we actually have the
ability to create an account and sign
into our application. So let's start
with the sign up page. Now for the
signup page, this is very easy. All we
need to do is just say import sign up.
And then this is going to be from the
at@ clerk/clerreact
package. And then what we can do is just
return a simple div. For the div we can
say class name is equal to off dash
container. And then inside the div we
can put a signup component. We can say
routing is equal to and this is going to
be path. And then we can say path is
equal to slash sign up. So it knows that
it goes back to this page. And then
we're going to say the signin URL is
equal to slash sign-in.
Okay. Then we can actually just
selfenclose this component. And that is
the sign up component from clerk. We
just use it and it will work like this.
Now, let's do the same thing for the
signin page. So, for the sign-in page,
it's going to be literally the exact
same thing except sign in. So, let's
just copy what we have here. Okay. So,
we're going to say from or we're going
to say import, sorry. And this is going
to be sign in. Okay. From at clerk/clerk
react for the return, make it the same
thing except this is going to be sign
in. This is going to be sign in. And
this is going to be sign up. And this is
going to be the sign up URL. So just
swapping those around. And now let's
remove this sign up component. If we go
back here, we refresh and we press sign
up for example, you see that it brings
us to the sign up page where we see the
sign up modal. If you go to sign in,
brings us to the signin page. So what we
can do now is try to make an account.
Let me create one. Press continue and
we'll go from there. Okay. So I'm just
going to make an account here with my
email. Let's close that. Uh, okay. I'm
going to need a new password. So, let's
set a new one. Go continue. And then
what it's going to do probably is ask me
to verify my email. So, yes, you can see
I have to verify the email. Let me do
that and I'll be right back. Okay. So,
this is the code I got in my email. And
now I press enter and I get brought back
to the page. Looks like there must have
been some error or something. I don't
think it signed me in maybe. So, I
signed up, but it didn't sign me in. So,
let me try to sign into that account
now. Uh, oh, now it's saying set up your
organization to continue. Okay, that's
interesting. So, let's just create an
organization, I guess, like Tim A or
something. Okay, and let's see if it
works. And there we go. Okay, now we get
brought into the dashboard where it
looks like we are all good. So, it's a
little bit buggy when we're creating the
new account where we need to actually
create the organization first, otherwise
it doesn't let us access this page. I
also still need to change the color. So,
I think I might have just had a spelling
mistake when I was adjusting the
parameters here. But you can see I'm
inside an organization. I can now manage
this information from this kind of clerk
dashboard here and I have the ability if
I want to invite someone to my
organization, I can view the dashboard.
I can go to the pricing page even though
there's nothing there. And then if I
press on my little user account guy, you
can see that I have the account again
because of clerk. And I can for example
just go here and go sign out. And then
the UI will update and show me this. And
if I go back to clerk now and I refresh,
it should start showing me my users. And
you can see that I have a user here,
timotiv.net. I can view all the
information about the user, when they
signed in, their password. Well,
actually, I don't think I can view their
password, but I can change or reset
their password, etc., etc., etc., and I
can even see their organizations, which
one they belong to, invite them to an
organization, mess with all of their
settings. You get the idea. Okay, super
cool. So, the O is working. We're able
to sign in. We're able to sign up,
create a new account, and create
organizations. Now, what we want to do
is start handling kind of the taskboard
and then get into some more of the
advanced stuff where we're inviting
different users, having the billing, the
subscriptions, the pricing, all of that.
All right. So, now that we finished the
login functionality, what we're going to
start working on is the actual task
management. So, having that kind of
canban style board like you saw,
creating tasks, deleting tasks, and then
of course the pricing, and upgrading the
organization. So let's actually start by
going to the homepage and let's code
this out for now so that we have kind of
some styling and we have like a nice
landing page people can go to. Then we
can build the dashboard where you're
going to be able to actually see the
different tasks and move those around.
Okay. So from the homepage we're going
to start by importing a link from React
Router DOM. Then we're going to import
signed in and then signed out use
organization which comes from clerk as
well as create organization. Okay. All
right. So now we're going to go and
inside of the homepage component we're
going to check the organization the user
is in. So we're going to say const
organization is equal to use
organization. Okay. So let's pull in
that react hook. And from here, let's
start creating the UI. So, we're going
to return a div. For the div, we're
going to have class name is equal to,
and this is going to be the home dash
container.
Okay. And let's spell container
correctly like that. Now, inside of this
div, we're going to have an h1. The h1
is just going to be the title. So, we're
going to have class name equal to home
dash title. Here we're going to say team
task management like that. And then
we're going to put a span. We're going
to say class name is equal to home and
then dashtitle and then dash accent. And
we're just going to have made simple
just to add some kind of nice styling
here to the header. Then we're going to
have a paragraph tag. We're going to say
class name is equal to and for the class
name this is going to be the home dash
subtitle.
Inside the subtitle we're going to say
organize your team's work with powerful
and let's spell this correctly with
powerful task boards. Then we're going
to say create, assign, and track tasks
across
your organization.
Okay. Then we're going to have a signed
out container for the users that are
signed out. We're essentially just going
to tell them, hey, you know, go and like
create a new account. So we're going to
have a div. We're going to have class
name is equal to the home-buttons.
Then inside the div, we're going to have
two links. So for the first link, we're
going to say two is equal to signup and
this is going to be /s signup. And then
for the class name, we're going to say
this is equal to btn btn- primary btn-lg
for large. And inside the link, we're
going to say get started for free. Okay.
Then we're going to have another link.
For this one, we're going to say two.
And this is going to be slash signin.
And then we're going to say the class
name is equal to this will be btn btn-
outline btn-large
again. And then this is just going to
say sign in. Okay, so that's it. If you
are signed out, now if you are signed
in, the UI is going to look a little bit
different. So first we're going to check
if you're currently in an organization.
So we're going to say organization
question mark. Okay. Now if you are in
an organization, then we're just going
to have a link. And the link is going to
go to the dashboard and just tell you,
okay, you know, go manage your task from
the dashboard. So here we're going to
say the class name for this link is
going to be equal to btn btn- primary
and then btn-lg.
Okay. And we're going to say go to
dashboard. Then otherwise if you do not
have an organization, we're going to
have a div. So let's create the div
here. The div is going to have a class
name which is equal to home-create-org
and then we're going to put create
organization like this. So this is
essentially a form that is rendered by
clerk. So we want to show them hey you
need to create an organization. So we're
just going to show this directly on the
homepage so that they can see it and
they can create it. And then we're going
to have after create
organization
URL is equal to slashdashboard.
Okay. So after they create an
organization, we'll redirect them to the
dashboard. Okay. So that's going to be
it for the homepage. Effectively, what
we're saying is all right, if the user
is signed out, tell them to sign in or
sign up. If they're signed in, check if
they have an organization. If they do,
allow them to go to the dashboard. If
they don't have an organization, then
simply tell them to create one. Okay, so
that's the homepage. Let's test it out.
Let's go here. And there we go. Nice.
Team task management made simple. I
think we're going to have to add like a
line break there because looks like it's
on the same thing. So, let's just add a
BR like that. There we go. Looks good.
And we can see we have this nice UI.
Okay. So, let's continue from here. And
the next thing we're going to do is
start coding out some of the components
related to the tasks. So, actually, I'm
just going to close all of these windows
for right now. I'm going to make a new
folder here, and I'm just going to call
this one services.
And inside of services, what I'm going
to do is I'm going to write a file
called API.js, where we're going to put
all the calls to our backend API. So,
we're going to say API.js. Here, we're
going to make a variable. We're going to
say const API URL is equal to
import.env.vit_appi
vit_api
URL or then this is going to be http
slash okay localhostport8000
now if we want to define this as a
variable in the environment variable
file we can otherwise it'll just load
this by default if we don't have
anything there then we're going to have
a function so we're going to say export
async function and this is going to be
fetch with o what this is going to do is
this is going to ascend a request to our
backend with the clerk authentication.
So what I'm doing in this file is I'm
writing all of the requests that will be
sent to our backend. So we can simply
just call the functions from our
front-end code. Now here we need to make
sure that we include the correct headers
which includes the clerk JWT token which
is essentially how clerk identifies our
signedin users. We're going to send that
to our backend along with every single
request. So that's what this kind of
helper function is going to do. So we're
saying export async function uh and this
is fetch with o. We're going to take in
some endpoint. We're going to take in
get token and then options which is
equal to an empty uh object. We're going
to say const and this is going to be
token is equal to a weight get token.
This is a function that we're going to
call from clerk which is going to give
us the token that we need to use. Then
what we're going to do is we're going to
say const response is equal to await
fetch. What we're going to do is we're
going to fetch the following URL. So
this is going to be inside of a dollar
sign because we're putting a variable
the API URL. And then we're going to
have another dollar sign and then we're
going to put the endpoint that was
passed to this function. So that's the
URL that we're calling. Now the options
that we're going to pass is dot dot dot
options. So this right here one of our
parameters as well as we're going to
pass the content dash type and this is
going to be application /json and then
we're going to have o
and then we're going to have
authorization
is
bearer and then we're going to put our
token in here. This identifies the user.
And then we're going to say dot dot dot
options dot headers. And this reminds me
that I need to actually fix something
because I need to put headers like this.
So I need to say headers and then all of
this is going to be a header that we're
passing with our options. Okay. So let's
just quickly fix that as we did.
Perfect. So now after the response,
we're going to say if not response.
So response. Okay. Then what we're going
to do is say con error is equal to await
response.json.
Let's spell response correctly.
catch. And for the catch, we're just
going to put something empty here
because we're not going to handle that
right now. Then we're going to say throw
new
error. And we're just going to throw the
error dot detail or we're going to throw
request failed like that. Okay. Then
we're going to say if the response
status is equal to 204, so it has no
content, we're just going to return
null. Otherwise, we're going to return
response.json, which is essentially the
response, right? And whatever we got
back from the API. Okay, so this is the
function that we're going to call when
we want to send a request to the backend
with our clerk authentication. So now
what we're going to do is we're going to
write the individual functions for the
operations that we want to perform in
the back end. So the first one is going
to be export async function and this is
going to be get tasks and this is going
to get all the tasks from our back end.
So same thing we're going to take in
this get token function and we're going
to return fetch with off.
Okay. And when we fetch with Oth, we're
going to fetch the slash API slash tasks
sorry route. We're going to pass the get
token function. Okay. Now let's copy the
same thing. And for the next one, rather
than get tasks, we're going to say
create task. This time we're going to
take in get token and we're going to
take in a task. And then we're going to
call API/tasks, but this time it's going
to be a post request. So what we're
going to do is we're going to add in
some options here. For the option, we're
going to say method is equal to in all
capitals post. And we're going to say
the body is equal to JSON dot stringify.
Stringify like so. And we're going to
pass in the task. Okay. So that is now
how you create the task. Now we'll paste
this again. And now we're going to do
update task. So we're going to say
update task. Okay. We're going to take
in get token. We're going to take in
task ID as well as the task. We're going
to fetch with Oth. Same thing,
API/tasks.
And now this time we're going to say the
method is equal to put because that's
the method we use when we want to
update. Then we're going to say the body
is JSON dot stringify. And we're going
to stringify the task. And actually one
small change, we need to include the
task ID in the URL. So we're just going
to do that like this by changing these
to back. Okay, it already is back.
Perfect. That's great. So slash API
slashtasks slash the task ID of the task
that we want to update. And then in the
body, we just include the new task data
that we want to use when we're updating.
Okay. And then the last thing we need to
do is delete a task. So we're going to
change this to say delete task. Same
thing, we're going to take get token and
this time the task ID. Then we're going
to change this to be a back tick. Okay?
and we are going to include the task ID
we want to delete. So let's include
that. And we're going to change the
method to be delete. So we're going to
say method
delete in all capitals like that. And
now we have the four functions. So get
task, create task, update task, and
delete task. And now we can use those to
call the backend API. Okay. So with that
in mind, let's start writing the
components that we need for representing
the tasks. So we're going to go in the
components directory. And the first
component that we're going to work on is
just going to be our task card. So we're
going to say task card.jsx.
And inside here, we're just going to
write a card that represents one
individual task. So we're going to say
function task card. And we're going to
take in as values here the task onedit.
So a function to call if we're ending
the task and a function to call if we
are deleting the task. Then we're going
to say const and we're going to say
canedit is equal to exclamation mark
exclamation mark onedit. So essentially
did we pass that function? Then we're
going to say const can delete. Okay. And
this is going to be equal to exclamation
point exclamation point and then on
delete. Okay. Then we're going to return
the UI. So we're going to return a div.
We're going to set the class name is
equal to and this is going to actually
be in backtix. And we're going to say
task dashcard. And then we're going to
have a dynamic name based on if we can
edit the task or not. So we're going to
say can edit question mark. And then if
we can edit, we're going to have the
following task-cardclickable.
So you can click the task to edit it.
Otherwise, we're just going to have an
empty string. So if you can't edit it,
we're not going to let you click on the
task or at least we're not going to show
that with this class name. Next, what
we're going to do is have the onclick
handler. So that's going to be in the
div as well. So let's fix this here. So,
we're just going to fix the styling.
Okay. And we're going to say like this
on click is equal to same thing. We're
going to say canedit
question mark. If we can edit, then
we're going to call the onedit function.
So, onedit with the task. Otherwise,
we're going to say undefined. Okay. Then
we're going to have another div inside
of here. For the div we're going to have
class name equal to and we're going to
start with the header. So we're going to
say task card header. Inside this div,
we're going to have an H4.
So let's write that. For the H4, we're
just going to put the task name. So
we're going to say class name is equal
to task card-title.
And then inside of here, we're going to
have task.title.
Okay. Now, underneath the H4, we're
going to have a can delete. So if we can
delete, we're going to show a delete
button. We're going to say can delete
and and and then we're going to put a
set of parenthesis. We're going to put a
button. For the button, we're going to
say the class name is equal to and this
is going to be task-card-bascard-b.
Okay. Now, let's just fix the classes a
little bit here. Beneath this, we're
going to have the on click. The on click
is going to be the following. So we're
going to have E. Okay. Then we're going
to go into a function. Now inside of the
function we're going to say E.top.
And this is propagation. Okay. Then
after that we're going to call the ondee
function that's passed into the parent
with the task ID to delete it. Okay.
Then we're going to continue and we're
going to have title and the title is
going to be delete
task like that for this particular
button. And then we're just going to
simply have an X inside of the button.
That's what we're going to render on
screen. Okay. So, if we can delete,
we're going to show that. And then
beneath this, we're going to say task
dot description just to make sure it
does have a description. If it does,
then we're going to show the
description. And for that, we'll just
have a paragraph tag. We'll say class
name is equal to and this can be
task-card
description
like that. And then for the description,
we can just show the task dot
description. Okay, so that should be it
for the task card. Then what we can do
is export this. So export default.
Okay, and then task card like so. And
then we can start using the task card.
Okay. So as well as the task card, now
we're going to create the task column
because we're going to have three
columns full of task cards. So we're
going to say task column.jsx.
For the task column, this is just going
to display the various task cards. So
we're going to say import task card from
there. Okay. We're then going to say
const status
labels is equal to and then we're going
to have the label. So we're going to
have pending is equal to todo.
We're going to have started which is
equal to in progress. And then we're
going to have completed which is equal
to done. Okay. Okay. Then we're going to
have function task column. This is the
component. We're going to take in
status. We're going to take in the
tasks. We're going to take an onedit and
ondee as those functions. And then we're
going to return the UI. So we're going
to return a div. The class name
is going to be for this first div the
canban dash column. Okay. Now inside of
this div, we're going to have another
div. So for the first one, we're going
to have class name. And this is going to
be inside of back tick because it's
going to be dynamic. It's going to be
canban dash column
dash header and then canban dash column.
Let's spell column correctly. dash
header dash and then we're going to put
the status. So whatever the actual
status is, we're going to use that in
the class name so that we can show a
different color um what do you call it?
board kind of based on what the status
is. Then we're going to have an H3 tag
for the name of the column. So we're
going to have a class name for the H3
and the class name is going to be the
canban dash column dashtitle. And what
we're going to do is we're going to use
the status labels and we're going to
pass in the status so that we get kind
of the string representation that we
actually want to show in the header. And
then we're going to have a span that's
just going to show the number of tasks
that are here. So, we're going to have
class name equal to cananban dashc
column dash count. And inside of here,
we're going to have the tasks.length.
Okay. Now, beneath that, we're going to
have a div. We're going to say class
name is equal to cananban dash column
dashbody. This is where we're actually
going to display the tasks. And we're
effectively just going to take all the
tasks and we're going to map them to
their components. So, we're going to say
task. Okay. And then this is going to
map to the task card. So, we're going to
say task card
like that. Now, for the task card, we
need to write all of the values. So,
let's actually just put this in
parenthesis. Okay. Put another set of
parenthesis and put this down here so
that we can actually write it properly.
So, we're going to say key is equal to
task. ID. Then, we're going to say the
task is equal to the task. We're going
to say onedit is equal to onedit. And
we're going to say ondee is equal to
ondelete.
Okay. And that's going to render the
tasks. And then that's it. We can just
export default the task column from this
component or from this file. Perfect. So
now we have the task column. The task
column renders the task cards. Now we
need essentially like a canban kind of
layout. So we can render the canban
layout which renders the columns which
renders all of the tasks. So let's write
another component. This time it's going
to be called the canban
board.jsx.
And inside of here we're going to start
writing all of the kind of complex logic
with the functions to actually pull the
tasks display them in the correct
columns etc. So we're going to say
import use state from and then we're
going to go to react. Then we're going
to say import
use organization
from at clerk slash clerk react. Then
we're going to import the task column
from dot slashtask column. Okay. And I
don't need the jsx there. Then I'm going
to import the create task
update task. Okay. as well as delete
task. Let's write this from the
services. Okay, so from dot dot slash
services/ API because that's where we
wrote these different functions.
Awesome. Now, we're also going to need
to have a form for creating the tasks,
but we will write that in 1 second. And
then we're going to have const and in
capital we're going to have statuses is
going to be equal to pending
started and completed as it matches up
with our back end. Now we're going to
have the components. We're going to say
function canban board. Here we're going
to have the tasks. We're going to have
set tasks and we're going to have get
token as the functions that we need. Now
inside of here we're going to say const
membership
is equal to use organization and it's
going to tell us what our role is within
the organization. So if you want to get
the role of the particular user, you can
use this use organization hook from
clerk and then you can pull membership.
So previously we were looking at the
organization itself here. However, we
can also get the membership and that
will tell us if they're a member, an
admin, an editor, whatever their role in
the org is as you've defined in clerk
when you set it up. We're also going to
have const
show form set show form. This is going
to be for showing the creation form
which we will write in a second. So,
we're going to say use state and that's
going to be false. And we're then going
to have const editing task.
Okay, set editing
task and this is going to be equal to
use state and false. And then let's get
rid of that. We're going to get the
role. So we're going to say const ro is
equal to membership question markroll.
So this is going to give us their role
in the organization. We're going to say
const can manage. So essentially can
they edit is equal to ro equal equal to
and then we're going to say org colon
admin. So this is the role if they're an
admin in the organization or role is
equal to or colon editor which is the
other role that we created. If you had
your own custom roles all you would do
is just change what you see here after
the colon colon sorry to that custom
roles name right as you saw in clerk.
Okay. Then we're going to have function
get tasks by status.
We're going to take in a status and
we're going to return tasks like this
dot filter and then task and we're going
to go task dot status is equal to the
status. So this is just going to filter
all the tasks in our task list and give
us the ones that are a particular status
so we can put them in the correct
column. Then we're going to have a
function and this is going to be
handleedit.
We're gonna have a task and inside of
here we're going to say set editing task
and we're going to put the correct task
that we're currently editing and we're
going to say set show form to true.
Okay, so actually I need to change this
state to say null. So essentially the
task that we're currently editing we're
going to store in this variable right
here. The reason we need that is because
in a second we're going to pop up a form
that's going to show the information for
the task that we either want to create
or edit. So we have two variables,
right? One, okay, should we show the
form on screen? Yes or no? And if we are
showing the form, do we have a task
we're currently editing? If we do, we'll
put that inside of the form so we can
edit that particular task. Okay. Now, a
few other functions that we're going to
need. So, for example, like deleting the
task, etc. So, what I'm going to do here
is say function, and this is going to be
actually an async function because we're
going to call our back end. So, we're
going to say async function handle
delete. This is going to take in a task
ID to delete.
And what we're going to do here is we're
going to say if not, confirm. And we're
going to say, are you sure you want to
delete this task?
Okay. And we're just going to return. So
if they didn't confirm this, because
this is just going to pop up on the
window essentially ask them, hey, like
do you want to delete this or not? So if
they don't confirm it then we will not
delete the task and we will return.
Otherwise what we'll do is we'll say con
task to delete is equal to tasks.find
and we're going to find the task with
the particular ID. So T ID is equal to
the task ID like so. We're going to say
set tasks and then we're going to say
previous and we're just going to remove
this task from the screen so that it
goes away right away. We're going to say
previous.filter filter and then t do ID
does not equal the task ID. So
effectively what we're doing is we're
just finding the task that we want to
delete and then we are just removing
that task from the task list immediately
so that it no longer shows on screen. So
we're then going to say try await
and then delete task like so. When we
delete the task, we're going to pass in
the get token function. And the get
token function is right here because
we're passing it to this component.
We're also going to pass in the task ID
that we want to delete. We then are
going to catch any errors here. So,
we're going to say catch error and we're
going to say set tasks. So if there was
an error and we're going to add this
task back on the screen. We're going to
say dot dot dot previous and then the
task that we originally were going to
delete. And we're going to say console
error and we're just going to show the
error like that. Okay. So this is the
handle delete function which I think is
all good. Now what we're going to do is
handle the submit function which is
either going to update a task or create
a task for us. Okay. Okay, so we're
going to say async function handle
submit. Again, this is going to be for
editing or deleting a t or not deleting,
creating a task. Sorry, we're going to
take in some task data. Okay, what we're
going to do here is we're going to say
if we are currently editing a task. So
if we have one that we're editing, then
what we're going to do is we're going to
say const updated task is equal to and
we're going to say dot dot dot editing
task and then dot dot dot to the new
task data that we have. So we're going
to merge those two together to
effectively update the task that's
currently on our UI. We're then going to
say set tasks. We're going to take the
previous list of tasks and we're going
to say previous map and then we're going
to do is say t okay standing for task
and we're going to say t dot id and this
is going to be triple equal to editing
task do ID question mark if it is we're
going to put the updated task otherwise
we're just going to put the original
task and that's going to update the
tasks on screen for us we're then going
to say set show form false and set edit
editing task to null. Okay. Now, inside
of this if statement, we're then going
to send the request to our backend to
actually delete it. So, effectively,
what we're doing is we're updating the
UI. So, it looks like it happens right
away and then we're actually deleting
the task by sending the request to the
back end. So, we're going to say try
await and this is going to be update
task. Okay, so this is calling that
backend function, right, that we
imported here. So, update task. Now when
we call sorry update not updated when we
call update task we're going to pass in
the get token the editing task id as
well as the task data that we want to
update it with. Then we're going to
catch any errors. Let's fix this here.
So we're going to say catch error and
for this we're going to say set tasks
and then same thing we're going to
restore the previous task if there was
an error. So we're going to say previous
previous dot map t do id is equal to
editing task do ID question mark editing
task colon and then t okay so
essentially we check is the current task
that we're looking at the one that we
were editing if it was okay just put the
editing task back otherwise just put the
original task okay we're then going to
say console error and we're just going
to log the error so we can see the
message okay now if that's not the case.
So if we're not updating the task, then
that must mean that we're creating a new
one. So what we're going to do is say
try const new task is equal to await
create task. To create the task, we're
going to pass again that get token
function as well as the task data. We're
then going to say set tasks and we're
going to add this new task. So we're
going to say previous and then this is
going to be a list. We're say dot dot
dot previous and then the new task like
that. And then we're going to say set
show form
false like that to no longer show the
form. And then we can catch any errors.
And if we have any errors, we can just
console dot error the error, right?
Okay. So let's spell error correctly.
Perfect. So that should be good for
essentially handling the submit. So this
is when they submit the form. But we
still need to have a few other
functions. So we're going to have the
function sorry to handle cancel. So this
is if they're cancelling an edit or a
creation. So to handle cancel, we're
going to say set show form is false and
set editing task to null. Okay. And then
we're going to have a function and this
is going to be handle add task. Let's
spell handle correctly. What we're going
to do here is we're going to say set
editing task to null. So if they're
adding one, then we're no longer editing
one. And then we're going to say set
show form to true to show the form
that's going to allow us to start
editing. Now I know we don't have that
form yet. We're going to put that on the
screen in just one second. For now
though, let's return kind of that empty
canban board so we can at least have a
look at it and then we can create that
creation form. So we're going to have
div class name here. This is going to be
the cananban- wrapper. Then we're going
to have another div. Inside this div,
we're going to have a class name which
is equal to the cananban dash header.
Then inside of here, we're going to have
an h2. For this, it's going to be called
tasks. And then we're going to have the
class name equal to the cananban- title
for this particular H2. We're then going
to have a can manage variables. Okay. If
we are able to actually manage the
tasks, that means we can create one. So
what we're going to show is the ability
to create a task by adding a button with
the class name which is equal to btnb
btn- primary. Then we're going to have
on click which is equal to and this is
going to be let's write this again
handle add task like so. And then for
this we're going to say plus add task.
So essentially if you have the ability
to edit so you can create a new task
then we will show you this button where
when you press the button effectively
we're going to call this where it will
show the form and let you make a new
task. Okay. So let's move out of that
div because that's the header and let's
make another div. This time we're going
to say class name is equal to and this
is going to be the canban board. Okay.
For the cananban board what we're going
to do is show three columns. So we're
going to say statuses right dot map. I
think we called it statuses up here.
Let's check. Yeah, statuses dom map.
We're going to take the status and we're
going to map this to a task column
component. So here, let's make sure this
is correct. And we're going to put task
column, which I believe we imported
already. For the task column, let's go
down here. We are going to have a key.
The key will be equal to the status.
Then we can have the status, which is of
course equal to the status. Then the
tasks for the tasks this is going to be
the function get tasks by status and
then we'll pass the status there to get
all the tasks. Then we're going to have
on edit which is going to be equal to
can manage question mark handleedit
otherwise null. And then we're going to
have on delete which same thing is going
to be equal to can manage question mark
handle and this is going to be delete
and then otherwise null. Okay. So only
if we're able to edit are we going to
have the ability to delete or of course
well edit the tasks. And then down here
we're going to have show form and and
for now I'm going to write null but in a
second this is where we're actually
going to show the form that allows us to
create new tasks. Then we're going to
say export
default the canban board. Okay. So what
we're missing here is the form to be
able to create the tasks. However,
before we put that there, I want to
first show this Canananban board on
screen. In order to do that, I need to
go to my pages and I need to go to my
dashboard page and I need to quickly
write the dashboard page to display the
cananban board and also load all of our
tasks. So, let's do that. So, we're
going to go to the top of our canban our
dashboard, sorry. And we're going to say
import use state import use effect
import use callback from React. We're
then going to say import
use off use organization as well as
create organization from clerk/clerk
react. Then we're going to say import
get tasks. Okay. And this is going to be
from dot dot /services.
So the file we write before slash API.
And we're going to import the cananban
board from the components file. From the
dashboard page, there's a few things
that we need. So first we need that get
token function so we can get the token
from clerk. So we're going to say const
get token
equals use off. Now this is how it works
in clerk. You can use this hook called
use o which will give you access to a
get token function. We can call the get
token function which will then give us
the clerk authorization token or JWT
token which we can then pass to the
backend to authenticate the request. So
that's where I'm getting it right from
this particular hook. Then same as
before I can say const organization
membership okay is going to be equal to
use organization. And for this what I'm
going to do is I'm going to say
membership. Okay. And then
infinite
is equal to true. Now what this is going
to allow me to do is get the membership
status as well as the organizations.
Okay. And when I say memberships
infinite true, what that's going to do
is just allow us to display all of the
memberships that a particular user has,
which is what we're looking for. Okay.
So now what we're going to do is say
const and then we're going to say tasks
set tasks is equal to use state and this
is going to be an empty list for now
because we haven't loaded the tasks.
Then we're going to say const loading
set loading
is equal to use state and to start the
loading state is going to be true. Then
we're going to have const
error. And then we're going to say set
error is equal to use state. And then
for now this is going to be null. Then
we're going to say const
member and this is going to be count is
equal to membership question mark.ount
or zero. So we can figure out how many
members are in the particular
organization because that's what we want
to display on this page. Then what we're
going to do is we're going to say const
or id is equal to organization question
mark ID. And now we're going to start
writing some functions to load the task.
So we're going to say const load tasks.
Okay, this is a function. So we're going
to say use callback
and this is going to be async and then
inside of here for this particular
function we're going to say try.
We're going to say set loading
is equal to true. We're going to say set
error. Okay, is error spelled correctly?
Yes, it is to null. Then we're going to
say const data is equal to await. Get
tasks which is the function we're
calling from that file we wrote before.
Now we're passing that get token uh
function. So we can actually get the
clerk token. We're going to catch on
error and we're going to say set error
and this is going to be error dot
message. And then we are going to go
here to a finally block. And for the
finally we're going to say set loading
equal to false because no matter what we
want to stop that loading state. Then
what we're going to do is just remember
to set the tasks with the data because
we need to do that otherwise this isn't
going to update anything for us. And
we're going to put in the dependency
array of this callback, the get token
function. So that if that updates that
we will do this again to get the new
tasks for this new token, which will be
based on the organization that the user
is currently active inside of as well as
which user is signed in. Then we need a
really quick use effect hook so that we
can run this automatically when the
component mounts. So in the dependency
array, we're going to put the org ID as
well as the load tasks function. And
then what we're going to do here is
we're going to say if org ID so if we do
have an organization load tasks
okay otherwise we're going to say set
loading to false. Okay. And load tasks
is this function right here. Perfect. So
we're essentially doing a use effect.
We're saying all right when it loads if
we have an organization ID we'll try to
load the tasks. If we don't, we don't
need to load anything because there's no
task to load unless we're inside of an
organization. Now, quickly, we're going
to say if you are not in any
organization, then what we need to do is
return just a quick little UI to show
you something. So, we're going to say
class name is equal to dashboard
dash container. Then, we're going to
have another div with class name equal
to no-orgontainer.
Then we're going to have an H1. This is
going to have a class name which is
going to be equal to no-orgt.
And then we're going to say welcome to
taskboard which is going to be the name
of the app. Right? Then we'll put a
paragraph tag and we're going to say
class name is equal to no-org
text. And then inside of here, we're
going to say create or join an
organization
to start managing tasks with your team.
Okay. And let's spell managing
correctly. Now, after that paragraph
tag, we're just going to show the create
organization form
from clerk, which I think was right
there. Perfect. So create organization
and after create organization
URL is going to be equal to slash
dashboard which I know is the page we're
currently on but it will refresh the
page. Okay, perfect. So that's if you
don't have an organization. Now if you
do have an organization we're just going
to simply show the dashboard with the
cananban page. So we're going to say div
class name is equal to the dashboard
container.
Then inside of this div, we're going to
have another div for the header. So
we're going to say div class name is
equal to and this is going to be the
dashboard-
header. Then we're going to have a div
with no class name. And here we're going
to have an h1. For the h1, we're going
to put the name of the organization. So
we're going to say organization.name.
And this is going to have a class name.
The class name is going to be equal to
dashboard-title.
Then we're going to have a paragraph
tag. This is going to be class name
equal to the org dash members. Then
we're going to show the member count. So
we're going to say member
count. And then we're going to say
member and then we're going to put the
member count does not. Okay, so does not
equal one. Question mark. We're going to
have an s. Otherwise, we're going to
have an empty string. So we're going to
say like one member or two members or
three members. So plural or not plural
depending on if we have one or more.
Okay. So this is our little header
component right here. Now beneath that
we're going to say loading question
mark. So if we are loading we're going
to quickly show let's do this. We're
going to quickly show a loading
paragraph tag. So we're going to say
paragraph
class name is equal to text dash muted
and we're just going to say loading
tasks dot dot dot. Otherwise, we're
going to say, is there an error? If
there is an error, then we're quickly
going to show what that error is. So,
we're going to put a div. We're going to
say class name is equal to, and this is
going to be card- error. And then we're
going to have a not div, but actually a
paragraph tag with class name equal to
text- error. And then this is inside of
here, text- error-title.
And we're going to say error like this
loading tasks. And then we're going to
show what the error actually is. So
we're going to do another paragraph tag.
And same thing, we're going to have
class name is equal to text dash error.
And then this is going to be text-
error- message and we're going to put
the particular error. Okay. Now if
that's not the case, so if it's not
loading and we don't have an error,
we're finally going to show the cananban
board. So we're going to show canban
board. For the cananban board, we need
to pass in the information. So we're
going to pass in the tasks, which is
equal to tasks. We're going to pass in
set tasks, which is equal to the set
tasks state. And we're going to pass in
the get token, which is equal to that
get token function. Okay, so that should
now load all of the tasks for us and
display them in the dashboard. Let's try
it out by signing into our account and
seeing if it works. Okay, so I just
signed into my account. I also just
created a new organization called test.
And you can see that we now have the
cananban state. We have to-do in
progress and done. It's all showing up
properly for us. And if we decide to
maybe make a new organization, test one,
two, three or something. Okay, create
organization. And notice that this
changes now right in the background to
test one two three and we can change
between the different organizations and
the dashboard page will update
accordingly. Now we need to make the
form to create a new task. Let's go
ahead and do that. So let's go to
components. Let's make a new file and
this is going to be called the task
form.jsx.
Now for the task form we're going to
start by importing what we need. So
we're going to say import use state and
use effect from React. We're then going
to say function
task form and we're going to have the if
we can write this correctly task
onsubmit
and on cancel.
Now what we're going to do here is say
const and we're going to say title
set title is equal to use state. So,
we're going to start putting in all of
the fields that we need to create new
tasks. We need a title, a description,
and a status. So, we have the title.
Now, we're going to do the description.
So, const
description
set description is equal to use state.
And then, same thing, empty string.
Then, we're going to have const
status set status is equal to use state.
And by default, we'll just start it in
the pending status. Then we're going to
have const is editing is equal to not
not task. Okay, so do we already have a
task? If we do, then we're editing. If
we don't have a task, we are not
editing. We're then going to have a use
effect and we're essentially going to
check, okay, are we currently editing
the task? If we are currently editing
the task, so we need that in the
dependency array, then we need to update
the state here with what is passed from
this task. So, we're going to say if
task. Okay. Then what we're going to do
is say set title. And this is going to
be task.title.
We're going to say set description. And
this is going to be task.escription.
Okay. Or and then this is an empty
string. Then we're going to say set
status. And this is going to be task
like oops. Let's go fix this. task
status like so. Okay, we're then going
to have an else. In the else, we're
going to say set title to an empty
string. So, this is if we're not
editing, then we just want to make sure
that it's empty. We're going to say set
description to an empty string. And
we're going to say set status equal to
pending. Okay, so this is the beginning
of our form. again just handling if
we're editing or not because we could be
passed some data in this task uh
variable here that is what we want to
populate the form with to start. Then
we're going to have a function handle
submit on handle submit we're going to
have E. What we're going to do is say
E.prevent
default so we don't refresh the page.
We're going to say if not title trim
then return. We need to have a title to
be able to create a task. And we're
going to say on submit, which is the
function that's passed here, and we're
going to pass to this the data. So we're
going to say title is title.trim.
We're going to say description is
description. So let's go here. Is
description.trim
or null. And then we're going to pass
the status. Okay. So that's our
onsubmit. Now we need to render the
actual form. So we're going to say
return div. For the first div, this is
going to be a modal. So what I'm going
to do is say class name is equal to
modal dash overlay. Okay, let's spell
that correctly. We're going to have on
click is equal to on cancel. So if you
click outside of the modal, that's what
this is going to be. Then it will close
it. We're then going to have a div.
We're going to have the class name for
this div to be the actual modal itself.
So essentially we have like the modal
background and then the modal. If you
click outside of the modal which is this
then we'll close the modal. Now we're
going to have an on click in the modal.
So we're going to say on click is equal
to and this is going to be sorry e and
then this is going to be e.stop
propagation.
Okay. Now we're going to go inside of
this div. We're going to have another
div. We're going to have class name is
equal to and then this is going to be
the modal header. Then we're going to
have the H2. We're going to have class
name is equal to and this is going to be
the modal title. And what we're going to
do is say okay well if we are editing.
So if is editing then we're going to put
edit task. Otherwise we're going to put
new task as the title for this modal.
Now beneath that we're going to have a
button.
This button is going to have a class
name which is equal to the modal close
to close the modal. We're going to have
an on click which is going to be equal
to on cancel. And then we're going to
have an X. Okay, so that's the X button
in the header. Now beneath that we're
going to have a form. The form is going
to have an onsubmit. The odds submit is
going to be the handle submit function
that we already wrote. Inside of the
form, we're going to have some form
groups. So, we're going to have a first
one. So, we're going to have div class
name is equal to form-group.
Then, for the first form group, we are
going to put the title. Okay. So, let's
put that here. We're going to say label
and this is going to be class name is
equal to form- label. We're going to say
HTML 4. So, HTML 4 is equal to label or
is equal to title. Sorry. The label is
going to say title. And then beneath
that, we're going to have an input box.
So, we're going to say input. And for
the input, we're going to say ID is
equal to title. We're going to say type
is equal to text. We're going to say
class name is equal to the form dash
input. We're going to say the value
is equal to the title. So let's do that
there. We're going to say on change is
equal to and this is going to be e and
then this is set title e.target
dot value. Okay. Then we're going to
have the placeholder which is equal to
enter task
title. And then we're gonna have
autofocus
true. Okay, so this is the first input
that we need. Now we're going to copy
this entire one and we're going to go to
the second input which is the
description. So same thing, form group
form label. This time we're going to
write
description.
Then we're going to put description
here. So description
and just spell description
correctly. Okay. Okay. Now rather than
the ID being title, this is going to be
description. Now this time rather than
input is going to be a text area. The ID
is description. We can remove the type.
The class name is going to be form dash
text area. The value is going to be the
description. Again, I keep spelling
description incorrectly. Rather than
enter the task title, we're going to say
enter
description.
Okay. Okay. And then this is going to be
optional. Let's spell description
correctly. And rather than set title,
this is going to be set description.
Okay. So that's the description. And
then lastly, we need to handle the
status. So same thing, let's copy this
just to give us a head start. Let's
paste it. We'll have the label again.
And this time we just change it to say
status.
So status.
And here this will say
status. Now, rather than a text area,
I'm actually just going to delete all of
this because we're going to use a select
box. So, we're going to say select and
then we're going to say inside of the
select here, the ID is equal to status.
We're going to say the class name is
equal to a form dash
select. We're then going to say the
value is equal to the status. And we're
going to say onchange is equal to same
as before e. And then we're going to say
set status e.target.
Okay, target dot value. And then inside
of the select, we're going to put the
select options. So we're going to say
option value is equal to pending
as the first value. And then for the
text, we'll just put to-do. We can copy
this two times and then put the other
options. So rather than just pending,
we're going to have started and we're
going to have completed. And then for
this, we'll have in progress and we'll
have done. And then lastly, we just need
one more div here to actually um what do
you call it? Complete the action. So
we're going to say div class name is
equal to form actions because this is
where we're going to put the submit
button. We're then going to put a
button. For the button, we're going to
say type is equal to button. We're then
going to say class name is equal to btn
btn dash outline. We're going to say on
click is equal to and then this is going
to be on cancel. This button is going to
say cancel. And then we're going to have
one more button. Let's copy this one
here. This one is going to say the
following. So if we're editing so we're
going to say is editing question mark
then we're going to say save changes
otherwise we're going to say create task
and then rather than the outline this is
going to be btn btn primary and we don't
need an on click because this will be
handled in the form submission because
we're going to change the type to say
submit and that should complete this
form. All right so now that the task
form is created what we're going to do
is just export this. So export default
task form and we're going to bring it in
to our I think it's the canban page
where we want to display it. Yes. So
we're going to first import it from the
cananban page. So let's go import task
form from task form and we're going to
go down here where we say show form and
we're going to show the task form and
pass the props that we need. So we're
going to say task is equal to and this
is going to be editing task. Then we're
going to have the onsubmit.
So onsubmit is equal to handle sububmit.
And then on cancel is going to be equal
to handle cancel. And let's fix the
formatting a little bit so that we can
actually read this. We're not going to
call these functions. We're just going
to pass the function names. And there we
go. We now have the form. So let's test
this out and see if the form works.
Okay. It looks a little bit messed up.
So I think I probably messed up some of
the CSS. Uh, let me see what I did wrong
there and I'll be right back. Okay, so
it looks like I have this whole form not
actually inside the modal. So I need to
essentially copy this whole form and
we're just going to delete it from there
and place it inside of the modal div so
it gets moved inside there. Okay, so
that's good. Now if we go back and we go
add task, you can see that it shows up
as a proper modal. Okay, so let's try to
add a task. Let's go hello world, new
task. and create it. And we can see that
nothing is happening. Okay. So, let's
check our console and see if we're
getting any errors here. And it says
failed to fetch. Um, you know, there's a
corores error that's been blocked. Okay.
Let me have a look at this and I'll be
right back. Okay. So, I just found the
error here. Essentially in our backend
in our task schema, we have an ID which
is an int which actually needs to be a
string. So, if we change this to a
string, it should fix it. We were
getting an internal server error that
was saying unable to parse int as
string. So we just need to fix that
which I just did again. Go to back end
go to app schemas task and then simply
switch the ID in the task response from
an int to a string. Now if we go back
here let's just refresh and try it
again. And you can see these tasks get
created and actually were created. They
simply uh were not being shown on the
screen because we were getting an error.
Now, we also have an error with this X
button that I want to fix. So, I'm going
to look at the styling for that. Let's
try to delete it. Looks like it deletes
successfully. Let's try to edit it.
Looks like we can edit it as well.
Perfect. So, it's working. And let's
just try to add another task. So, let's
go test. Okay. Hello. Create uh this
task. And we have hello. Um, okay. Let's
just refresh here. And yeah, it looks
like we are good. Yes. Test. Hello. Like
that. Perfect. Okay. So, let's now fix
the styling because this is a little bit
messed up on the card with the X button
and the description kind of showing here
and then we'll go from there. Okay, so
the issue is just that we have the
description inside of the wrong div in
our task card. So, we're just going to
move it out here like that. Uh, now in
order to fix this, just go to the task
card, scroll down to where you see the
description, and just move it out one
div. So, we had it inside of this div,
the header. We don't want it in the
header, we just want it outside of that.
And then we should be good to go. And if
we come back here, you can see now the
description is below and the X button is
in the top right, which is exactly what
we're looking for. So at this point, the
tasks are working. Now this member count
doesn't seem to be working, which we can
have a look at. But the next thing we
need to do is have a look at actually
increasing the organization member
limits and the pricing. So we can have
subscriptions and billings, etc. So
let's change over to this org. And I
just want to show you that if I go into
an organization here and I go to manage
for example and members, I can invite
members. So let me invite some more
members and show you what happens when
we try to invite more than two. Okay, so
I just invited Tim at dev launch.us, one
of my other emails. And when I went to
this email, you can see this is the
email I received, right, where it says,
"Hey, development invitation to join
test." I'm going to accept that
invitation. When I accept the
invitation, it should actually redirect
me back to my front end. And you can see
that it does. And I am. Let's have a
look at it here. Signed in with the
other account. So, let me just sign out
and sign in with this new account that I
accepted the invite from. Okay, so I
actually just accepted the invite again
because since I was already signed in,
it gave me an error. But when I accepted
the invite, when I wasn't signed in cuz
I just signed out. You can see it just
asked me to fill in a password. So,
let's just use that password. That's
fine. Press continue. And now you can
see that I'm signed in as Tim at
devaunch us. And the only organization
I'm in is test in which I am a member.
So, let me now sign out of this account.
Actually, let's go to the dashboard. So,
we can see the same taskboard as we saw
before. But notice that I can't do
anything. I can't edit or delete or add
a task because I'm just a member. I'm
not an editor. So, let me sign out of
this. Let me sign in with my other
account. Now, you'll see that it's Tim
at techwithim.net. If I go to the
dashboard now, I can actually change
stuff because I am an editor or in this
case an admin. And what I'm going to do
is try to invite another member. As you
can see, Tim at devaunch is invited. And
when I press invite and I go, for
example, you know, canydevaunch
us and I want to send that invitation,
it says I cannot because I reached a
limit of two organization memberships.
So that's exactly what we want. But what
we want now is that we allow the user to
actually create a subscription where
they buy our pro tier, which then allows
them to invite more members. So let's
start setting that up inside of Clerk
and then we'll fix this member count
issue as well. Okay. So, we're going to
go back to clerk. We're going to go to
configure and we're going to go to the
billing. Now, from the billing, we have
the subscription plans, right? So, we
created the pro tier. Just make sure you
have that. Now, all we need to do is
actually use this pricing table
component directly inside of uh our
website to be able to display the
different tiers that we have here and
then a user will be able to purchase it.
So what I can do is I can go to pages,
go to my pricing page, and I can write a
really simple component that just
displays the different pricing options.
So in order to do that, I'm going to say
import, and then I'm going to say use
organization from clerk/clerreact.
I'm also going to import the pricing
table as well as the create organization
view from clerk clerk react. Okay. Okay.
And actually all of this can just be
together, but I think we'll just leave
it in two because it's a little bit
easier to read. We now have the pricing
page. From the pricing page, I'm going
to say const and this is going to be
organization
and then membership like this is equal
to use organization.
Okay. And what we're going to do is
we're going to make sure that this
member is an admin before we allow them
to view this page because only an admin
should be able to manage the
subscription and billing of the
organization. So we're going to say
const is admin is equal to membership
question mark ro is equal to or colon
admin. Okay. Now we're going to say if
there is no organization because it's
possible the user is not a part of any
then what we're going to do is we're
going to say return div we're going to
say class name is equal to pricing dash
container we're then going to say div
class name is equal to no-org
container we're going to have an h1 it's
going to say view pricing
the class name is going to be equal to
no or d-title.
Underneath the H1, we're going to have a
P and we're going to say class name is
equal to no-org
text. And the text here is going to say
create or join an organization.
Okay. To view pricing plants.
Cool. And let's spell join correctly.
Then underneath this we're going to put
the create organization modal and we're
going to say after create organization
URL is equal to slashpricing.
Cool. So we have that now. So if there's
no organization it will show them this.
Otherwise we need to show them the
pricing table. So we're going to go here
and we're going to say div. We're going
to say class name is equal to the
pricing dash container.
Then we're going to do a div. We're
going to say class name is equal to the
pricing dash header. Then we're going to
have an h1. We're going to say class
name is equal to the pricing title. Then
we're going to say simple
transparent
pricing and we'll remove this comma
because that doesn't make sense.
Underneath the H1 we'll put a paragraph
tag and we'll say start free with up to
two members. Upgrade to pro for
unlimited
members. Okay. Then we're going to go
beneath this div and we're going to
check if they are an admin. So, we're
going to say is admin question mark. If
they are an admin, we're going to put a
paragraph tag and we're going to say
sorry if they're not an admin because we
have the exclamation point. So, if
they're not admin, we're going to have
the class name equal to and this is
going to be text-muted
and then pricing-minote.
And this is going to say contact your
organization's
admin to manage the subscription. And
then otherwise,
okay, so let's go here. Otherwise, what
we're going to do is we're going to
display the pricing table. And it's
important that we put for organization
because sometimes you can have
individual uh pricing as well as
organization pricing. So in our case, we
just go organization. And then we spell
subscription correctly. And now if we go
to the pricing page, we should see the
pricing table. So let's go here,
refresh. Let's go pricing. Uh, and you
can see because we are the admin of the
organization, it shows us the free tier
as well as the pro tier. And what we can
do is we can subscribe to the pro tier.
So, let's do that. If we subscribe to
the protier, we can just pay with the
test card. So, let's do that. And when
we pay with the test card, we'll just go
continue. It will make the payment. And
now, if we go back to pricing, you can
see that this pricing is active and we
are pro. So if we go back to dashboard,
uh, okay, it's giving us an error saying
view permission required. Let's see why
we're getting that. Okay, so I just had
a look at this and the reason why we're
getting that error is because if we have
a look in the plans here in our pro
tier, we needed to add this tasks as a
feature to the organization in order for
any of the other permissions that we
apply per the user roles to actually
work. So effectively what we need to do
is we just have to go here to add
feature and then just check on tasks and
when we do that now all of this is good
and this feature will be available to
people that are in the pro tier. Now by
default it is available to the free
tier. So if you have a look here you can
see it's already in there. If we didn't
want users to be able to create tasks in
the free tier we could just remove that
feature but I need to add it to the pro
tier so it's available there as well.
That's why we're getting that issue
saying hey you don't have permission to
view this. But now it's working because
I readded that perm. Okay. So now the
pricing is working. If we go to the
organization and we manage it for
example, we can actually view the
billing right now and we could manage
it. We can cancel the subscription. We
can change the plans. We can view the
billing history, the statements, the
payments, the payment method. All of
that kind of stuff is handled directly
by clerk for us. Cool. So, let's quickly
fix this members count and then let's
move on to the next feature which is
actually allowing the organization to
invite more members because right now if
I go here and I try to invite someone
else you'll see Kenny at devalanche us.
It's not going to allow me to do that
because I haven't yet updated the
organization membership limits. Okay, so
the issue is pretty straightforward but
effectively I forgot to write
memberships instead of membership. So I
just need to change to say memberships
and this to say memberships. And now if
we go back here and we have a look, you
can see it shows to members and the
count is now updated. Okay. So next,
like I said, what we're going to do is
make it so that we can actually update
the subscription account or update the
number of members, sorry, for a
particular organization when it upgrades
to pro. So if you go to settings for
example inside of organizations right
you'll see that it says limited
membership but it shows us that we can
actually update the membership in the
dashboard or the number of members or
via clerk's backend API. So if we click
into this you'll see clerk has all kinds
of different APIs that you can use. One
of which allows you to actually change
the max allowed memberships per an
organization. So what we're going to do
is we're going to create a web hook
where when someone purchases the pro
subscription and it's verified by clerk,
we send a request to clerk telling it to
update this organization so that it can
have more members. Now the way the web
hook works is that we're going to set an
endpoint on our server that clerk will
send a request to to tell us, hey, this
user just purchased Pro. when they
purchase Pro for an organization, we're
then going to tell Clerk, "Hey, go ahead
and update the membership count so they
can have unlimited members." So, in
order to do that, we're going to go into
Clerk. We're going to go to developers
and then web hooks. Now, when we go
here, what we're going to do is create a
new web hook. So, we're going to go add
endpoint and we're going to scroll down
and we're going to find, let's have a
look at this here, subscription. And
we're just going to check check the box
right here for subscription. When we do
that, anytime anything changes with a
subscription, clerk will send a request
to the URL that we're going to put right
here. Now, in order for the web hook to
work in development, we're going to use
something called Enrock. Enro is free
and it works as a proxy that allows you
to take a public IP address and
associate that with something running on
local host or your own computer. So,
what you're going to need to do is
download Enro. I will leave a link to it
in the description. You also can just
search for Enro. Once you download it,
you're going to need to sign into an
account. So, make a new account on Enro
and then sign into it in your terminal.
The way that you're going to do that is
you're simply going to go in your
terminal. Once Enro is installed, you're
simply going to type Enro. When you do
that, it's going to tell you to sign
into Enro. In my case, I'm already
signed in, so I don't need to do
anything. And when you try to sign in,
it's going to prompt you to sign in with
the browser. You can sign in. It will
connect your account. and then you are
good to go. So download Enro. Make sure
you create an account on the website.
Sign into that account from your
terminal by either just typing the
command I'm about to type or typing
enrock. It should prompt you to sign in.
And then type the command enro http8000
where 8000 matches the port that your
backend server is running on. So port
8000. Okay. When you do that, it's going
to create a forwarding URL. So this one
right here is what we want to look at.
And now any requests sent to this URL
will be forwarded to your backend API.
So localhost port 8000. This allows us
to test in development mode the web hook
which you're going to see in one second.
Okay. So what I'm going to do now is I'm
going to go to my clerk here and I'm
going to paste this URL. Make sure you
remove all of the spaces and I'm going
to put slash API slash web hooks like
that. I'm then going to put one more
slash and I'm going to put clerk. So now
what will happen is anytime a
subscription changes in my clerk
project, it's going to send a request to
this endpoint, which is one that we're
going to write in 1 second in fast API.
So we're going to go ahead and press on
create. And then from here, we're going
to grab the web hook signing secret. So
we're going to reveal that and copy it.
We're now going to go back into our
code. We're going to go into our back
end now. So no longer our front end.
We're going to go to our env file. We're
going to paste the clerk web hook web
hook, sorry, secret. Now, this secret is
going to allow us to actually verify
that the request that was sent came from
clerk because anybody can hit this web
hook that we're creating. So, we have
this special key that clerk is going to
send along with the request. We're going
to look at it. We're going to go, okay,
if you're actually clerk, then you would
have sent this key. If it sends the key,
we know it's clerk. It's good. we could
actually verify that web hook request.
If they didn't send the key or the key
is wrong, then it means someone is
trying to fake being clerk and kind of
get like a free pro account, which we're
of course not going to allow them to do.
So that's why you need this signing
secret to verify the web hook. Okay. So
now what we're going to do is we're
going to go into app API web hooks.py
and we're going to start writing this
file. So we're going to say import
json. We're going to say from fast API
import the API router
request http exception
let's spell that correctly and status.
We're then going to say from sphix svix
web hooks import and we're going to
import web hook and web hook
verification error. We're then going to
say from app.core.config
config import settings so we can get the
web hook secret and we're going to say
from app.core.clerk
import clerk.
Okay. Now what we're going to do here is
we're going to create a router because
this is going to be an API endpoint. So
we're going to say API router and this
is going to say prefix
is equal to slappi/web
hooks. Let's spell web hooks correctly.
Then we're going to say tags is equal to
web hooks.
Then we're going to say procore tier
slug is equal to procore tier which is
what we're going to look for from the
web hook data that is sent to us. We're
going to say the free tier limit is
equal to the settings.free tier limit.
And we're going to say the unlimited
limit is equal to and we're just going
to put a really large number because
when we set unlimited number unlimited
uh sorry seats it's not truly unlimited.
We're just going to set a really really
large value so you can have as many
members as you want. We're then going to
make a function. So we're going to say
define set_org
member_limit.
We're going to say org id string and
then limit int. And then what we're
going to do is say
clerk.organizations.update
directly from the clerk SDK. And we're
going to say the organization ID. Okay,
so organization ID is equal to the org
ID and the max allowed
memberships is equal to whatever limit
is passed to this function. And that's
as easy as it is using the clerk backend
SDK to just update an organization's
membership limit. Now, we're also going
to have a function that says has active
pro plan and we're going to say items
list and then what we're going to do is
return a boolean.
Now, from here, we're going to say
return
any and we're going to say item.get
plan
And then this is going to be an empty
dictionary in case plan doesn't exist.
Get slug
is equal to the pro tier slug and
item.get
status
is equal to active for item in items.
Now the reason for this is what's going
to happen is whenever the web hook is
sent, it's going to give us a bunch of
data. In that data, there's going to be
a list of items. We're going to look
through those items to see if any of the
items refer to the plan, right? So,
we're looking for plan. And if it does
refer to a plan, we're going to check
the name of the plan, which is a slug,
to see if it's the pro plan, and we're
going to see if it's active. So, if we
found a pro plan that's active, then
that means we need to update that
organization's membership limit, which
is what we're going to do. So, we're
going to have an at@ routouter.poste
event here. We're just going to post
this to /clerk
and we're going to say async define and
this is going to be the clerk web hook.
This is where we're going to actually
handle the request coming from clerk.
We're then going to say inside of here
the payload
is equal to await and this is going to
be the request.body.
This is the data that clerk is sending
us. And we're going to say the headers
is equal to the dictionary of request do
headers. Then we're going to attempt to
verify the web hook. So we're going to
say if settings.clerk
webhook
secrets.
Then what we're going to do is say try
and we're going to say wh is equal to
web hook and we're going to say payload
and then headers and we're going to say
event is equal to whverify
and we're going to verify with the
payload and headers. And sorry, the web
hook, I just wrote this in the wrong
way. It needs to be settings.clerk web
hook web hook secret, sorry. Okay, then
we're going to say accept. And we're
going to accept a web hook verification
error. And we're going to raise an HTTP
exception.
We're going to say status.http.
And then this is going to be 400 bad
request. We're going to say invalid
signature.
Okay. So what we're doing right now is
we're essentially just verifying to see
okay is the data that was sent to this
web hook actually valid. So we say do we
have a web hook secret? If we do we're
going to create a web hook object and
we're going to verify that the data that
was just sent to us is valid and
contains that signature. Now otherwise
we're just going to say event is equal
to JSON.loads
and then payload. So if we didn't define
a secret then we'll just allow anything
to hit this endpoint. Okay. Then we're
going to say the event type is equal to
event.get and we're going to get the
type because the web hook is going to
respond to different events related to
the subscription. So like created,
cancelled, passed to etc. Right? It's
going to send all those different types
of events. So we need to look at those
events and then handle the correct ones.
We're then going to say data is equal to
event.get
data and then an empty dictionary in
case data doesn't exist. and we're going
to check the different events that could
occur in this web hook. Specifically, if
a subscription was created or was
updated or if a subscription was deleted
or cancelled. So, we're going to say if
event
type is in sorry and this is going to be
a list. We're going to say subscription
docreated or subscription dot and this
is going to be updated. So these are the
ones where we're essentially going to
allow the user more limits or more
seats. We're going to say org ID is
equal to data.get
and then payer. This is the person who
paid. Okay. Get the organization ID. So
we're looking for the ID of the
organization of the person who paid.
Then we're going to say if org ID what
we're going to do is say limit is equal
to and then this is going to be
unlimited limit if the has active pro
plan data.get
and then here items otherwise an empty
array
and sorry that needs to be inside of
here. Okay. Otherwise, we're going to
say else free tier limit. All right. So,
we're going to make the limit unlimited
if they have an active pro plan. So,
we're going to check the plan to make
sure that it is actually active. If it
is active, then we'll give them the
unlimited limit. Otherwise, we're going
to set their limit to the free limit.
Okay. Then underneath this if so in the
same block, we're going to say set_org
member limit. And then we're just going
to pass the org ID.
So or id and this new updated limit.
Okay. Now l if the event type is in and
now this is going to be the
subscription.deed
or the subscription.
Then what we're going to do is say the
org ID is equal to data.get. And same
thing as before we're going to get the
payer. Okay. And then we're going to get
the organization
ID. Then we're going to say if there is
some org ID, we're just going to set the
org member limit of that org ID to be
the free tier limit because they canled
their subscription. Then we're going to
return
received
is true. Okay, we just got to spell
received correctly. So that's all we
need for the web hook. Now clerk can
send a request to this. We can handle
that request and we can update the limit
for a particular organization. So if we
go now we can just refresh the web hook.
Okay. Now from here we can go to testing
and we can test this with a particular
event if we want and we can see if that
works. However, we'll just test it with
a new organization. So we're going to go
here. I'm just going to refresh. What
I'll do is just swap over to my test 123
organization. Now, I want to verify with
this organization that we cannot invite
more members. So, let's try to invite a
few. Let's go. Timwithtim.net
or timdevaunch
us.
Okay, let's send the invitation. Let's
try to send another one. Let's go kenny
at
devaunch
us and send that. And it says we've
reached a limit of two organization
members. Now, what I'll do is I will
upgrade to that pro plan. So, I'm going
to go pricing and I'm going to go
subscribe.
Okay. From here, I'm just going to pay
with the test card. And when I pay with
this now, let's go continue. And now,
I'm going to go to my dashboard. I'm
going to go here, manage members, and
I'm going to try to invite Kenny. So,
let's go Kenny at devaunch. us. And we
got an error. So, let me check my logs.
And it looks like the web hook is saying
it was not found. So API web hooks
clerk. Aha. So the reason why is we did
not actually connect the web hook to our
main app which I need to do right here.
So let's connect the web hook. The way
that we can do that is we can just go
here. We could say from actually web
hooks. We can just import it like that.
And then we can simply say at
app.include include
routouter and then web hooks.outer.
Okay, so now that we do that, the web
hook should work. However, it's giving
us an issue saying there's no free tier
limit in our settings. So, let's quickly
go check our settings and see if that's
the case. Config. And we do have a free
tier free tier membership limit. Okay,
so let's just change this to just say
limit and then run this. And hopefully
now it should work. Okay. And now let's
test the web hook again. So what we can
do is we can go to for example billing.
We can go manage and we can cancel this.
And then let's just do it again. So now
go manage and okay let's go resubscribe
and subscribe. Continue. And now if I go
look in my logs, you can see that it
posted to the web hook. And now if I go
to my organization and I try to add a
new member. Let's try it. Okay, Kenny
ate devaunch US.
Let's see. And you see that the
invitation goes through because it
successfully updated our libby. Now, if
we were to cancel, then it would again
not allow us to add more members. You
get the idea. Okay, so that is pretty
cool. And honestly, with that said,
that's going to wrap up everything that
I wanted to show you in this video. We
handled pricing, we handled permissions,
we handled different member roles, we
handled billing, we handled
organization, we handled signing in,
signing out, web hooks, front end,
backend. A lot of things went into this
project. And all of the code for this
project will be available from the link
in the description in case you missed
anything or you want to copy anything
directly. Overall, the major thing here
is that using Clerk and some of the
features that I showed you and take in
there's a lot more that you can use, you
can build a full B2B SAS that allows you
to collect money and handle all of the
complex organization roles and
permissions without having to write all
of the code manually. So, if you guys
enjoyed the video, make sure leave a
like, subscribe to the channel, I will
see you in the next one.
Full transcript without timestamps
In this video, I'll give you a full tutorial on how to build a B-2B SAS application that includes organizations, multiple team members, billing, subscriptions, permissions, roles, and everything you would need to create a SAS app. We're going to be doing this using Python, specifically with fast API for the back end, and then with React and JavaScript for the front end. We're also going to be using Clerk for handling all of the complex billing and organization related features as well as the authentication like signing in, signing out, etc. This will be a long project with a lot of coding. So, for that reason, I've included all of the code that's written in this video linked in the description. You can find a GitHub repository in case you need to copy anything or you prefer to follow along that way. Also worth noting that this video is not designed for beginners. While I will explain to you everything that I'm doing and the reason for the decisions that I have, I'm not going to be going over the fundamentals of the frameworks or the language. So, I won't be teaching you fast API or teaching you React. This is more about how you assemble all of the things, you know, into a large complex project that will act as a really solid base if you wanted to build something like a B2B SAS. Anyways, with that in mind, that's all I had to go through in the intro. What I'm going to do now is give you a quick demo of the project and then we'll get into coding it. So let's get started. All right. So let's get started here with a quick demo of the finished application. Now we're going to be building a teambased taskboard. So think of it something like notion or a sauna obviously with some simplified features. So you can see I have a simple kind of landing page here and I have the ability to view the pricing which requires me to sign in or to sign in or sign up. So what I'll do now is I'll sign in. You'll notice that what we're using to sign into this is Clerk. Now, Clerk has kindly sponsored this video, but they are completely free. You do not need to pay to use them. And they are the easiest way to set up authentication as well as things like organization, billing, all of that stuff that you're going to see in this video, which is precisely why I partnered with them and why we're going to use them. So, you can see it gives me a nice email address field here. Let me sign in and then I'll be right back and show you what the app looks like. Okay, so I was able to sign in here and you'll notice right away that the first thing I see is the current organization that I'm inside of. So I have this new org test. I also have this hello world organization and I have the ability to create another new organization by simply pressing this button right here. Now if I go to my dashboard, you'll notice it's going to start loading my different tasks. Right now we don't have any. Shows me we have two members in this organization. If I want to make a new task, I can go like test, you know, this or something, put it in the to-do category, and you can see that it's here. And then if I want to change its category, I can simply just swap it. And you see that it moves right over. Now, the interesting thing is that if I change over to my Hello World organization, you'll notice that I now see some different tasks popping up in this board because the tasks that I have are defined per organization. Now, what I can also do is click on the pricing. You'll see that we have some pricing tiers here. So, we have a free tier and then we have a pro tier. And the way that I've set this up is that if you want to have more than two members in your organization, you can use the pro tier, which I just put out $1 per month, but you could set this to any price that you want. And if you have less than that, so two or less members, then you can use the free tier. Now, the way that you manage the members is you go to manage with inside of your organization. You go to members, and you can see the various members that appear here, and you can set the roles for those members. So, for example, you can make them an editor, a member, an admin. I'll talk about all of that in this video. But you can see that this really is kind of like a B2B SAS setup where you have billing, you have members, you have organizations, you have subscriptions, right? $1 per month. We have kind of data that is shared between different teams. We have different roles for members. That's what I'm trying to show you in this video. With that said, let's hop over to the code editor, start writing some code, and building this project. So I'm inside my code editor here and what I've done is I've just opened a new folder called B2B SAS on my desktop. So open any folder in any code editor that you want and you'll notice that for this video I'm going to be using PyCharm. Now like I said you can use whatever you like but typically I recommend PyCharm for large Pythonbased applications. In this case a lot of the work is going to be in fast API. PyCharm is specifically designed for working with frameworks like that. Gives us really good typins as well as recommendations. Has a lot of great features. So, I would recommend using it. Now, if you do want to use PyCharm and you want to access their Pro subscription, try it for free and see if you like it, you can do that from the link in the description. I do actually have a long-term partnership with them. So, again, if you click that link below, you'll be able to test it out and use it completely for free and see if you like it. Anyways, with that said, let's get into the setup here. What I'm going to start doing is setting up two folders. One for my backend and one for my front end. So, I'm going to open up my terminal here. I'm going to go into my B2B SAS application and I'm just going to make one folder here. So let's go new folder. Let's simply call that backend. Then let's make another folder. Actually, we'll do that just from the command line. That will be our front end. So let's create our front end. In order to do that, you're going to need NodeJS installed on your computer. So make sure you have that installed because we're going to be using React. And we're going to type npm create vit at latest like that. And then we're just going to simply put front it. Now when we do that, it should create a React application for us if we select the correct framework. So I'm going to select React here. I'm just going to use JavaScript. I'm not going to use TypeScript for this particular project, but you could if you want to. I'm going to go no for roll down V. And I'm going to say install with mpm and start now. Yes. And it's going to start installing and creating this front-end folder for me. So this is the setup for the front end. Then we're going to set up the back end. We're actually going to write the entire backend first. We're going to understand the architecture of our application and then we're going to start building the front end, the UI and kind of connecting all of the pieces together. Okay, so you can see our front end is running. If I click on it, you know, this is kind of the default dummy front end that you get when you create the React application. I'm just going to shut this down by hitting C. I'm going to CD into my backend directory and I'm going to start setting up the code that I need here. So for this project, I'm going to use UV. So I'm going to type UV init and then dot to create a new UV project inside of this backend directory. You can see when I do that it creates five files here. We can delete this main file because we don't need this one for right now. Now if you're unfamiliar with UV, I'll leave a video on screen that explains how it works, but essentially it's a better version of pip. You can install it and then you can just use the UV command like I am here. All right. So for our particular backend project here, we're going to need a few different Python backend frameworks, right? Or Python modules. So, what we're going to do is type uv add and we're going to add the fast API module because of course we're using fast API for our backend API. We're going to install uicorn. This is the web server that will run our backend API. We're going to install SQL Alchemy. This is what's going to be used for connecting to the database. Then we're going to use Python.env. This is for loading environment variable kind of configurations. Then we're going to use pi JWT. This is for verifying JWT tokens. We're going to bring in the Clerk backend API. This is the Python package for Clerk that allows us to use Clerk on the backend for handling all of our authentication. We'll talk more about that later. And we're going to bring in SVIX. This is what we're going to use to actually validate a web hook that we're going to get from Clerk later on, but for now, let's install all of those. Okay. So, you're going to see that that then creates the virtual environment for us, installs everything. and we get this VNV folder and now we're good to go and start setting up our backend. So what I'm going to do to begin so going to make a new file and I'm going to call this env. This is where we're going to put some environment variables that we need for the project. Now for the env file I'm just going to put in the variables and then we'll grab the values that we need later. So first things first we're going to type clerk secret_key. We're then going to type clerk_publishable_key. Then we're going to type clerk under undersc sorry jwks URL. Then we're going to have the database URL which we can actually fill in right now. And for the database we're going to use a local SQL light database, but you could use anything that you want. So, I'm going to type SQLite like that and then colon three forward slashes dot slash and then taskboard. DB, which is going to create a database called taskboard for us where we store all of the information. We then are going to have the frontend URL and we're going to make this equal to http/lohost and then port 5173 which is where our react application is going to run. And we're going to have the clerk_web hook secret. And we're actually going to put this up top because that is one of the clerk values. So we might as well just keep them all together. Okay. So we're going to look at all these values later on. But like I mentioned, for all of the authentication, all of the login, all of the organization, billing, subscriptions, we're going to use a free framework or a free tool, I guess, called clerk. Okay, so that's why I'm putting in the variables here. We're going to create that clerk. We're going to create that clerk account in 1 minute after I start stubbing the API and then you'll see why we're using this and why we need this these particular values. Sorry. Okay. So for our API, what I want to start by doing is just creating the different directories and files that we're going to need so that we can start to kind of understand the architecture and how things are going to be set up. Then after that, we'll start actually writing the code and going into the individual files. So for now, inside of our backend folder, we're going to make a new file and we're going to call this start. py. This is going to be the entry point for our application, the file that we run to effectively run the app. We're then going to make a folder here. So, new directory called app. And this is where all of the code for our application is going to live. Now, inside of app, we're going to make a few new folders. So, we're going to have one folder, and this is going to be called API. This is for all of the API routes. We're then going to have another folder. This is going to be called core for the core functionality essentially. Another new directory. This is going to be called models for our database models and then another directory and this is going to be schemas. Now the schemas are going to be used to essentially validate data. Then inside of the app directory we're going to make a new file. This file is going to be called main.py. Okay. And then we'll just go ahead and press cancel there. So what we have now is app. We have four folders. API core models schema. We have our main.py. And now what we're going to do is start writing the different files that are going to go inside of these folders. Now I'm not going to write all of the code, but we're just going to write the file names so that at least we know what we're going to have and how the app is kind of going to be structured. So from API, we're going to make a new Python file. And this is going to be tasks. py for handling all of the API routes related to our tasks. We're then going to make another new file and this one is going to be called web hooks. py. Later we'll discuss what a web hook is, but essentially this is going to be for all of the endpoints to receive data from clerk. So when some event happens like we create a new organization or we subscribe to a particular billing plan, we can get that information and handle it inside of our app. We're then going to have core. So inside of core, we're going to make a few new files. So here we're going to have a file called o. py for handling authentication. We're going to have another new file. This is going to be called clerk. py. Okay, this going to be a lot of files. Just bear with me and then we'll start actually writing them out. We're going to have another one called config. py for all of the settings for our application and we're going to have another one called database.py for you guessed it handling the database. Now we're going to go inside of models for our database models. These are going to be pretty easy. We're just going to have one called task. py and then we'll write the model directly inside of there. And then for our schema, same thing. We're going to make a new file and this is going to be called task. py. Okay. So, quickly pause the video, have a look at all of the files that we've created. Make sure that your app looks the same. And this is just going to make your life easier. Sorry, as we continue that all of the files are already created. Okay, so now that all of those files are created, we're going to start grabbing some of the credentials that we need to store inside of this environment variable file. Okay, so we're going to go to our browser and I'm going to quickly explain to you why we're using Clerk and how to create an account here. So, like I said, Clerk allows you to essentially manage all of the users, authentication, organizations, billing, subscription, etc. for your application. So, it has pre-built components like the ones you saw right here for things like signup, signin, user button, user profile, all of the ones you actually already saw in the app that I demoed to you. Things like switching the organization, you know, creating the organization, looking at a profile of the organization. So, it just makes our life as a developer significantly easier. And again, the best part is this is free and it's actually very widely used. You've probably seen these UIs in a lot of applications and large SAS. Okay, so in order to use Clerk, what we need to do is just create a free account here. I'll leave a link in the description where you can make that account. Once you do that, simply go to your dashboard and we're going to create a new Clerk project. So if you just go into your workspace, you go here and you just go create application, it will allow you to give the application a name. So, in this case, I'm just going to call this, you know, B2B task manager or something. Or let's just go like SAS task manager maybe. Okay. And you'll notice that you can enable or disable a ton of different sign-in methods. So, I'm just going to leave email for now, but you could enable Google Signin, Facebook signin, you could enable, you know, all of these signins at once, right? And this is the benefit of using Clerk is that if you ever want to change the authentication methods, you just directly do it from this nice UI. You don't have to do a ton of setup. It's very easy to do it. So even like you can sign in with notion. Okay. So we're going to go with just email for now. We're going to press on create application. This is going to make a new clerk app for us. Now there's going to be a lot of instructions here that explain to you how to add this to your front end. We will do that later when we start setting up the front end. But for now, what we're going to do is go to this configure button and start grabbing some of the keys that we need for our environment variable file. Now, you'll also notice that there's a ton of settings here that you can mess with and play with. For now, we'll just leave it as it is. Okay. So, we're going to go down here to where it says API keys from the settings, and we're going to grab a few of the keys that are here. So, first one is the publishable key, otherwise known as the public key. We're just going to copy that, and we're going to put that into our environment variable file where it says publishable key. So, let's paste that. The next one is the secret key. So, I'm just going to copy that. And same thing, I'm going to paste that into the clerk secret key variable. We then need the JWKS URL. We're going to find that from the right hand side here where it says JWKS URL. Same thing. We're going to copy that and just paste that right there. And then lastly, we have the clerk web hook secret. We're not going to have that right now. So, we'll just put an equal sign and we'll fill that value in later when we get to the web hook. Okay. So, now we have the values that we need in our environment variable file. Again, we'll go back to clerk later on, but for now, we're going to start filling in some of the Python files that you see here. So, for now, where we'll start is inside of this core folder. We're going to go into config. py, and we're going to start writing the code to load in essentially all of the settings that we need for this app. So, we're going to start by saying import os. We're then going to say from.env import load_.env. I'm just going to configure my interpreter here so we don't get those errors. Okay. So now we're going to type load.env. What this is going to do is load this environment variable file for us so we can access some of the values inside of it. We're then going to create a class called config. This is standard in fast API to store all of your settings and variables in one class. And we're simply going to write a mapping from our environment variable files or variables sorry two variables inside of the class. So we're going to say clerk secret key. We're going to say this is of type string is equal to os.get get env. And then this is going to be the clerk secret key or an empty string if for some reason that doesn't exist. Next, we're going to get the clerk publishable key. So, we're going to say clerk, if we can type this in capitals, underscore publishable, okay, underscore key. And then this is of type string in lowercase. And this is going to be equal to os.get env. And then the clerk publishable key. And again, an empty string. We then are going to have the clerk underscore web hook secret and this is going to be a string which is equal to the os.get env and then the clerk web hook secret and again empty string. We then are going to have the clerk_jwks url same thing string is equal to os.get enviable clerk jwks URL. We then are going to have the database URL which is a string. Same thing equal to os.get env database URL. We then have the frontend URL. So front end URL string is equal to os.get env frontend URL. And then we're going to have two variables that we're going to define oursel. The first is going to be the free tier_membership limit. This time it's going to be an int which is equal to two. And then we're going to have the procore tier membership limit which is going to be equal to zero which stands for unlimited. Now what I'm doing is just putting two values here that we'll need to use later to essentially define okay how many members can you have in a free plan? How many can you have in a pro plan that is stored in here and we're not hard coding in multiple places in our app. We're then going to go and say settings is equal to config like that so that we have access to all of effectively the settings for our application. Okay, so that is it for the config.py file. Now we're going to go and just write the database connection. So from database we're going to say from SQL alchemy import create engine. We're going to say from SQL alchemy and then this is going to be import the session maker and the declarative base. We're then going to say from app.core.config we're going to import the settings like so. Okay. We're then going to continue and we're going to say engine is equal to create underscore engine and we're going to say settings dot and this is going to be the database URL is going to be essentially how we're creating the database or what the URL is we're using for that particular database. And then we're going to say the connect arguments is equal to a dictionary and we're going to say check same thread and then is equal to false. I'm not going to explain this too much in depth, but it's just going to make sure that we're able to run the database successfully and we don't have any problem with it running inside of the same thread as something else. We're then going to say session local is equal to the session maker and we're going to say auto commit is equal to false. We're going to say auto flush is equal to false as well. And we're going to bind this to our engine. Now, I know a lot of this will look a little bit confusing, but this is very standard when working with fast API to be able to connect to a SQLite database. We're then going to say base is equal to declarative base. And what we're going to do is say define get database and we're going to say database is equal to session local. When we call this, it's essentially going to bind to the database engine. It's going to create the database if it doesn't already exist. If it does exist, it's simply just going to yield it to us. We're then going to say try and we're going to say like this yield and we got to spell yield correctly the database and we're going to say finally. So why is this not working like this finally we are going to say db.close. Okay. So this is all we need for the database. What this is doing is essentially just creating a database session and then we have this function where when we want to access the database we just call it. it yields the database to us and if there's any issues then it just closes the database and make sure that it saves successfully. Okay, so let's continue here and let's now go into the clerk.py file and let's write this to connect to clerk. This is super straightforward. What we're going to do is say from clerk_backend api import clerk and we're then going to say from app.core config. Okay, if we spell that correctly, import settings. And then we're going to say clerk is equal to clerk. And we're going to say the bearer off is equal to settings. clerk. Okay, let me just spell this correctly. clerk secret_key. Now, the reason why we need to set up some stuff related to clerk here in the back end is that clerk is going to handle all of our authentication automatically for us in the front end. Essentially, we can just bring in a clerk component and it will allow the user to sign in, sign out, handle the organizations, and it will just do all of the O. However, we only want authenticated users to be able to send requests to our Python backend because our backend is going to handle things like creating the tasks, setting where the tasks are, maybe deleting a task. So, what we want to do is ensure that only users that have the right permissions to handle those tasks are able to do so. So what we're going to do is from our front end, we're going to include the clerk user data to a request to our backend and our backend is going to verify that this user is who they say they are by using this clerk package. So essentially we're going to go to clerk and we're going to say hey clerk is this actually one of the users who signed into our app. Clerk is going to say yes or no. And then based on that information we can kind of gate what that user is able to do in our backend application. It'll make more sense later on, but that's kind of the basics of why we're setting up Clerk like we are. So, with that in mind, let's actually go back to Clerk and I'm going to start setting up some of the things that we need in order to make this authentication work. So, from Clerk, we're going to go to organizations here and we're going to go to settings. Now, what we're going to do is enable organizations for our app. We're going to turn off allow personal accounts and just enable this. Now, effectively what we're doing here when we enable organizations is we're allowing users to create organizations and invite other members to them. This is very common in something like a B2B software as a service where one person creates the org, they invite different members and maybe you pay per member, right? Or you have like a certain number of seats and you upgrade to another plan to unlock more seats. Clerk allows you to do that and that's kind of what we're enabling right now. So, what we're going to do is we're going to set the limited membership to two right now and make that saved. The reason for that is that I want to limit any new organizations or free organizations to just have two members and then force them to pay to upgrade their organization in order to have unlimited seats. Okay. Now, we can scroll down here. There's a few other things that we can set. For example, the default role for new members, the creators initial role in the organization, allow members to delete organizations. Right? There's a bunch of stuff that we can do here. And for now, we'll kind of leave it as is. We also could turn off allow user create organization so that you had to manually create an organization yourself as the app creator or admin in order for someone to join that or all right. So, next thing though, we're going to go to roles and permissions. Within organizations, you can have various different roles, right? Viewer, editor, admin, you know, content manager, sales manager. You've probably seen that before if you've used any kind of SAS. So notice that we have admin currently, right? And we can just kind of describe what the admin can do. We have member, right? And then we can create our own rule. So for this particular app, because we're going to have kind of this task board, I want to create a new uh role here called editor. So I'm going to give this role editor. See the key is editor. I'm going to say a user who can edit tasks. Cool. And I'm going to go ahead and I'm going to save that. Now with this role, we can just check if a user is admin, editor or member. But we can even get more specific and we can add particular permissions per each role. So what I can do here is go to features. From features, I can press add feature. This particular feature I'm going to call is task. Okay? Or let's call it tasks actually. And I'm going to say task in the task board. And what I'm going to do is start setting some permissions that I want to be able to set for particular users. So I'm going to go create permission. For the first permission, let's call this create. We're going to say can create tasks. And we're going to go ahead and create that. And you can see this one permission has now been created. Let's make another one. We're going to call delete. Can delete tasks. Let's make another one. Let's call this view. Can view tasks. Okay. And let's make another one and call it edit and say can edit tasks. Okay. So now we have four permissions. Create, delete, view, and edit. Those are within the feature of tasks. We're going to go ahead and save that. Go out of here. And you'll see now that we have this tasks feature created. So now if we go back to our organizations, we go to roles and permissions. We can go to the admin for example, and you'll see the permissions are now appearing. and we can enable all of them for the admin. Okay, let's go ahead and save that. Now, let's go back to the editor. Same thing for the editor. Let's allow them to do all of this. Okay, so save. And for the member, let's just allow them to view. So, they cannot edit, delete, or create, but they can view the tasks in the taskboard. Cool. So, there you go. We just added a few different roles. We set up the permissions here and now we can start using these directly from our code whenever someone signs in with their clerk account so we know what permissions they actually have access to. However, before we do that, I want to start setting up the billing and the subscription as well while we're on this page. So, I'm going to go to billing and I'm going to go to settings. Now, from here, what I'm going to do is enable organization billing and press on save. Now, when I do that, it's going to give me a few other settings like allow me to connect my Stripe account or to directly use the clerk payment gateway. Now, if you were in production, this would become more important for now because we're just testing in development. It doesn't really matter which one you use here. And we'll be able to just test with kind of like a fake credit card, which you'll see in a second when we talk about these kind of different plans and upgrading to pro and all of that kind of stuff. Now, what you also see here is that it shows me plans. So, it says create plan. I can also just go to subscription plans here and I can start creating various different plans for organizations or for individual users. So, what I'm going to do for now is I'm going to create a new organization plan. I'm going to call this pro tier like that. And I'm just going to write a description and say unlimited seats in the organization. Okay, like that. And then for the fee, I'll just make it $1. You can make it literally anything that you want. You could enable a free trial, make it publicly available, add various features to this particular plan. For example, you could add, you know, the tasks feature. So maybe you can actually unlock different features with different plans. In my case, I'm not doing that, but maybe we have some, you know, AI feature, something that you only get access to if you're in the pro plan. Then you could make that a feature, enable it directly in clerk, and then have it actually one of the things associated with this plan, and your code can then check that and see if the user or the organization has that particular feature. This is super powerful. That's why I'm using it. But you can see for now I just created this new plan. Now we have the free plan, sorry, and the protier plan. And later I'll show you how we can display that. And notice it's actually kind of showing it to us already by using this pricing table component in React and using this method and kind of protect to protect certain features based on what plan the organization or the user has. Okay, so that's pretty much all I wanted to do for now. I will quickly mention to you that everything you see inside of clerk you can customize, you can change. There's all kinds of other stuff you can look at here. For now though, we'll leave this as is and we're going to go back to our code and we're going to start writing this off module which now hopefully should make a little bit more sense because we just enabled those kind of permissions inside of clerk. All right, so what we're going to do for our off here is we're going to start by importing httpx. We're then going to say from fast API import depends HTTP exception if we can spell exception correctly request. Okay. And status. We're then going to say from the clerk backend API.curity import the authentication request options. We're then going to say from app.core.config import settings. and we're going to say from app.core.clerk import clerk. Okay. All right. So now we have the imports that we need and in this particular file we're going to handle all of the authentication and essentially understanding if a particular user has the ability to edit a task, delete a task, etc. Now effectively what's going to happen is when someone signs into our front end, like I mentioned, they're going to be using clerk. From our front end, we're going to include the user's clerk account details, which includes a JWT token, which is essentially their identity as the user in our app. And it's going to be sent to our back end. So front end is going to send request to the back end. Okay? And this is going to include a JWT token from clerk. Now, what we're going to do on the back end is the back end is going to authenticate this token. When we do that, we're going to get the user details from clerk and check the user's permissions. Okay, so this is effectively what this file is going to do. We're receiving a request from the front end that includes some details about the signedin user. Our backend is going to authenticate these details are valid. We're going to get the details from clerk about this particular user and we're going to check their permissions to see, okay, are they a member? Are they an editor? Are they an admin? What do they actually have the ability to do? So I'm going to make a class here called o user. Inside of here I'm going to say define innit and I'm going to take in self a user ID which is a string and org id which is also a string and org permissions like this which is a list. Then what I'm going to do is say self do user ID is user ID self.org ID is or ID and self.org org permissions. I'll spell this correctly. Our org permissions. Then I'm going to say define has underscore permission. We're going to take in self and then a permission which is a string and we're going to return a boolean. We're then going to say return permission in self.org permissions. Now, this is simply just going to check if this user has a particular permission inside of this permissions list. That's because whenever we check the user in clerk, it's going to give us a list of permissions that user has. Those permissions are going to include the ones that we just created like can they edit a task, can they delete a task, etc. So, we're going to check those essentially and if we have them, then we're going to tell the backend or whatever function, okay, yes, they can actually do that particular task. So now I'm going to create a few properties. So I'm going to say app property define can view. Okay, this is going to take in self. It's going to return a boolean and we're going to return self.permission and then we're going to say org colon tasks colon view. So the way that the permissions are set up inside of clerk is that the particular permission that we created like view, create, delete, edit is associated with some feature. In this case, the feature is tasks and that feature is associated with an organization. So we're saying or tasks view. We're checking in this particular organization in the tasks feature, do we have the view permission? So I'm going to copy this now uh this method and we're going to write it for all of the different properties that we have. So, as well as can view, we're going to have can create. And we just change this to create. Same thing for can delete. Change this to delete. And then what is the last one that we have? So, we have view, create, delete, and then we're going to have edit. And then simply change this to edit. And that's it. We now have these four different properties in this class. And I can use this O class to determine if a user has a particular permission. Okay. Okay, so now we're going to write a few functions that essentially takes the data that our front end sends to the back end and sends it to clerk to validate this data and make sure the user is who they say they are. So we're going to write a function called convert_2_http request. Okay. Now inside of here, what we're going to do is have a fast API request which is of type request. And this is going to return an httpx dot request. Now inside of this function, I'm going to go return httpx dot request and I'm going to have the method which is equal to fast API request do method. I want to have the URL which is equal to fast API request URL. And we're just going to convert this into a string. And we're going to have headers which is equal to a dictionary. And this is going to be the fast API request dot headers. Now, effectively all we're doing here is we're just taking the fast API request object and we're converting this into an HTTPX request object. Just a different request object that's going to be used directly with the clerk module. Now, we're going to have another function. This is going to be async define and this is going to be get_currencore user. This is going to take in a request which is a fast API request and it's going to return an authenticated user. Okay. And let's spell request correctly here. Awesome. So from this function, what we're going to do is we're going to say httpx request is equal to convert to httpx request and then we're going to pass this fast API request. So we just take the request convert it into this httpx one. We're then going to say the request_state is equal to clerk.auuthenticate request and we're going to pass the http request. Okay. As well as the authenticate request options and we're going to say the authorized parties is equal to and this is going to be settings dotfrontend URL. All right. So effectively what this is saying is okay get the data from this HTTP request authenticate it with clerk and also just make sure that we're only going to authenticate ones that come from our front-end URL. We're then going to say if not request_state is signed in. Okay, because what's going to happen now is this request state is going to give us a bunch of information about the user. What's their username? Are they signed in? are they signed out? Have they created an account? Etc., etc. So, if they're not signed in, then we're going to raise an HTTP exception and we're going to say the status_code is equal to status.http_41 unauthorized and we're going to say detail is equal to not authenticated. Okay, so that's going to check if the particular user is signed in. Then we're going to say claims are equal to request_state dotp payload. We're going to say the user ID is equal to claims.get and then sub. Now what's going to happen effectively is that when clerk authenticates this request, right? And it kind of pulls out the information from this JWT token, it's going to include something called a payload. Now, in the payload, we're going to have some information like the sub, which is actually the user's ID in clerk, as well as the organization ID that they're inside of and things like their permissions. So, we're going to get that information so we can then use that from our backend. So, we're going to say the org ID is equal to claims.get and then or ID. We're going to say, let's get out of this parenthesy here. Okay, go back. that the org permissions are equal to claims.get and we're going to get permissions or we're going to get claims.get and then org permissions or this because it could be stored under permissions or permissions or if we don't have either of those then we're just going to have an empty list because we have no permissions. We're then going to say if not user id then same thing we're just going to raise this error because if we don't have a user ID that means there's some error and the user is probably not signed in. We're also going to say if not and this is going to be org ID. So if they're not a part of some kind of organization then what we're going to do is we're going to return a 400. So we're going to say 400 bad request and we're going to say no organization selected. Okay, because they need to select some particular or organization. Sorry. And then if all of that is good, we're going to return an O user and we're going to pass to the O user the user ID which is equal to the user ID, the org ID which is equal to the org ID and the org permissions which is equal to the org permissions. So effectively we're saying this function will get us the current user from clerk. We're going to convert the request. We're going to authenticate with clerk. We're going to check if they're signed in. If they are, we're going to get information like their user ID, the org ID, and the permissions they have. If for some reason they don't have that data, there's some kind of error. So, we'll return that. Otherwise, we will return the authorized user. Now, just from this file, we're going to create a few more functions as well, which are going to act as helper functions to essentially gate access to particular functionality. Bear with me. These are going to be pretty simple once we write the first one. The first one is going to be called require view. This is a function we're going to use to require the view permission from a particular user. So we're going to say user and then this is going to be off user equals depends and then this is going to depend on the function get current user. Okay, we're not going to call the function. We're just going to write its name. We're then going to say this will return an o user. And what we're going to do from here is we're going to say if not and then user.can_view then we're going to raise an HTTP exception. And inside of here, we're going to have a status code which is equal to status.http_43, okay, underscore forbidden, saying you don't have this permission. We're then going to say detail and we're going to say the view permission required. Okay, pretty straightforward. Then down here, we're going to return the user. Now, we're going to copy this function and we're going to have this for every permission. So rather than now require view, we're going to have require create. We're going to change this to can create. We're then going to have create permission required. Okay. Then we're going to do the same thing except rather than require create, we're going to say required delete. We're going to change this to be delete. We're going to change this to say delete permission required. Okay. Now let's go down here. rather than require view this is going to be require edit we're going to change this to say can edit and then same thing edit permission required okay that's all that we need the reason why I'm writing these four functions is we're going to use these as what's called a dependency injection in a minute in fast API so that if a user wants to for example create a new task we just call this function it will then get the current user and see if the user is actually able to create the task or not that's why we have that inside of this O file. So, I know that was kind of complicated. That was a lot of code, but now we've handled the core work for our API and we're going to start working on the database. Then we'll write the backend API routes and then we're done with the API. We can test it and then we can move on to the front end. So, let's close all of this for now. Again, we have kind of the off stuff handled, which is the most complicated. And what we're going to do is start writing our database models. So, the only database model that we're going to have here is simply to represent a task, right? And a task can be in different stages. So like pending, started, completed. That's kind of how we'll set it up, but you can make this more complicated if you want. So from this task file inside of models, I'm going to define what a task looks like. So I'm going to import UU ID, which will allow us to create a unique ID. I'm going to say from datetime, import date time. I'm then going to say from SQL Alchemy. Okay. and then import column string text datetime and enum. And by the way, if you're getting lost here, all of this code will be available from the link in the description. I should have mentioned that earlier. Now, let's continue. I'm going to say import enum. And I'm going to say from app.core database import base. Okay, we're then going to say class task status and this is going to be string, enum enum. And we're just going to make a simple enum in Python. So we're going to have pending which is equal to pending in lowercase. We're then going to have started which is equal to started in lowercase and we're going to have completed. Okay, which is equal to completed in lowercase as well. So this is just the status for a particular task. You can have more, but we're just going to have pending started completed. Then we're going to have class task. This is going to inherit from base. And what we're going to do is just define the table name. So underscore table named_. Okay. And this is going to be equal to tasks. Then we're going to define all of different data that's going to be stored on this task. So the first is going to be the ID. So we're going to have id column this is going to be string primary key true and then the default is going to be lambda and then string uyu IDU ID4. What this is going to do is just by default create a new unique ID for all of the tasks automatically for us. Next we're going to have a title of the task. This is also going to be column. It's going to be of type string. Now we're going to put 255 to limit the length to 255 characters. And we're going to say nullable is equal to false. Meaning this cannot be empty. We're then going to say description. This is going to be column. We'll just make it text because it can be long. But this time we're going to say knowable is equal to true because it can be empty. We're then going to say status is equal to column. This is going to be of type enum with the task status. The default is going to be task status.pending and nable is going to be false. This cannot be empty. Then we're going to have the org ID because every task needs to belong to some org. So we're going to say column string and then we're going to say nullable is equal to false and we're going to say index is equal to true so that we can look up values based on this column very quickly to find all of the tasks for a particular organization. We're then going to have created by and this is going to be the user who created this. So this is going to be column and then string and then nullable is equal to false. We're then going to have created at and this is going to be column datetime and we're going to say nullable is equal to false or actually we don't need that. We're just going to say default okay default is equal to datetime doc now and then we're going to have updated at and this is going to be column and same thing datetime and then default is going to be datetime. now. Okay, perfect. So, what this is going to do is it is going to essentially just define the table schema for our task. So, we have an ID, title, description, status, the or this task belongs to, who it was created by, when it was created at, and when it was updated at. That's all of the information that we need to store about any given task. Now that we have that, we're going to go into schemas and we're going to write essentially the data validation for creating a task, updating a task, and getting a task so that we have the correct types in our fast API application. So what we're going to do is we're going to say from datetime import datetime. We're going to say from paidantic import the base model. We're going to say from typing import optional. Okay. Okay. And we're going to say from app domodels.task. Okay. The one we just created imports the task status. Now what we're about to create and let's go back to here is something called schemas. Schemas are essentially Python classes that use Pantic to help us validate information that gets sent to or returned from our API. So if someone wants to create a task, for example, they need to pass a title, a description, a status. That's what we're defining here and that we'll use in just one minute. So we're going to say class task create. This is going to be the schema that's going to be used when someone wants to create a task. It's going to inherit from the base model. We're going to say title string. We're going to say description and this is going to be optional. Okay. And then string. We're going to say status and this is going to be task status. And then is equal to task status dot pending. Okay, so that's kind of the default when they create a task is that it will go inside of pending. So now if a user wants to create a task, they need to pass this information effectively, which we'll use in a minute. Next, we're going to have the task update. Now this is going to be pretty much the same thing as the other one except all of the fields are going to be optional. So we're going to say title and then optional string, okay, is equal to none. Then we're going to say description and same thing. This is an optional string is equal to none and the status okay optional task status equal to none. So if you want to update the task you can pass any or none of these different combinations of values it will update based on the ones that you pass. Right? Then we're going to have class task status update. Okay. So if this is just for updating the status and we're going to take in the status and the task status like so. And then lastly, we're going to have the class task response. Now, the reason why we write a task response model or schema is because sometimes we don't want to include all of the information that's in our database when we return information about data in the database. So, in this case, we're kind of writing a slim version of a task that we'll return to the front end that might hide any of the sensitive data that we don't want to return. So, we're going to say ID int. We're gonna say title string. We're going to say description. Okay. And this is going to be optional string. We don't need to make this equal to none, just optional. Then we're going to say status is going to be the task status. We're going to say the org ID is a string. We're going to say created_by is a string. We're going to say created at is a date time object. Let's go created and spell that correctly by the way. And let's go updated at updated at date time. And then we're going to say class config. And we're going to say from underscore attributes equals true. Which means this will automatically create this response class based on the attributes of another class which you will see in a minute. Okay. So that's the schema. Again, we're going to use this in a second where it will make a little bit more sense. Now what we're going to do is we're going to go to our tasks.py PI file inside of the API and we're going to start using all of the code that we just wrote to define the endpoints or kind of the routes of our API for the different operations related to our tasks. So we're going to say from fast API import the API router the depends the HTTP exception and the status. We're then going to say from SQL alchemy import session we're going to say from typing import the list we're going to say from app.core do database okay we're going to import the get database we're going to say from app.core core. import the get_curren underscore user. We're going to import require view require create. So all these functions that we wrote require delete and require edit. Okay, I know you can't see that, but I wrote require edit. All right, then we're going to say from app domodels.task import the task model. And we're going to say from app.s schemas.task imports the task create the task update the task status update and the task response. Okay. So that's all of our imports. Now what we're going to do is we're going to create our router. So we're going to say router is equal to API router. The prefix is going to be /appi/tasks. And then we're going to say tags is equal to tasks. What we're effectively doing here is saying, okay, all of the endpoints I'm about to write here are going to be prefixed with API/tasks. So if I have an API here like slashcreate, I would go to / API/task/create. And also, let me just quickly fix this because this needs to be inside of a list for the tax. All right, so now we're going to say at routouter.get, get we're going to put just an empty string for now which means if you go to this exact route what we're going to do is we're going to specify the response model which is going to be equal to a list of task response and what we're going to do is return all of the tasks that are in the current users organization. So we're going to say define and this is going to be list tasks. We're going to take in the user. So we're going to say user off user equals depends and then require view. So what's going to happen now is we're saying okay and we need to make this a capital story. We're going to depend on this require view function. So we're going to call the require view function and if that doesn't give us back an authenticated user it means we don't have the ability to actually view these tasks. So then we'll just raise an exception. Right? If we do get the authenticated user, then we're good to go and we can view them. We're then going to say DB session is equal to depends and then get database. So we need the database as well as the permission to view in order to run this function. We're then going to say tasks is equal to DB doquery. We're going to query the task and we're going to say dot filter. Then we're going to say task.org ID is equal to user.org org id. Okay. And then dotall. So what this is going to do is it's just going to filter and it's going to make sure that the user's organization ID matches the tasks organization ID. If it does, then we will return those particular tasks because those are the tasks that this user is currently in the organization of. Uh I think that makes sense why I said that, but hopefully you get the idea. Okay. Next, we're going to write something very similar except this time it's going to be to create a task. So, I'm going to copy this and I'm just going to start changing some things. So, rather than router.get, we're going to change this to router.post, which means you need to send a post request to this particular endpoint. Now, for this endpoint, we don't need to change it. We can actually just leave it as this because if you send a get, we'll list the tasks. If you send a post, we will create the task. Now, rather than the response model being a list this time, it's just going to be one individual task. And similarly to before, we're going to take in the user, except this time it's going to be require create. We're going to take in the session because we need the database. But before that, we're also going to take in the task data, which is going to be from task create schema that we wrote earlier. Now, let's actually just clean up this function a little bit so it's easier to read. So, let's put our dependencies on separate lines and then go like this and start writing the rest of the function. Okay. So similarly to before again we're getting the user we're getting the database but now this time we're taking in the data from this schema. Let's have a look at it. Right? So we need the title description and status in order to create the task. What we're going to do now is just create the task. So we're going to say task is equal to task. We're going to say title is equal to the task data.title. We're going to say the description is equal to the task data.escription. We're going to say the status is the task data status. We're going to say the org ID is the user.org ID and created by is going to be equal to and this is the user do user id. Okay, so that now creates a task. And by the way, the reason why I don't need to check if any of these values exist is because fast API automatically does that for us by using that schema we created. So when I put this in here as a requirement for this endpoint, fast API checks, okay, this schema, did you pass all of this correct data? And if you didn't, it automatically returns an error message to the user. Okay, so let's continue here. We're now going to say db.add the task. So after you create the task, you need to add it to kind of the staging area for the database. We're then going to say db.comit. When we say db.comit, this is actually going to save it to the database. And then we can type db.refresh. refresh this task and return the task. And what refreshing does is it checks the database and kind of repopulates this object with any new values that were created. So for example, when I create this task here, I didn't set the ID for it. I didn't set the created at time or the update at time. But when I refresh here, because I added that to the database and the database will automatically make that for us, it adds those values back to this object. and then we can return it with all of the populated kind of hydrated values. Hopefully that makes sense. Now let's go and start writing a few more endpoints that we need. So the next one we need is going to be to get a particular task. So we're going to say router.get and we're going to type slash and then task ID because this is going to be a dynamic path. We're going to say the response model is equal to the task response. We're then going to say define get task. We're going to take in the task id which is a string which is going to match with what's in this path parameter right here. We're then going to take in the user right which is the off user equals depends and then this time it's going to be require view because we're viewing a particular task. And then same thing db session okay autocomplete come on is equal to depends get database. And let's clean this up again like we did before so that we can read these values a little bit easier. Okay. And now let's start writing this function. So what we're going to do to get a particular task is we're going to say db.query task. Okay. And we're going to filter the task. ID is equal to task ID. And the task.org ID is equal to the user.org org ID to make sure that both these things match because sure you can know the task ID but it needs to be the task that's in this particular organization. Now we do dot first which just gives us the first response if it exists. Now if it doesn't exist we're going to say if not task then we can just return a 404. So we can say raise HTTP exception. Okay. Now let's go back here. This is going to be status code is equal to status.http_45. http_44 not found and then we can say detail is equal to task not found and then if that's not the case so if we did find the task we can simply return it okay and let's add a space there so we get rid of that highlight okay so that is getting one particular task now let's go to updating a task okay so to update a task we're going to say at routouterput we're going to go slash and then same thing we're going to take the task ID and there's response model will be the task response. I'm doing putut because that means we're updating if you send a put request and we're going to call this define update task. Now for the parameters, we're going to take in the task ID which matches this. We're also going to take in the task data which is going to be the task update schema. We're then going to have the user, right? And we're also going to have the database like so. Okay. So now that we have all of those, we're going to try to find the task, right? And we're also going to make sure, sorry, that we have the requireedit permission. So let's make sure that it says require edit in the depends right there. Okay, so first things first, let's try to find the task. So let's just copy what we found here. The task needs to exist in order for us to edit it. So that's the first thing that we're doing. Now, similarly to before, we can actually just copy this right here and paste it because if the task doesn't exist, well, we cannot edit it. Now, what we're going to do is say if the task data.title title is not none. Then what we're going to do is say task.title is equal to task data.title. Now we're going to do the exact same thing for the description. So we're going to say if the task data.escription is not none, then task.escription is equal to the task data.escription. And we're going to say if the task status, okay, or sorry, task data.status is not none, then same thing, the task status will be equal to the task data. status. So we're essentially checking the update data saying okay well if the update data is not none then we will actually update this current task with that information and then we can just type db.comit which will save that information. We can then refresh this right from the database. We can refresh the task and we can return the task and that will be the update function. Now the last function we need is simply to delete a task. So it's going to be very similar to what we did before. In fact let's copy everything we have here. Let's come down. Let's paste that. Let's change this to router.delete. Let's make sure they have the required delete permission. We'll remove the task data. We don't need that. We'll try to find the task. We'll make sure the task exists. And if it does, we can just delete it. So, db.delete task. And then we can say db.comit to save that in the database. And then we can just return none. And for the response model, we're just going to change this to actually remove it. And we're going to say status_code is equal to status.http_204 no content because when you delete something, well, there's nothing really for us to return. So, we're just returning none, right? Find the task if it exists, delete it if we have the right permission to do that. And then we're good to go. Perfect. So, that is it for the tasks API. Okay, this allows us to get the task. I also realized that sorry this needs to be called create task. So it doesn't have the same function name as list task but okay get all the tasks create a task get one individual task and then same thing here delete a task. I forgot to change the name and now we have pretty much all of the functionality that we need for handling the various different tasks. The last thing we need to do is essentially hook this up to actually start running the API. Add kind of all of the configuration and then we can test it. So let's quickly write that. So we're going to go to this main.py PI file now that we've written all of these individual files and we're going to say from fast API import with some capitalization fast API. We're also going to say from fast API dom middleware docores import the course middleware. We're then going to say from app.core.config import and this is going to be settings. We're then going to say from app.core.database database import the engine and the base and we're going to say from appi import tasks like that. Now what we're going to do is we're going to say base dot metadata okay metadata create_all and we're going to say bind is equal to engine. What this is going to do is it's going to look for all of the different models that we've defined in our database and create them if they don't already exist in the database. We're then going to say app is equal to fast API. We're going to say the title of the app is equal to and let's go taskboard API. We can give it a description. So we can just say you know B2B task board app. Okay. And then we can go version and we don't need to put this here, but I'm just going to put version 1.0.0. Okay. Then I'm going to say app dot and this is going to be add middleware. And I'm going to add the corores middleware. Now corores stands for cross origin resource sharing. This is going to allow us to have the API be called from a different domain or a different resource essentially or origin sorry. So I'm going to allow this to be called from our front end. So I'm going to say allow origins equal to settings dot frontend URL to make sure our front end is able to actually call this. I'm then going to say allow credentials true so we can pass our authorization tokens. I'm going to say allow method star. So allow everything and allow header star to allow all of the various headers. Okay. I'm then going to say at app.include router and I'm going to include the tasks.outer which is the API router that we just wrote here. So we just connecting this to our main fast API application. And then I'm going to say uh actually I think that's it. That's all that we need from this particular file. Okay. Now I'm going to quickly go to my start. py file because this is the entry point of my app. I'm going to import uicorn and I'm going to say if underscore named equals and this is going to be underscore main then uicorn.r run and I'm going to run like this app. App say host is equal to 0.0.0.0 zero and port is equal to 8,000 and reload is equal to true because we're doing this in debug mode. Now, what this is going to do is it's going to look for this app folder. It's going to look for this main file. It's going to look inside the main file for an app called app and it's going to run it using Unicorn. It's going to run it on localhost, which is this right here on port 8000. So, now we should be good to actually run the API and see if it works. So, what we can do is make sure we're in the backend folder. We can type uv run start.p py and we should see that the API starts running. If the API is running that's good. Uh however it's giving me some error saying no module named backend. Uh so let me quickly check why I'm getting that. Okay so I just had to make a fix here inside this file I had from backend.app.core. I just need to change this to say from app.core. But actually I think that I should have just put this import up here. So O user like that. that. So, I'm just going to remove this from here. Have the O user imported from that. And now, if I save this and run it, it looks like we're all good. The application is started up and we're no longer getting that error. So, the API should be functioning. Now, we're not able to really test this until we actually have a clerk account and we've signed into our front end. Fortunately, that's pretty easy to do. So now what we'll do is we'll leave the back end running because pretty much all of the functionality is done and we can start working on the front end where we actually sign in users, write the UI and then send the requests to our backend where they're authenticated by clerk. So we're now moving on to the front end. Now for the front end we're going to change directories in our terminal into the front end directory. You'll see it looks something like this. What we're going to do from here is just install a few npm packages that we need specifically for clerk again for handling all of the authentication and then for react router DOM for routing between different pages. So we're going to type npm i and then this is going to be at clerk slash clerk and then dash react and then beside this we're going to install react dash router-d. So, let's go ahead and install that and wait for that to finish. Okay, so all of that has been installed. I'm now going to close the terminal and I'm going to go into my front-end directory. Now, for this project, I am not going to write all of the CSS completely from scratch because there is a ton of it and it's just a huge waste of time for me to do that on the video. Uh, you know, truthfully speaking, most of the CSS was just generated with AI anyways. So, what I'm going to allow you guys to do is just download all of the CSS and just bring it into your project and then write all of the components manually if you want to follow along with me so that you don't have to go through all of this tedious, you know, hundreds, actually probably close to a thousand lines of CSS. So, what I'm doing is I'm linking all of the code in the description via GitHub. If you go to that repo, you go to front end, you go to source, you go to styles, you'll see all of the styles are organized by pages. So, badges, cards, canband, layout, all of this kind of stuff. So, you can click into them and you can view all of the different CSS styles and just drag them right into your project, which is where I'm starting. All of the CSS is already here. Again, I'm not going to write any of it. It's just already inside of the project. Now, same thing with this index.css file. What I've done is I've just imported all of the individual styles from this styles folder inside of this index.css file. So, just make sure you were aware of that. Now, what we're going to do now that we have all of the styles is we're going to actually start setting up the clerk authentication. Then, we're going to start writing all of the pages that we need. So, for now, I'm just going to delete this assets folder because I don't need it. So, let's get rid of this. Okay. And we're going to go back to Clerk and I'm going to show you how we can set this up on the front end. All right. So, from Clerk, we're going to go to overview. We're going to select React and it's going to show us here exactly how we can set up Clerk. So what we need to do is install the React package which we already did and we need to create av file where we put in this clerk vit publishable key or vit clerk publishable key. So we're going to go back to our code. We're going to go inside of front end. We're going to make a new file called env. And we're just going to paste this in here. Vit clerk publishable key. Okay, perfect. So we've got that in. Now let's go to the next step. And it's telling us that what we need to do is we need to import this inside of our main.tsx tsx file where we have the clerk publishable key. So, let me copy these two variables right here. And let's go ahead and do that. Okay. So, we're going to go to main.jsx. Now, from here, I'm just going to copy in these two variables. So, the publishable key like that. And I'm just going to change a few things here because I need to essentially wrap my app in the clerk provider component, but I also need to wrap it in my browser router so I can do the uh what do you call it? uh kind of routing or page routing. So from here I'm going to say import and then this is going to be the clerk provider. Okay, from and this is going to be at clerk slash clerk-react. I'm then going to import the browser router from and this is going to be react-rower DOM. Okay. Now for my app, I'm going to wrap this in the clerk provider. For the clerk provider, we're going to provide our publishable key, which is stored in the variable publishable key. Okay? And then we're going to put our app directly inside of here. Now, around that, we're also going to wrap, let's just close this, the browser router. So, we're going to say browser router like that. Okay? And again, inside of the browser router, we're going to put our app. Okay. So, now we should be good from the main.js. JSX. So what we're doing is we're just wrapping the app in the clerk provider and the browser router so we get access to the clerk settings or the clerk configuration as well as the React router DOM features. Okay. Now what we're going to do is go inside of app.jsx. From here we're just going to clear everything that is inside of this app component. We're also going to remove the import of app.css because I've deleted that. We're going to remove the imports of the React logo and the Vit logo. And even same thing with use state. We actually don't need that. And we're going to start setting this up to actually handle the routing for our application. Now, before I can do all of the routing, I do need to have the different pages that I will be routing to. So, what I'm going to do is just stub those pages in my front end. So, from source, I'm going to make a new folder. So, let's go new directory like this, and we're going to call it pages. Now, inside of pages, we're just going to create some empty pages that we can route to. So, the first page we're going to have, so let's make a new file is going to be the dashboard. Okay? And then page.jsx. Now, for this, all we're going to do is we are just going to write a really simple component. So, we're just going to say function dashboard like so. And actually, this can be dashboard page. And then we're just going to return an empty fragment. Okay? And then we're going to say export default the dashboard page like so. Okay. Now we can just copy that and let's go to the next page. Now for the next page, this is going to be the homepage. So let's just go homepage.jsx. Okay. And then we can just change this from dashboard page to say homepage like so. Now let's have another page. So let's go new file. This is going to be the pricing page. So pricing page.jsx. Same thing. Just change this to say pricing and pricing. Perfect. Now we have two more pages. I believe we're gonna have the sign in and the sign up page. So we're going to say sign up.jsx. Same thing. Just change this to be the sign up page and the sign up page. And then let's go a new one. So new page. And this is going to be the signin page.jsx. And from here, sign in. Like that. And sign in. Okay. So, those are our five pages. Let me just close all of those. Now, what we're going to do is go to app and we're going to start setting up the router to route between these different pages. So, once we write them, they're already showing up. So at the top of our file, we're going to say import and then route and router or sorry not router route from and this is going to be react dash router-dom. Okay, that's the first import. Then we're going to say import signed in signed out and redirect to signin from at clerk/clerk-react. This allows us to essentially gate pages so that if you're signed in, we show you something. If we're signed out, we show you something else. We're then going to import the homepage. Okay, we are then going to import the signin page. Okay, so let's do that. Then we're going to import the sign up page. Then we're going to import the dashboard page. And then I think the last one we need is the pricing page. So let's import the pricing page like that. Now we're going to create a very simple protected route function. So we're going to say function. And this is going to be protected route like so. And we're just going to take in some children. And what we're going to do is we're going to return a react fragment. And inside here, we are going to say if you are signed in, then we will simply show the children of the protected route. Otherwise, if you are signed out, then what we're going to show is the redirect to sign in. Okay. So, all this is going to do is redirect to the sign-in page if you are not signed in. That's it. Very easy. Now, from our app, what we're going to do is we're just going to define the different routes. So, if you've never used React Route or DOM, all we're doing here is we're saying, okay, these are all of the different pages that you could access. So, like /home/signin slign out. That's all we're putting here. And then when you go to one of those routes, it will just render the component that we wrote, which is one of these pages. So, we're going to say routes. Now, we're going to make a route here. For the first route, we're just going to say path is equal to slash. Okay, so that's it. So that's it for that. Now, inside of this route, we're going to have a bunch of other nested routes. So we're going to say route index. Index is the default one. And we're going to say element is equal to and then this is going to be the homepage. Okay, so let's close the component like that. And then for the route, we actually don't need to close the route. We can just make it self-encclosed. Then we're going to have another route. Now for this route we're going to say path is equal to sign-in slash and then asterisk and then we're going to say the element is equal to and this is going to be the signin page like so. Then we're going to have another route. Okay. So let's just do actually the exact same thing that we did here. And let's change this to be sign up. And then you guessed it. This is just going to change to sign up. Then let's copy that again for the next route. Let's change this to be slpricing. Okay, so that's going to be the pricing page. For the element, this is going to be the pricing page. And then we can have the dashboard. So for the dashboard, we're going to say route. We're going to say the path is equal to dashboard. Then beneath here, we're going to say the element is equal to and for the element this time it's going to be the protected route. Okay, so protected route and inside of the protected route we are going to have the dashboard page. So essentially what we're saying is okay, if you are signed in, we'll allow you to access the dashboard. If you're not signed in, we're not going to let you access the dashboard. So that's why we're using this protected route component. For all of the other pages, you can access them even if you're not signed in. That's fine. Okay, now that's it for kind of handling the routing. Now, if we run this and we go to these different pages, you'll see that it will actually just render those pages. although they won't look any different because we don't have anything different in those components. But we can actually test it for now because we can test for example the protected rept. So let's open this up. Let's go npm rundev. Okay, it should run that for us. Let's open up our front end. Okay, you notice this is kind of the homepage. And if I go to slash dashboard for example, you'll see that it should redirect me. And you see it redirects me to the sign-in page here with clerk where it asks me to sign into my account because I am not already signed in. Okay, let's go back now. Let's try to go to slashs signup or something. And you can see we can just go to that route. But if we try to go to the protected one, then it brings me to the signin page. Awesome. So that is running. Now what we're going to do is we're going to start building kind of like the navbar which allows us to sign in and sign out, see if we're signed in, navigate between the different pages, and then we'll start building the various other components. So we're now going to make another folder inside of src. So, new folder, call this components. And for the components, we're going to start by creating a layout component, which is going to always be on the screen, which is going to act kind of like a navbar. So, I'm going to say layout.jsx. Now, inside of here, I'm going to import outlet as well as link from okay, and this is going to be react router DOM. Then I'm going to say import and this is going to be signed in signed out user button. The user button is kind of like the profile button. Then we're going to have the organization if we can spell spell this correctly. Uh switcher as well as use organization from at clerk/clerk- react. And for some reason it's giving me an error here. It says it's defined but never used. Okay, that's fine. So we will use it later. Then we are going to define the function. So we're going to say function layout like so. We're going to say const organization. Okay. And this is going to be equal to use organization. And we're just going to put this inside of braces. So we can grab the organization. We're then going to say return. And we're going to start building this layout component. Again, the way that the layout works is that we're effectively just going to have this always be on the screen where we're kind of showing this like navbar at the top of the page. So for this div, we're going to have class name equal to layout. We're then going to have another div. So let's add this here. We're going to say class name is equal to and this is going to be nav. We're then going to have another div. If you can't tell, right now we're building the navbar. We're going to say class name is equal to nav dash container. We're then going to have a link. So we're going to say link and then this is going to be two equals slash so to the homepage. And we're going to say class name is equal to nav- logo. And for this we're going to put the name. So we're going to say taskboard. If you press this it will just bring you to the homepage. Now beneath that we're going to have another div. This is going to be class name equal to nav-links where we'll have the different links that you can navigate between. So the first link, let's put this here is going to go to and we're going to go to the pricing page. Okay, so is it going to be slashp pricing? Yeah, it needs to be slashpricing. The class name will be equal to nav-link. And then here we can simply say pricing. Okay, now we're going to have some dynamic things. So, we're going to say signed out. So, if you're signed out, then we'll show you the ability to sign in or to sign up. So, we're going to have a link. Okay? And we're going to say two is equal to and then same thing. This is going to be slash sign-in. Then, we're going to have class name is equal to nav-link. And you guess what this one is going to say? It is sign in. Then, let's copy it. And directly below that, we're going to have the sign up. and just change this to sign up. Okay, that's it. So, if you're signed out, we'll show you this. However, if you're signed in, then we're going to show you your organization as well as your profile. So, to show the organization, we're going to say organization switcher. This is a component that comes directly from clerk. And there's a bunch of settings that we can pass here to change the styling, which is what I'm going to do. So, first I'm going to say hide personal. Then I'm going to say after okay and this is going to be create organization URL is equal to dashboard then I am going to say after select okay let's spell this correctly organization URL is equal to the dashboard as well then I'm going to say create organization mode is equal to modal. So this means it's going to pop up as like a popup on screen rather than be a separate page that we navigate to. And then we can override the appearance which I'm just going to quickly change because we need to change it from kind of light mode to dark mode. So we're going to say elements and then here we're going to say use or not use user preview main identifier text personal workspace. I know this is a lot of code but this is how I change the color is going to be color and then white like that. Again it looks like we spelled identifier correctly. So incorrectly sorry. So let me just fix that. Okay. Now after that one we're going to have organization preview main identifier_ganization switcher trigger is and let's spell trigger correctly and then same thing I always keep spelling identifier incorrectly is going to be color-white. Okay. Again, I just need to change this from light mode effectively where the text is going to be black to dark mode where the text will be white. Okay. So, that's it for the organization switcher. Kind of annoying to do that override, but that is just one thing we need to do. And then I'm going to say, okay, if you're currently in an organization, so let's spell organization correctly. So, we're going to say organization and and then we're going to have a link. And the link is going to say to equals and then slash dashboard. Okay. and class name is equal to nav-link and then here we're just going to say dashboard like that. Okay. So the idea here is that a user might be signed in but they might not yet be a part of an organization. So if they're not a part of an organization well I can't show them the dashboard because the dashboard only exists per organization. So that's kind of what we're talking about here in this signed component. Now if they're not signed in of course they're not in a uh what do you call organization cuz well they're not signed in. So we'll just show them this to sign in or to sign up. Okay. Then we need to export this. So export default layout. And I think we are all good. Now the only thing is that we need to render this outlet and we also need to display the user button which I forgot. So let's quickly do that. So out so inside but at the end of this signin container we're going to put the user button which is just going to show the user's profile. And then down here in the end of this div, we're going to say main and we're going to put outlet. Okay. Now, what this is going to do is it's going to take whatever should be showing in the page that we're navigating to and just put it inside of here. So, effectively the way the layout works is that we're just rendering the page inside of this outlet. Everything else is just static and always stays on screen. So, this layout is always visible based on what's happening here. and then we show whatever else kind of the content that the current screen is showing inside of this out. Hopefully that makes sense. So now what we need to do is just import layout from here. So we're just going to say import layout from and this is going to be components. So I think it's dot /components/ layout like that. And then we're going to go to our route like this and we're going to say the element is equal to layout. Cool. So now if we do that and we go back here, we should see the navbar popping up. And you can see that we have pricing, sign in, sign up. And for some reason the styling is not working 100%. So I'll have a look at that in one second. Um, but that is a good start. Okay. Okay, so I was just having a look at the styling and I noticed some issues right in terms of how the styling was here. So I just realized I made a few errors when I was building this layout where first for this link I actually needed to remove the nav link that was here before and change it to this btn btn- primary and I need to take all of this and just put it one div up. So essentially after the pricing it goes inside of here. Okay. So that it's in this nav links div which it wasn't in before. Okay. And let's just fix this a bit so that it is all inside of here correctly. Let's fix the indentation. And you can see now that it's inside of this nav links div. So now if I come back you can see that it's properly on the right hand side of the screen which is what I was looking for before. Okay. So now the layout component is finished. And what I want to do is start writing the sign in and sign up page. So we actually have the ability to create an account and sign into our application. So let's start with the sign up page. Now for the signup page, this is very easy. All we need to do is just say import sign up. And then this is going to be from the at@ clerk/clerreact package. And then what we can do is just return a simple div. For the div we can say class name is equal to off dash container. And then inside the div we can put a signup component. We can say routing is equal to and this is going to be path. And then we can say path is equal to slash sign up. So it knows that it goes back to this page. And then we're going to say the signin URL is equal to slash sign-in. Okay. Then we can actually just selfenclose this component. And that is the sign up component from clerk. We just use it and it will work like this. Now, let's do the same thing for the signin page. So, for the sign-in page, it's going to be literally the exact same thing except sign in. So, let's just copy what we have here. Okay. So, we're going to say from or we're going to say import, sorry. And this is going to be sign in. Okay. From at clerk/clerk react for the return, make it the same thing except this is going to be sign in. This is going to be sign in. And this is going to be sign up. And this is going to be the sign up URL. So just swapping those around. And now let's remove this sign up component. If we go back here, we refresh and we press sign up for example, you see that it brings us to the sign up page where we see the sign up modal. If you go to sign in, brings us to the signin page. So what we can do now is try to make an account. Let me create one. Press continue and we'll go from there. Okay. So I'm just going to make an account here with my email. Let's close that. Uh, okay. I'm going to need a new password. So, let's set a new one. Go continue. And then what it's going to do probably is ask me to verify my email. So, yes, you can see I have to verify the email. Let me do that and I'll be right back. Okay. So, this is the code I got in my email. And now I press enter and I get brought back to the page. Looks like there must have been some error or something. I don't think it signed me in maybe. So, I signed up, but it didn't sign me in. So, let me try to sign into that account now. Uh, oh, now it's saying set up your organization to continue. Okay, that's interesting. So, let's just create an organization, I guess, like Tim A or something. Okay, and let's see if it works. And there we go. Okay, now we get brought into the dashboard where it looks like we are all good. So, it's a little bit buggy when we're creating the new account where we need to actually create the organization first, otherwise it doesn't let us access this page. I also still need to change the color. So, I think I might have just had a spelling mistake when I was adjusting the parameters here. But you can see I'm inside an organization. I can now manage this information from this kind of clerk dashboard here and I have the ability if I want to invite someone to my organization, I can view the dashboard. I can go to the pricing page even though there's nothing there. And then if I press on my little user account guy, you can see that I have the account again because of clerk. And I can for example just go here and go sign out. And then the UI will update and show me this. And if I go back to clerk now and I refresh, it should start showing me my users. And you can see that I have a user here, timotiv.net. I can view all the information about the user, when they signed in, their password. Well, actually, I don't think I can view their password, but I can change or reset their password, etc., etc., etc., and I can even see their organizations, which one they belong to, invite them to an organization, mess with all of their settings. You get the idea. Okay, super cool. So, the O is working. We're able to sign in. We're able to sign up, create a new account, and create organizations. Now, what we want to do is start handling kind of the taskboard and then get into some more of the advanced stuff where we're inviting different users, having the billing, the subscriptions, the pricing, all of that. All right. So, now that we finished the login functionality, what we're going to start working on is the actual task management. So, having that kind of canban style board like you saw, creating tasks, deleting tasks, and then of course the pricing, and upgrading the organization. So let's actually start by going to the homepage and let's code this out for now so that we have kind of some styling and we have like a nice landing page people can go to. Then we can build the dashboard where you're going to be able to actually see the different tasks and move those around. Okay. So from the homepage we're going to start by importing a link from React Router DOM. Then we're going to import signed in and then signed out use organization which comes from clerk as well as create organization. Okay. All right. So now we're going to go and inside of the homepage component we're going to check the organization the user is in. So we're going to say const organization is equal to use organization. Okay. So let's pull in that react hook. And from here, let's start creating the UI. So, we're going to return a div. For the div, we're going to have class name is equal to, and this is going to be the home dash container. Okay. And let's spell container correctly like that. Now, inside of this div, we're going to have an h1. The h1 is just going to be the title. So, we're going to have class name equal to home dash title. Here we're going to say team task management like that. And then we're going to put a span. We're going to say class name is equal to home and then dashtitle and then dash accent. And we're just going to have made simple just to add some kind of nice styling here to the header. Then we're going to have a paragraph tag. We're going to say class name is equal to and for the class name this is going to be the home dash subtitle. Inside the subtitle we're going to say organize your team's work with powerful and let's spell this correctly with powerful task boards. Then we're going to say create, assign, and track tasks across your organization. Okay. Then we're going to have a signed out container for the users that are signed out. We're essentially just going to tell them, hey, you know, go and like create a new account. So we're going to have a div. We're going to have class name is equal to the home-buttons. Then inside the div, we're going to have two links. So for the first link, we're going to say two is equal to signup and this is going to be /s signup. And then for the class name, we're going to say this is equal to btn btn- primary btn-lg for large. And inside the link, we're going to say get started for free. Okay. Then we're going to have another link. For this one, we're going to say two. And this is going to be slash signin. And then we're going to say the class name is equal to this will be btn btn- outline btn-large again. And then this is just going to say sign in. Okay, so that's it. If you are signed out, now if you are signed in, the UI is going to look a little bit different. So first we're going to check if you're currently in an organization. So we're going to say organization question mark. Okay. Now if you are in an organization, then we're just going to have a link. And the link is going to go to the dashboard and just tell you, okay, you know, go manage your task from the dashboard. So here we're going to say the class name for this link is going to be equal to btn btn- primary and then btn-lg. Okay. And we're going to say go to dashboard. Then otherwise if you do not have an organization, we're going to have a div. So let's create the div here. The div is going to have a class name which is equal to home-create-org and then we're going to put create organization like this. So this is essentially a form that is rendered by clerk. So we want to show them hey you need to create an organization. So we're just going to show this directly on the homepage so that they can see it and they can create it. And then we're going to have after create organization URL is equal to slashdashboard. Okay. So after they create an organization, we'll redirect them to the dashboard. Okay. So that's going to be it for the homepage. Effectively, what we're saying is all right, if the user is signed out, tell them to sign in or sign up. If they're signed in, check if they have an organization. If they do, allow them to go to the dashboard. If they don't have an organization, then simply tell them to create one. Okay, so that's the homepage. Let's test it out. Let's go here. And there we go. Nice. Team task management made simple. I think we're going to have to add like a line break there because looks like it's on the same thing. So, let's just add a BR like that. There we go. Looks good. And we can see we have this nice UI. Okay. So, let's continue from here. And the next thing we're going to do is start coding out some of the components related to the tasks. So, actually, I'm just going to close all of these windows for right now. I'm going to make a new folder here, and I'm just going to call this one services. And inside of services, what I'm going to do is I'm going to write a file called API.js, where we're going to put all the calls to our backend API. So, we're going to say API.js. Here, we're going to make a variable. We're going to say const API URL is equal to import.env.vit_appi vit_api URL or then this is going to be http slash okay localhostport8000 now if we want to define this as a variable in the environment variable file we can otherwise it'll just load this by default if we don't have anything there then we're going to have a function so we're going to say export async function and this is going to be fetch with o what this is going to do is this is going to ascend a request to our backend with the clerk authentication. So what I'm doing in this file is I'm writing all of the requests that will be sent to our backend. So we can simply just call the functions from our front-end code. Now here we need to make sure that we include the correct headers which includes the clerk JWT token which is essentially how clerk identifies our signedin users. We're going to send that to our backend along with every single request. So that's what this kind of helper function is going to do. So we're saying export async function uh and this is fetch with o. We're going to take in some endpoint. We're going to take in get token and then options which is equal to an empty uh object. We're going to say const and this is going to be token is equal to a weight get token. This is a function that we're going to call from clerk which is going to give us the token that we need to use. Then what we're going to do is we're going to say const response is equal to await fetch. What we're going to do is we're going to fetch the following URL. So this is going to be inside of a dollar sign because we're putting a variable the API URL. And then we're going to have another dollar sign and then we're going to put the endpoint that was passed to this function. So that's the URL that we're calling. Now the options that we're going to pass is dot dot dot options. So this right here one of our parameters as well as we're going to pass the content dash type and this is going to be application /json and then we're going to have o and then we're going to have authorization is bearer and then we're going to put our token in here. This identifies the user. And then we're going to say dot dot dot options dot headers. And this reminds me that I need to actually fix something because I need to put headers like this. So I need to say headers and then all of this is going to be a header that we're passing with our options. Okay. So let's just quickly fix that as we did. Perfect. So now after the response, we're going to say if not response. So response. Okay. Then what we're going to do is say con error is equal to await response.json. Let's spell response correctly. catch. And for the catch, we're just going to put something empty here because we're not going to handle that right now. Then we're going to say throw new error. And we're just going to throw the error dot detail or we're going to throw request failed like that. Okay. Then we're going to say if the response status is equal to 204, so it has no content, we're just going to return null. Otherwise, we're going to return response.json, which is essentially the response, right? And whatever we got back from the API. Okay, so this is the function that we're going to call when we want to send a request to the backend with our clerk authentication. So now what we're going to do is we're going to write the individual functions for the operations that we want to perform in the back end. So the first one is going to be export async function and this is going to be get tasks and this is going to get all the tasks from our back end. So same thing we're going to take in this get token function and we're going to return fetch with off. Okay. And when we fetch with Oth, we're going to fetch the slash API slash tasks sorry route. We're going to pass the get token function. Okay. Now let's copy the same thing. And for the next one, rather than get tasks, we're going to say create task. This time we're going to take in get token and we're going to take in a task. And then we're going to call API/tasks, but this time it's going to be a post request. So what we're going to do is we're going to add in some options here. For the option, we're going to say method is equal to in all capitals post. And we're going to say the body is equal to JSON dot stringify. Stringify like so. And we're going to pass in the task. Okay. So that is now how you create the task. Now we'll paste this again. And now we're going to do update task. So we're going to say update task. Okay. We're going to take in get token. We're going to take in task ID as well as the task. We're going to fetch with Oth. Same thing, API/tasks. And now this time we're going to say the method is equal to put because that's the method we use when we want to update. Then we're going to say the body is JSON dot stringify. And we're going to stringify the task. And actually one small change, we need to include the task ID in the URL. So we're just going to do that like this by changing these to back. Okay, it already is back. Perfect. That's great. So slash API slashtasks slash the task ID of the task that we want to update. And then in the body, we just include the new task data that we want to use when we're updating. Okay. And then the last thing we need to do is delete a task. So we're going to change this to say delete task. Same thing, we're going to take get token and this time the task ID. Then we're going to change this to be a back tick. Okay? and we are going to include the task ID we want to delete. So let's include that. And we're going to change the method to be delete. So we're going to say method delete in all capitals like that. And now we have the four functions. So get task, create task, update task, and delete task. And now we can use those to call the backend API. Okay. So with that in mind, let's start writing the components that we need for representing the tasks. So we're going to go in the components directory. And the first component that we're going to work on is just going to be our task card. So we're going to say task card.jsx. And inside here, we're just going to write a card that represents one individual task. So we're going to say function task card. And we're going to take in as values here the task onedit. So a function to call if we're ending the task and a function to call if we are deleting the task. Then we're going to say const and we're going to say canedit is equal to exclamation mark exclamation mark onedit. So essentially did we pass that function? Then we're going to say const can delete. Okay. And this is going to be equal to exclamation point exclamation point and then on delete. Okay. Then we're going to return the UI. So we're going to return a div. We're going to set the class name is equal to and this is going to actually be in backtix. And we're going to say task dashcard. And then we're going to have a dynamic name based on if we can edit the task or not. So we're going to say can edit question mark. And then if we can edit, we're going to have the following task-cardclickable. So you can click the task to edit it. Otherwise, we're just going to have an empty string. So if you can't edit it, we're not going to let you click on the task or at least we're not going to show that with this class name. Next, what we're going to do is have the onclick handler. So that's going to be in the div as well. So let's fix this here. So, we're just going to fix the styling. Okay. And we're going to say like this on click is equal to same thing. We're going to say canedit question mark. If we can edit, then we're going to call the onedit function. So, onedit with the task. Otherwise, we're going to say undefined. Okay. Then we're going to have another div inside of here. For the div we're going to have class name equal to and we're going to start with the header. So we're going to say task card header. Inside this div, we're going to have an H4. So let's write that. For the H4, we're just going to put the task name. So we're going to say class name is equal to task card-title. And then inside of here, we're going to have task.title. Okay. Now, underneath the H4, we're going to have a can delete. So if we can delete, we're going to show a delete button. We're going to say can delete and and and then we're going to put a set of parenthesis. We're going to put a button. For the button, we're going to say the class name is equal to and this is going to be task-card-bascard-b. Okay. Now, let's just fix the classes a little bit here. Beneath this, we're going to have the on click. The on click is going to be the following. So we're going to have E. Okay. Then we're going to go into a function. Now inside of the function we're going to say E.top. And this is propagation. Okay. Then after that we're going to call the ondee function that's passed into the parent with the task ID to delete it. Okay. Then we're going to continue and we're going to have title and the title is going to be delete task like that for this particular button. And then we're just going to simply have an X inside of the button. That's what we're going to render on screen. Okay. So, if we can delete, we're going to show that. And then beneath this, we're going to say task dot description just to make sure it does have a description. If it does, then we're going to show the description. And for that, we'll just have a paragraph tag. We'll say class name is equal to and this can be task-card description like that. And then for the description, we can just show the task dot description. Okay, so that should be it for the task card. Then what we can do is export this. So export default. Okay, and then task card like so. And then we can start using the task card. Okay. So as well as the task card, now we're going to create the task column because we're going to have three columns full of task cards. So we're going to say task column.jsx. For the task column, this is just going to display the various task cards. So we're going to say import task card from there. Okay. We're then going to say const status labels is equal to and then we're going to have the label. So we're going to have pending is equal to todo. We're going to have started which is equal to in progress. And then we're going to have completed which is equal to done. Okay. Okay. Then we're going to have function task column. This is the component. We're going to take in status. We're going to take in the tasks. We're going to take an onedit and ondee as those functions. And then we're going to return the UI. So we're going to return a div. The class name is going to be for this first div the canban dash column. Okay. Now inside of this div, we're going to have another div. So for the first one, we're going to have class name. And this is going to be inside of back tick because it's going to be dynamic. It's going to be canban dash column dash header and then canban dash column. Let's spell column correctly. dash header dash and then we're going to put the status. So whatever the actual status is, we're going to use that in the class name so that we can show a different color um what do you call it? board kind of based on what the status is. Then we're going to have an H3 tag for the name of the column. So we're going to have a class name for the H3 and the class name is going to be the canban dash column dashtitle. And what we're going to do is we're going to use the status labels and we're going to pass in the status so that we get kind of the string representation that we actually want to show in the header. And then we're going to have a span that's just going to show the number of tasks that are here. So, we're going to have class name equal to cananban dashc column dash count. And inside of here, we're going to have the tasks.length. Okay. Now, beneath that, we're going to have a div. We're going to say class name is equal to cananban dash column dashbody. This is where we're actually going to display the tasks. And we're effectively just going to take all the tasks and we're going to map them to their components. So, we're going to say task. Okay. And then this is going to map to the task card. So, we're going to say task card like that. Now, for the task card, we need to write all of the values. So, let's actually just put this in parenthesis. Okay. Put another set of parenthesis and put this down here so that we can actually write it properly. So, we're going to say key is equal to task. ID. Then, we're going to say the task is equal to the task. We're going to say onedit is equal to onedit. And we're going to say ondee is equal to ondelete. Okay. And that's going to render the tasks. And then that's it. We can just export default the task column from this component or from this file. Perfect. So now we have the task column. The task column renders the task cards. Now we need essentially like a canban kind of layout. So we can render the canban layout which renders the columns which renders all of the tasks. So let's write another component. This time it's going to be called the canban board.jsx. And inside of here we're going to start writing all of the kind of complex logic with the functions to actually pull the tasks display them in the correct columns etc. So we're going to say import use state from and then we're going to go to react. Then we're going to say import use organization from at clerk slash clerk react. Then we're going to import the task column from dot slashtask column. Okay. And I don't need the jsx there. Then I'm going to import the create task update task. Okay. as well as delete task. Let's write this from the services. Okay, so from dot dot slash services/ API because that's where we wrote these different functions. Awesome. Now, we're also going to need to have a form for creating the tasks, but we will write that in 1 second. And then we're going to have const and in capital we're going to have statuses is going to be equal to pending started and completed as it matches up with our back end. Now we're going to have the components. We're going to say function canban board. Here we're going to have the tasks. We're going to have set tasks and we're going to have get token as the functions that we need. Now inside of here we're going to say const membership is equal to use organization and it's going to tell us what our role is within the organization. So if you want to get the role of the particular user, you can use this use organization hook from clerk and then you can pull membership. So previously we were looking at the organization itself here. However, we can also get the membership and that will tell us if they're a member, an admin, an editor, whatever their role in the org is as you've defined in clerk when you set it up. We're also going to have const show form set show form. This is going to be for showing the creation form which we will write in a second. So, we're going to say use state and that's going to be false. And we're then going to have const editing task. Okay, set editing task and this is going to be equal to use state and false. And then let's get rid of that. We're going to get the role. So we're going to say const ro is equal to membership question markroll. So this is going to give us their role in the organization. We're going to say const can manage. So essentially can they edit is equal to ro equal equal to and then we're going to say org colon admin. So this is the role if they're an admin in the organization or role is equal to or colon editor which is the other role that we created. If you had your own custom roles all you would do is just change what you see here after the colon colon sorry to that custom roles name right as you saw in clerk. Okay. Then we're going to have function get tasks by status. We're going to take in a status and we're going to return tasks like this dot filter and then task and we're going to go task dot status is equal to the status. So this is just going to filter all the tasks in our task list and give us the ones that are a particular status so we can put them in the correct column. Then we're going to have a function and this is going to be handleedit. We're gonna have a task and inside of here we're going to say set editing task and we're going to put the correct task that we're currently editing and we're going to say set show form to true. Okay, so actually I need to change this state to say null. So essentially the task that we're currently editing we're going to store in this variable right here. The reason we need that is because in a second we're going to pop up a form that's going to show the information for the task that we either want to create or edit. So we have two variables, right? One, okay, should we show the form on screen? Yes or no? And if we are showing the form, do we have a task we're currently editing? If we do, we'll put that inside of the form so we can edit that particular task. Okay. Now, a few other functions that we're going to need. So, for example, like deleting the task, etc. So, what I'm going to do here is say function, and this is going to be actually an async function because we're going to call our back end. So, we're going to say async function handle delete. This is going to take in a task ID to delete. And what we're going to do here is we're going to say if not, confirm. And we're going to say, are you sure you want to delete this task? Okay. And we're just going to return. So if they didn't confirm this, because this is just going to pop up on the window essentially ask them, hey, like do you want to delete this or not? So if they don't confirm it then we will not delete the task and we will return. Otherwise what we'll do is we'll say con task to delete is equal to tasks.find and we're going to find the task with the particular ID. So T ID is equal to the task ID like so. We're going to say set tasks and then we're going to say previous and we're just going to remove this task from the screen so that it goes away right away. We're going to say previous.filter filter and then t do ID does not equal the task ID. So effectively what we're doing is we're just finding the task that we want to delete and then we are just removing that task from the task list immediately so that it no longer shows on screen. So we're then going to say try await and then delete task like so. When we delete the task, we're going to pass in the get token function. And the get token function is right here because we're passing it to this component. We're also going to pass in the task ID that we want to delete. We then are going to catch any errors here. So, we're going to say catch error and we're going to say set tasks. So if there was an error and we're going to add this task back on the screen. We're going to say dot dot dot previous and then the task that we originally were going to delete. And we're going to say console error and we're just going to show the error like that. Okay. So this is the handle delete function which I think is all good. Now what we're going to do is handle the submit function which is either going to update a task or create a task for us. Okay. Okay, so we're going to say async function handle submit. Again, this is going to be for editing or deleting a t or not deleting, creating a task. Sorry, we're going to take in some task data. Okay, what we're going to do here is we're going to say if we are currently editing a task. So if we have one that we're editing, then what we're going to do is we're going to say const updated task is equal to and we're going to say dot dot dot editing task and then dot dot dot to the new task data that we have. So we're going to merge those two together to effectively update the task that's currently on our UI. We're then going to say set tasks. We're going to take the previous list of tasks and we're going to say previous map and then we're going to do is say t okay standing for task and we're going to say t dot id and this is going to be triple equal to editing task do ID question mark if it is we're going to put the updated task otherwise we're just going to put the original task and that's going to update the tasks on screen for us we're then going to say set show form false and set edit editing task to null. Okay. Now, inside of this if statement, we're then going to send the request to our backend to actually delete it. So, effectively, what we're doing is we're updating the UI. So, it looks like it happens right away and then we're actually deleting the task by sending the request to the back end. So, we're going to say try await and this is going to be update task. Okay, so this is calling that backend function, right, that we imported here. So, update task. Now when we call sorry update not updated when we call update task we're going to pass in the get token the editing task id as well as the task data that we want to update it with. Then we're going to catch any errors. Let's fix this here. So we're going to say catch error and for this we're going to say set tasks and then same thing we're going to restore the previous task if there was an error. So we're going to say previous previous dot map t do id is equal to editing task do ID question mark editing task colon and then t okay so essentially we check is the current task that we're looking at the one that we were editing if it was okay just put the editing task back otherwise just put the original task okay we're then going to say console error and we're just going to log the error so we can see the message okay now if that's not the case. So if we're not updating the task, then that must mean that we're creating a new one. So what we're going to do is say try const new task is equal to await create task. To create the task, we're going to pass again that get token function as well as the task data. We're then going to say set tasks and we're going to add this new task. So we're going to say previous and then this is going to be a list. We're say dot dot dot previous and then the new task like that. And then we're going to say set show form false like that to no longer show the form. And then we can catch any errors. And if we have any errors, we can just console dot error the error, right? Okay. So let's spell error correctly. Perfect. So that should be good for essentially handling the submit. So this is when they submit the form. But we still need to have a few other functions. So we're going to have the function sorry to handle cancel. So this is if they're cancelling an edit or a creation. So to handle cancel, we're going to say set show form is false and set editing task to null. Okay. And then we're going to have a function and this is going to be handle add task. Let's spell handle correctly. What we're going to do here is we're going to say set editing task to null. So if they're adding one, then we're no longer editing one. And then we're going to say set show form to true to show the form that's going to allow us to start editing. Now I know we don't have that form yet. We're going to put that on the screen in just one second. For now though, let's return kind of that empty canban board so we can at least have a look at it and then we can create that creation form. So we're going to have div class name here. This is going to be the cananban- wrapper. Then we're going to have another div. Inside this div, we're going to have a class name which is equal to the cananban dash header. Then inside of here, we're going to have an h2. For this, it's going to be called tasks. And then we're going to have the class name equal to the cananban- title for this particular H2. We're then going to have a can manage variables. Okay. If we are able to actually manage the tasks, that means we can create one. So what we're going to show is the ability to create a task by adding a button with the class name which is equal to btnb btn- primary. Then we're going to have on click which is equal to and this is going to be let's write this again handle add task like so. And then for this we're going to say plus add task. So essentially if you have the ability to edit so you can create a new task then we will show you this button where when you press the button effectively we're going to call this where it will show the form and let you make a new task. Okay. So let's move out of that div because that's the header and let's make another div. This time we're going to say class name is equal to and this is going to be the canban board. Okay. For the cananban board what we're going to do is show three columns. So we're going to say statuses right dot map. I think we called it statuses up here. Let's check. Yeah, statuses dom map. We're going to take the status and we're going to map this to a task column component. So here, let's make sure this is correct. And we're going to put task column, which I believe we imported already. For the task column, let's go down here. We are going to have a key. The key will be equal to the status. Then we can have the status, which is of course equal to the status. Then the tasks for the tasks this is going to be the function get tasks by status and then we'll pass the status there to get all the tasks. Then we're going to have on edit which is going to be equal to can manage question mark handleedit otherwise null. And then we're going to have on delete which same thing is going to be equal to can manage question mark handle and this is going to be delete and then otherwise null. Okay. So only if we're able to edit are we going to have the ability to delete or of course well edit the tasks. And then down here we're going to have show form and and for now I'm going to write null but in a second this is where we're actually going to show the form that allows us to create new tasks. Then we're going to say export default the canban board. Okay. So what we're missing here is the form to be able to create the tasks. However, before we put that there, I want to first show this Canananban board on screen. In order to do that, I need to go to my pages and I need to go to my dashboard page and I need to quickly write the dashboard page to display the cananban board and also load all of our tasks. So, let's do that. So, we're going to go to the top of our canban our dashboard, sorry. And we're going to say import use state import use effect import use callback from React. We're then going to say import use off use organization as well as create organization from clerk/clerk react. Then we're going to say import get tasks. Okay. And this is going to be from dot dot /services. So the file we write before slash API. And we're going to import the cananban board from the components file. From the dashboard page, there's a few things that we need. So first we need that get token function so we can get the token from clerk. So we're going to say const get token equals use off. Now this is how it works in clerk. You can use this hook called use o which will give you access to a get token function. We can call the get token function which will then give us the clerk authorization token or JWT token which we can then pass to the backend to authenticate the request. So that's where I'm getting it right from this particular hook. Then same as before I can say const organization membership okay is going to be equal to use organization. And for this what I'm going to do is I'm going to say membership. Okay. And then infinite is equal to true. Now what this is going to allow me to do is get the membership status as well as the organizations. Okay. And when I say memberships infinite true, what that's going to do is just allow us to display all of the memberships that a particular user has, which is what we're looking for. Okay. So now what we're going to do is say const and then we're going to say tasks set tasks is equal to use state and this is going to be an empty list for now because we haven't loaded the tasks. Then we're going to say const loading set loading is equal to use state and to start the loading state is going to be true. Then we're going to have const error. And then we're going to say set error is equal to use state. And then for now this is going to be null. Then we're going to say const member and this is going to be count is equal to membership question mark.ount or zero. So we can figure out how many members are in the particular organization because that's what we want to display on this page. Then what we're going to do is we're going to say const or id is equal to organization question mark ID. And now we're going to start writing some functions to load the task. So we're going to say const load tasks. Okay, this is a function. So we're going to say use callback and this is going to be async and then inside of here for this particular function we're going to say try. We're going to say set loading is equal to true. We're going to say set error. Okay, is error spelled correctly? Yes, it is to null. Then we're going to say const data is equal to await. Get tasks which is the function we're calling from that file we wrote before. Now we're passing that get token uh function. So we can actually get the clerk token. We're going to catch on error and we're going to say set error and this is going to be error dot message. And then we are going to go here to a finally block. And for the finally we're going to say set loading equal to false because no matter what we want to stop that loading state. Then what we're going to do is just remember to set the tasks with the data because we need to do that otherwise this isn't going to update anything for us. And we're going to put in the dependency array of this callback, the get token function. So that if that updates that we will do this again to get the new tasks for this new token, which will be based on the organization that the user is currently active inside of as well as which user is signed in. Then we need a really quick use effect hook so that we can run this automatically when the component mounts. So in the dependency array, we're going to put the org ID as well as the load tasks function. And then what we're going to do here is we're going to say if org ID so if we do have an organization load tasks okay otherwise we're going to say set loading to false. Okay. And load tasks is this function right here. Perfect. So we're essentially doing a use effect. We're saying all right when it loads if we have an organization ID we'll try to load the tasks. If we don't, we don't need to load anything because there's no task to load unless we're inside of an organization. Now, quickly, we're going to say if you are not in any organization, then what we need to do is return just a quick little UI to show you something. So, we're going to say class name is equal to dashboard dash container. Then, we're going to have another div with class name equal to no-orgontainer. Then we're going to have an H1. This is going to have a class name which is going to be equal to no-orgt. And then we're going to say welcome to taskboard which is going to be the name of the app. Right? Then we'll put a paragraph tag and we're going to say class name is equal to no-org text. And then inside of here, we're going to say create or join an organization to start managing tasks with your team. Okay. And let's spell managing correctly. Now, after that paragraph tag, we're just going to show the create organization form from clerk, which I think was right there. Perfect. So create organization and after create organization URL is going to be equal to slash dashboard which I know is the page we're currently on but it will refresh the page. Okay, perfect. So that's if you don't have an organization. Now if you do have an organization we're just going to simply show the dashboard with the cananban page. So we're going to say div class name is equal to the dashboard container. Then inside of this div, we're going to have another div for the header. So we're going to say div class name is equal to and this is going to be the dashboard- header. Then we're going to have a div with no class name. And here we're going to have an h1. For the h1, we're going to put the name of the organization. So we're going to say organization.name. And this is going to have a class name. The class name is going to be equal to dashboard-title. Then we're going to have a paragraph tag. This is going to be class name equal to the org dash members. Then we're going to show the member count. So we're going to say member count. And then we're going to say member and then we're going to put the member count does not. Okay, so does not equal one. Question mark. We're going to have an s. Otherwise, we're going to have an empty string. So we're going to say like one member or two members or three members. So plural or not plural depending on if we have one or more. Okay. So this is our little header component right here. Now beneath that we're going to say loading question mark. So if we are loading we're going to quickly show let's do this. We're going to quickly show a loading paragraph tag. So we're going to say paragraph class name is equal to text dash muted and we're just going to say loading tasks dot dot dot. Otherwise, we're going to say, is there an error? If there is an error, then we're quickly going to show what that error is. So, we're going to put a div. We're going to say class name is equal to, and this is going to be card- error. And then we're going to have a not div, but actually a paragraph tag with class name equal to text- error. And then this is inside of here, text- error-title. And we're going to say error like this loading tasks. And then we're going to show what the error actually is. So we're going to do another paragraph tag. And same thing, we're going to have class name is equal to text dash error. And then this is going to be text- error- message and we're going to put the particular error. Okay. Now if that's not the case, so if it's not loading and we don't have an error, we're finally going to show the cananban board. So we're going to show canban board. For the cananban board, we need to pass in the information. So we're going to pass in the tasks, which is equal to tasks. We're going to pass in set tasks, which is equal to the set tasks state. And we're going to pass in the get token, which is equal to that get token function. Okay, so that should now load all of the tasks for us and display them in the dashboard. Let's try it out by signing into our account and seeing if it works. Okay, so I just signed into my account. I also just created a new organization called test. And you can see that we now have the cananban state. We have to-do in progress and done. It's all showing up properly for us. And if we decide to maybe make a new organization, test one, two, three or something. Okay, create organization. And notice that this changes now right in the background to test one two three and we can change between the different organizations and the dashboard page will update accordingly. Now we need to make the form to create a new task. Let's go ahead and do that. So let's go to components. Let's make a new file and this is going to be called the task form.jsx. Now for the task form we're going to start by importing what we need. So we're going to say import use state and use effect from React. We're then going to say function task form and we're going to have the if we can write this correctly task onsubmit and on cancel. Now what we're going to do here is say const and we're going to say title set title is equal to use state. So, we're going to start putting in all of the fields that we need to create new tasks. We need a title, a description, and a status. So, we have the title. Now, we're going to do the description. So, const description set description is equal to use state. And then, same thing, empty string. Then, we're going to have const status set status is equal to use state. And by default, we'll just start it in the pending status. Then we're going to have const is editing is equal to not not task. Okay, so do we already have a task? If we do, then we're editing. If we don't have a task, we are not editing. We're then going to have a use effect and we're essentially going to check, okay, are we currently editing the task? If we are currently editing the task, so we need that in the dependency array, then we need to update the state here with what is passed from this task. So, we're going to say if task. Okay. Then what we're going to do is say set title. And this is going to be task.title. We're going to say set description. And this is going to be task.escription. Okay. Or and then this is an empty string. Then we're going to say set status. And this is going to be task like oops. Let's go fix this. task status like so. Okay, we're then going to have an else. In the else, we're going to say set title to an empty string. So, this is if we're not editing, then we just want to make sure that it's empty. We're going to say set description to an empty string. And we're going to say set status equal to pending. Okay, so this is the beginning of our form. again just handling if we're editing or not because we could be passed some data in this task uh variable here that is what we want to populate the form with to start. Then we're going to have a function handle submit on handle submit we're going to have E. What we're going to do is say E.prevent default so we don't refresh the page. We're going to say if not title trim then return. We need to have a title to be able to create a task. And we're going to say on submit, which is the function that's passed here, and we're going to pass to this the data. So we're going to say title is title.trim. We're going to say description is description. So let's go here. Is description.trim or null. And then we're going to pass the status. Okay. So that's our onsubmit. Now we need to render the actual form. So we're going to say return div. For the first div, this is going to be a modal. So what I'm going to do is say class name is equal to modal dash overlay. Okay, let's spell that correctly. We're going to have on click is equal to on cancel. So if you click outside of the modal, that's what this is going to be. Then it will close it. We're then going to have a div. We're going to have the class name for this div to be the actual modal itself. So essentially we have like the modal background and then the modal. If you click outside of the modal which is this then we'll close the modal. Now we're going to have an on click in the modal. So we're going to say on click is equal to and this is going to be sorry e and then this is going to be e.stop propagation. Okay. Now we're going to go inside of this div. We're going to have another div. We're going to have class name is equal to and then this is going to be the modal header. Then we're going to have the H2. We're going to have class name is equal to and this is going to be the modal title. And what we're going to do is say okay well if we are editing. So if is editing then we're going to put edit task. Otherwise we're going to put new task as the title for this modal. Now beneath that we're going to have a button. This button is going to have a class name which is equal to the modal close to close the modal. We're going to have an on click which is going to be equal to on cancel. And then we're going to have an X. Okay, so that's the X button in the header. Now beneath that we're going to have a form. The form is going to have an onsubmit. The odds submit is going to be the handle submit function that we already wrote. Inside of the form, we're going to have some form groups. So, we're going to have a first one. So, we're going to have div class name is equal to form-group. Then, for the first form group, we are going to put the title. Okay. So, let's put that here. We're going to say label and this is going to be class name is equal to form- label. We're going to say HTML 4. So, HTML 4 is equal to label or is equal to title. Sorry. The label is going to say title. And then beneath that, we're going to have an input box. So, we're going to say input. And for the input, we're going to say ID is equal to title. We're going to say type is equal to text. We're going to say class name is equal to the form dash input. We're going to say the value is equal to the title. So let's do that there. We're going to say on change is equal to and this is going to be e and then this is set title e.target dot value. Okay. Then we're going to have the placeholder which is equal to enter task title. And then we're gonna have autofocus true. Okay, so this is the first input that we need. Now we're going to copy this entire one and we're going to go to the second input which is the description. So same thing, form group form label. This time we're going to write description. Then we're going to put description here. So description and just spell description correctly. Okay. Okay. Now rather than the ID being title, this is going to be description. Now this time rather than input is going to be a text area. The ID is description. We can remove the type. The class name is going to be form dash text area. The value is going to be the description. Again, I keep spelling description incorrectly. Rather than enter the task title, we're going to say enter description. Okay. Okay. And then this is going to be optional. Let's spell description correctly. And rather than set title, this is going to be set description. Okay. So that's the description. And then lastly, we need to handle the status. So same thing, let's copy this just to give us a head start. Let's paste it. We'll have the label again. And this time we just change it to say status. So status. And here this will say status. Now, rather than a text area, I'm actually just going to delete all of this because we're going to use a select box. So, we're going to say select and then we're going to say inside of the select here, the ID is equal to status. We're going to say the class name is equal to a form dash select. We're then going to say the value is equal to the status. And we're going to say onchange is equal to same as before e. And then we're going to say set status e.target. Okay, target dot value. And then inside of the select, we're going to put the select options. So we're going to say option value is equal to pending as the first value. And then for the text, we'll just put to-do. We can copy this two times and then put the other options. So rather than just pending, we're going to have started and we're going to have completed. And then for this, we'll have in progress and we'll have done. And then lastly, we just need one more div here to actually um what do you call it? Complete the action. So we're going to say div class name is equal to form actions because this is where we're going to put the submit button. We're then going to put a button. For the button, we're going to say type is equal to button. We're then going to say class name is equal to btn btn dash outline. We're going to say on click is equal to and then this is going to be on cancel. This button is going to say cancel. And then we're going to have one more button. Let's copy this one here. This one is going to say the following. So if we're editing so we're going to say is editing question mark then we're going to say save changes otherwise we're going to say create task and then rather than the outline this is going to be btn btn primary and we don't need an on click because this will be handled in the form submission because we're going to change the type to say submit and that should complete this form. All right so now that the task form is created what we're going to do is just export this. So export default task form and we're going to bring it in to our I think it's the canban page where we want to display it. Yes. So we're going to first import it from the cananban page. So let's go import task form from task form and we're going to go down here where we say show form and we're going to show the task form and pass the props that we need. So we're going to say task is equal to and this is going to be editing task. Then we're going to have the onsubmit. So onsubmit is equal to handle sububmit. And then on cancel is going to be equal to handle cancel. And let's fix the formatting a little bit so that we can actually read this. We're not going to call these functions. We're just going to pass the function names. And there we go. We now have the form. So let's test this out and see if the form works. Okay. It looks a little bit messed up. So I think I probably messed up some of the CSS. Uh, let me see what I did wrong there and I'll be right back. Okay, so it looks like I have this whole form not actually inside the modal. So I need to essentially copy this whole form and we're just going to delete it from there and place it inside of the modal div so it gets moved inside there. Okay, so that's good. Now if we go back and we go add task, you can see that it shows up as a proper modal. Okay, so let's try to add a task. Let's go hello world, new task. and create it. And we can see that nothing is happening. Okay. So, let's check our console and see if we're getting any errors here. And it says failed to fetch. Um, you know, there's a corores error that's been blocked. Okay. Let me have a look at this and I'll be right back. Okay. So, I just found the error here. Essentially in our backend in our task schema, we have an ID which is an int which actually needs to be a string. So, if we change this to a string, it should fix it. We were getting an internal server error that was saying unable to parse int as string. So we just need to fix that which I just did again. Go to back end go to app schemas task and then simply switch the ID in the task response from an int to a string. Now if we go back here let's just refresh and try it again. And you can see these tasks get created and actually were created. They simply uh were not being shown on the screen because we were getting an error. Now, we also have an error with this X button that I want to fix. So, I'm going to look at the styling for that. Let's try to delete it. Looks like it deletes successfully. Let's try to edit it. Looks like we can edit it as well. Perfect. So, it's working. And let's just try to add another task. So, let's go test. Okay. Hello. Create uh this task. And we have hello. Um, okay. Let's just refresh here. And yeah, it looks like we are good. Yes. Test. Hello. Like that. Perfect. Okay. So, let's now fix the styling because this is a little bit messed up on the card with the X button and the description kind of showing here and then we'll go from there. Okay, so the issue is just that we have the description inside of the wrong div in our task card. So, we're just going to move it out here like that. Uh, now in order to fix this, just go to the task card, scroll down to where you see the description, and just move it out one div. So, we had it inside of this div, the header. We don't want it in the header, we just want it outside of that. And then we should be good to go. And if we come back here, you can see now the description is below and the X button is in the top right, which is exactly what we're looking for. So at this point, the tasks are working. Now this member count doesn't seem to be working, which we can have a look at. But the next thing we need to do is have a look at actually increasing the organization member limits and the pricing. So we can have subscriptions and billings, etc. So let's change over to this org. And I just want to show you that if I go into an organization here and I go to manage for example and members, I can invite members. So let me invite some more members and show you what happens when we try to invite more than two. Okay, so I just invited Tim at dev launch.us, one of my other emails. And when I went to this email, you can see this is the email I received, right, where it says, "Hey, development invitation to join test." I'm going to accept that invitation. When I accept the invitation, it should actually redirect me back to my front end. And you can see that it does. And I am. Let's have a look at it here. Signed in with the other account. So, let me just sign out and sign in with this new account that I accepted the invite from. Okay, so I actually just accepted the invite again because since I was already signed in, it gave me an error. But when I accepted the invite, when I wasn't signed in cuz I just signed out. You can see it just asked me to fill in a password. So, let's just use that password. That's fine. Press continue. And now you can see that I'm signed in as Tim at devaunch us. And the only organization I'm in is test in which I am a member. So, let me now sign out of this account. Actually, let's go to the dashboard. So, we can see the same taskboard as we saw before. But notice that I can't do anything. I can't edit or delete or add a task because I'm just a member. I'm not an editor. So, let me sign out of this. Let me sign in with my other account. Now, you'll see that it's Tim at techwithim.net. If I go to the dashboard now, I can actually change stuff because I am an editor or in this case an admin. And what I'm going to do is try to invite another member. As you can see, Tim at devaunch is invited. And when I press invite and I go, for example, you know, canydevaunch us and I want to send that invitation, it says I cannot because I reached a limit of two organization memberships. So that's exactly what we want. But what we want now is that we allow the user to actually create a subscription where they buy our pro tier, which then allows them to invite more members. So let's start setting that up inside of Clerk and then we'll fix this member count issue as well. Okay. So, we're going to go back to clerk. We're going to go to configure and we're going to go to the billing. Now, from the billing, we have the subscription plans, right? So, we created the pro tier. Just make sure you have that. Now, all we need to do is actually use this pricing table component directly inside of uh our website to be able to display the different tiers that we have here and then a user will be able to purchase it. So what I can do is I can go to pages, go to my pricing page, and I can write a really simple component that just displays the different pricing options. So in order to do that, I'm going to say import, and then I'm going to say use organization from clerk/clerreact. I'm also going to import the pricing table as well as the create organization view from clerk clerk react. Okay. Okay. And actually all of this can just be together, but I think we'll just leave it in two because it's a little bit easier to read. We now have the pricing page. From the pricing page, I'm going to say const and this is going to be organization and then membership like this is equal to use organization. Okay. And what we're going to do is we're going to make sure that this member is an admin before we allow them to view this page because only an admin should be able to manage the subscription and billing of the organization. So we're going to say const is admin is equal to membership question mark ro is equal to or colon admin. Okay. Now we're going to say if there is no organization because it's possible the user is not a part of any then what we're going to do is we're going to say return div we're going to say class name is equal to pricing dash container we're then going to say div class name is equal to no-org container we're going to have an h1 it's going to say view pricing the class name is going to be equal to no or d-title. Underneath the H1, we're going to have a P and we're going to say class name is equal to no-org text. And the text here is going to say create or join an organization. Okay. To view pricing plants. Cool. And let's spell join correctly. Then underneath this we're going to put the create organization modal and we're going to say after create organization URL is equal to slashpricing. Cool. So we have that now. So if there's no organization it will show them this. Otherwise we need to show them the pricing table. So we're going to go here and we're going to say div. We're going to say class name is equal to the pricing dash container. Then we're going to do a div. We're going to say class name is equal to the pricing dash header. Then we're going to have an h1. We're going to say class name is equal to the pricing title. Then we're going to say simple transparent pricing and we'll remove this comma because that doesn't make sense. Underneath the H1 we'll put a paragraph tag and we'll say start free with up to two members. Upgrade to pro for unlimited members. Okay. Then we're going to go beneath this div and we're going to check if they are an admin. So, we're going to say is admin question mark. If they are an admin, we're going to put a paragraph tag and we're going to say sorry if they're not an admin because we have the exclamation point. So, if they're not admin, we're going to have the class name equal to and this is going to be text-muted and then pricing-minote. And this is going to say contact your organization's admin to manage the subscription. And then otherwise, okay, so let's go here. Otherwise, what we're going to do is we're going to display the pricing table. And it's important that we put for organization because sometimes you can have individual uh pricing as well as organization pricing. So in our case, we just go organization. And then we spell subscription correctly. And now if we go to the pricing page, we should see the pricing table. So let's go here, refresh. Let's go pricing. Uh, and you can see because we are the admin of the organization, it shows us the free tier as well as the pro tier. And what we can do is we can subscribe to the pro tier. So, let's do that. If we subscribe to the protier, we can just pay with the test card. So, let's do that. And when we pay with the test card, we'll just go continue. It will make the payment. And now, if we go back to pricing, you can see that this pricing is active and we are pro. So if we go back to dashboard, uh, okay, it's giving us an error saying view permission required. Let's see why we're getting that. Okay, so I just had a look at this and the reason why we're getting that error is because if we have a look in the plans here in our pro tier, we needed to add this tasks as a feature to the organization in order for any of the other permissions that we apply per the user roles to actually work. So effectively what we need to do is we just have to go here to add feature and then just check on tasks and when we do that now all of this is good and this feature will be available to people that are in the pro tier. Now by default it is available to the free tier. So if you have a look here you can see it's already in there. If we didn't want users to be able to create tasks in the free tier we could just remove that feature but I need to add it to the pro tier so it's available there as well. That's why we're getting that issue saying hey you don't have permission to view this. But now it's working because I readded that perm. Okay. So now the pricing is working. If we go to the organization and we manage it for example, we can actually view the billing right now and we could manage it. We can cancel the subscription. We can change the plans. We can view the billing history, the statements, the payments, the payment method. All of that kind of stuff is handled directly by clerk for us. Cool. So, let's quickly fix this members count and then let's move on to the next feature which is actually allowing the organization to invite more members because right now if I go here and I try to invite someone else you'll see Kenny at devalanche us. It's not going to allow me to do that because I haven't yet updated the organization membership limits. Okay, so the issue is pretty straightforward but effectively I forgot to write memberships instead of membership. So I just need to change to say memberships and this to say memberships. And now if we go back here and we have a look, you can see it shows to members and the count is now updated. Okay. So next, like I said, what we're going to do is make it so that we can actually update the subscription account or update the number of members, sorry, for a particular organization when it upgrades to pro. So if you go to settings for example inside of organizations right you'll see that it says limited membership but it shows us that we can actually update the membership in the dashboard or the number of members or via clerk's backend API. So if we click into this you'll see clerk has all kinds of different APIs that you can use. One of which allows you to actually change the max allowed memberships per an organization. So what we're going to do is we're going to create a web hook where when someone purchases the pro subscription and it's verified by clerk, we send a request to clerk telling it to update this organization so that it can have more members. Now the way the web hook works is that we're going to set an endpoint on our server that clerk will send a request to to tell us, hey, this user just purchased Pro. when they purchase Pro for an organization, we're then going to tell Clerk, "Hey, go ahead and update the membership count so they can have unlimited members." So, in order to do that, we're going to go into Clerk. We're going to go to developers and then web hooks. Now, when we go here, what we're going to do is create a new web hook. So, we're going to go add endpoint and we're going to scroll down and we're going to find, let's have a look at this here, subscription. And we're just going to check check the box right here for subscription. When we do that, anytime anything changes with a subscription, clerk will send a request to the URL that we're going to put right here. Now, in order for the web hook to work in development, we're going to use something called Enrock. Enro is free and it works as a proxy that allows you to take a public IP address and associate that with something running on local host or your own computer. So, what you're going to need to do is download Enro. I will leave a link to it in the description. You also can just search for Enro. Once you download it, you're going to need to sign into an account. So, make a new account on Enro and then sign into it in your terminal. The way that you're going to do that is you're simply going to go in your terminal. Once Enro is installed, you're simply going to type Enro. When you do that, it's going to tell you to sign into Enro. In my case, I'm already signed in, so I don't need to do anything. And when you try to sign in, it's going to prompt you to sign in with the browser. You can sign in. It will connect your account. and then you are good to go. So download Enro. Make sure you create an account on the website. Sign into that account from your terminal by either just typing the command I'm about to type or typing enrock. It should prompt you to sign in. And then type the command enro http8000 where 8000 matches the port that your backend server is running on. So port 8000. Okay. When you do that, it's going to create a forwarding URL. So this one right here is what we want to look at. And now any requests sent to this URL will be forwarded to your backend API. So localhost port 8000. This allows us to test in development mode the web hook which you're going to see in one second. Okay. So what I'm going to do now is I'm going to go to my clerk here and I'm going to paste this URL. Make sure you remove all of the spaces and I'm going to put slash API slash web hooks like that. I'm then going to put one more slash and I'm going to put clerk. So now what will happen is anytime a subscription changes in my clerk project, it's going to send a request to this endpoint, which is one that we're going to write in 1 second in fast API. So we're going to go ahead and press on create. And then from here, we're going to grab the web hook signing secret. So we're going to reveal that and copy it. We're now going to go back into our code. We're going to go into our back end now. So no longer our front end. We're going to go to our env file. We're going to paste the clerk web hook web hook, sorry, secret. Now, this secret is going to allow us to actually verify that the request that was sent came from clerk because anybody can hit this web hook that we're creating. So, we have this special key that clerk is going to send along with the request. We're going to look at it. We're going to go, okay, if you're actually clerk, then you would have sent this key. If it sends the key, we know it's clerk. It's good. we could actually verify that web hook request. If they didn't send the key or the key is wrong, then it means someone is trying to fake being clerk and kind of get like a free pro account, which we're of course not going to allow them to do. So that's why you need this signing secret to verify the web hook. Okay. So now what we're going to do is we're going to go into app API web hooks.py and we're going to start writing this file. So we're going to say import json. We're going to say from fast API import the API router request http exception let's spell that correctly and status. We're then going to say from sphix svix web hooks import and we're going to import web hook and web hook verification error. We're then going to say from app.core.config config import settings so we can get the web hook secret and we're going to say from app.core.clerk import clerk. Okay. Now what we're going to do here is we're going to create a router because this is going to be an API endpoint. So we're going to say API router and this is going to say prefix is equal to slappi/web hooks. Let's spell web hooks correctly. Then we're going to say tags is equal to web hooks. Then we're going to say procore tier slug is equal to procore tier which is what we're going to look for from the web hook data that is sent to us. We're going to say the free tier limit is equal to the settings.free tier limit. And we're going to say the unlimited limit is equal to and we're just going to put a really large number because when we set unlimited number unlimited uh sorry seats it's not truly unlimited. We're just going to set a really really large value so you can have as many members as you want. We're then going to make a function. So we're going to say define set_org member_limit. We're going to say org id string and then limit int. And then what we're going to do is say clerk.organizations.update directly from the clerk SDK. And we're going to say the organization ID. Okay, so organization ID is equal to the org ID and the max allowed memberships is equal to whatever limit is passed to this function. And that's as easy as it is using the clerk backend SDK to just update an organization's membership limit. Now, we're also going to have a function that says has active pro plan and we're going to say items list and then what we're going to do is return a boolean. Now, from here, we're going to say return any and we're going to say item.get plan And then this is going to be an empty dictionary in case plan doesn't exist. Get slug is equal to the pro tier slug and item.get status is equal to active for item in items. Now the reason for this is what's going to happen is whenever the web hook is sent, it's going to give us a bunch of data. In that data, there's going to be a list of items. We're going to look through those items to see if any of the items refer to the plan, right? So, we're looking for plan. And if it does refer to a plan, we're going to check the name of the plan, which is a slug, to see if it's the pro plan, and we're going to see if it's active. So, if we found a pro plan that's active, then that means we need to update that organization's membership limit, which is what we're going to do. So, we're going to have an at@ routouter.poste event here. We're just going to post this to /clerk and we're going to say async define and this is going to be the clerk web hook. This is where we're going to actually handle the request coming from clerk. We're then going to say inside of here the payload is equal to await and this is going to be the request.body. This is the data that clerk is sending us. And we're going to say the headers is equal to the dictionary of request do headers. Then we're going to attempt to verify the web hook. So we're going to say if settings.clerk webhook secrets. Then what we're going to do is say try and we're going to say wh is equal to web hook and we're going to say payload and then headers and we're going to say event is equal to whverify and we're going to verify with the payload and headers. And sorry, the web hook, I just wrote this in the wrong way. It needs to be settings.clerk web hook web hook secret, sorry. Okay, then we're going to say accept. And we're going to accept a web hook verification error. And we're going to raise an HTTP exception. We're going to say status.http. And then this is going to be 400 bad request. We're going to say invalid signature. Okay. So what we're doing right now is we're essentially just verifying to see okay is the data that was sent to this web hook actually valid. So we say do we have a web hook secret? If we do we're going to create a web hook object and we're going to verify that the data that was just sent to us is valid and contains that signature. Now otherwise we're just going to say event is equal to JSON.loads and then payload. So if we didn't define a secret then we'll just allow anything to hit this endpoint. Okay. Then we're going to say the event type is equal to event.get and we're going to get the type because the web hook is going to respond to different events related to the subscription. So like created, cancelled, passed to etc. Right? It's going to send all those different types of events. So we need to look at those events and then handle the correct ones. We're then going to say data is equal to event.get data and then an empty dictionary in case data doesn't exist. and we're going to check the different events that could occur in this web hook. Specifically, if a subscription was created or was updated or if a subscription was deleted or cancelled. So, we're going to say if event type is in sorry and this is going to be a list. We're going to say subscription docreated or subscription dot and this is going to be updated. So these are the ones where we're essentially going to allow the user more limits or more seats. We're going to say org ID is equal to data.get and then payer. This is the person who paid. Okay. Get the organization ID. So we're looking for the ID of the organization of the person who paid. Then we're going to say if org ID what we're going to do is say limit is equal to and then this is going to be unlimited limit if the has active pro plan data.get and then here items otherwise an empty array and sorry that needs to be inside of here. Okay. Otherwise, we're going to say else free tier limit. All right. So, we're going to make the limit unlimited if they have an active pro plan. So, we're going to check the plan to make sure that it is actually active. If it is active, then we'll give them the unlimited limit. Otherwise, we're going to set their limit to the free limit. Okay. Then underneath this if so in the same block, we're going to say set_org member limit. And then we're just going to pass the org ID. So or id and this new updated limit. Okay. Now l if the event type is in and now this is going to be the subscription.deed or the subscription. Then what we're going to do is say the org ID is equal to data.get. And same thing as before we're going to get the payer. Okay. And then we're going to get the organization ID. Then we're going to say if there is some org ID, we're just going to set the org member limit of that org ID to be the free tier limit because they canled their subscription. Then we're going to return received is true. Okay, we just got to spell received correctly. So that's all we need for the web hook. Now clerk can send a request to this. We can handle that request and we can update the limit for a particular organization. So if we go now we can just refresh the web hook. Okay. Now from here we can go to testing and we can test this with a particular event if we want and we can see if that works. However, we'll just test it with a new organization. So we're going to go here. I'm just going to refresh. What I'll do is just swap over to my test 123 organization. Now, I want to verify with this organization that we cannot invite more members. So, let's try to invite a few. Let's go. Timwithtim.net or timdevaunch us. Okay, let's send the invitation. Let's try to send another one. Let's go kenny at devaunch us and send that. And it says we've reached a limit of two organization members. Now, what I'll do is I will upgrade to that pro plan. So, I'm going to go pricing and I'm going to go subscribe. Okay. From here, I'm just going to pay with the test card. And when I pay with this now, let's go continue. And now, I'm going to go to my dashboard. I'm going to go here, manage members, and I'm going to try to invite Kenny. So, let's go Kenny at devaunch. us. And we got an error. So, let me check my logs. And it looks like the web hook is saying it was not found. So API web hooks clerk. Aha. So the reason why is we did not actually connect the web hook to our main app which I need to do right here. So let's connect the web hook. The way that we can do that is we can just go here. We could say from actually web hooks. We can just import it like that. And then we can simply say at app.include include routouter and then web hooks.outer. Okay, so now that we do that, the web hook should work. However, it's giving us an issue saying there's no free tier limit in our settings. So, let's quickly go check our settings and see if that's the case. Config. And we do have a free tier free tier membership limit. Okay, so let's just change this to just say limit and then run this. And hopefully now it should work. Okay. And now let's test the web hook again. So what we can do is we can go to for example billing. We can go manage and we can cancel this. And then let's just do it again. So now go manage and okay let's go resubscribe and subscribe. Continue. And now if I go look in my logs, you can see that it posted to the web hook. And now if I go to my organization and I try to add a new member. Let's try it. Okay, Kenny ate devaunch US. Let's see. And you see that the invitation goes through because it successfully updated our libby. Now, if we were to cancel, then it would again not allow us to add more members. You get the idea. Okay, so that is pretty cool. And honestly, with that said, that's going to wrap up everything that I wanted to show you in this video. We handled pricing, we handled permissions, we handled different member roles, we handled billing, we handled organization, we handled signing in, signing out, web hooks, front end, backend. A lot of things went into this project. And all of the code for this project will be available from the link in the description in case you missed anything or you want to copy anything directly. Overall, the major thing here is that using Clerk and some of the features that I showed you and take in there's a lot more that you can use, you can build a full B2B SAS that allows you to collect money and handle all of the complex organization roles and permissions without having to write all of the code manually. So, if you guys enjoyed the video, make sure leave a like, subscribe to the channel, I will see you in the next one.
Download Subtitles
These subtitles were extracted using the Free YouTube Subtitle Downloader by LunaNotes.
Download more subtitlesRelated Videos
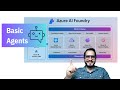
Download Subtitles for Azure AI Foundry Basic Agent Setup
Enhance your learning experience by downloading accurate subtitles for the Azure AI Foundry Basic Agent Setup video. Follow step-by-step instructions easily with clear captions, ensuring you don't miss any crucial details. Perfect for accessibility and improved comprehension.

Download Subtitles for How I Started My Small Business Video
Enhance your learning experience by downloading accurate subtitles for the 'How I Started My Small Business' video. Captions help you follow along easily, catch every tip for shipping and selling online, and ensure you don't miss any important insights. Perfect for visual learners and non-native speakers alike.

Download Subtitles for Introduction to DaVinci Resolve Full Course
Enhance your learning experience by downloading accurate subtitles for the Introduction to DaVinci Resolve full course. Captions help you follow along effortlessly, improve comprehension, and make the tutorial accessible anytime, anywhere.

Download Subtitles for CLAUDE CODE Full Course 2026
Enhance your learning experience with downloadable subtitles for the CLAUDE CODE FULL COURSE 4 HOURS: Build & Sell (2026). These captions help you follow along easily, improve comprehension, and revisit key concepts anytime. Perfect for learners who want clear, accessible content at their own pace.
Download Subtitles for WooCommerce SEO Tutorial with Yoast Plugin
Enhance your learning by downloading accurate subtitles for our WooCommerce SEO optimization tutorial using the Yoast free WordPress plugin. Easily follow along and grasp every step to improve your product listings and boost online visibility.
Most Viewed

Untertitel für 'Nicos Weg' Deutsch lernen A1 Film herunterladen
Laden Sie die Untertitel für den gesamten Film 'Nicos Weg' herunter, um Ihr Deutschlernen auf A1 Niveau zu unterstützen. Untertitel helfen Ihnen, Wortschatz und Aussprache besser zu verstehen und verbessern das Hörverständnis effektiv.

ดาวน์โหลดซับไตเติ้ล DMD LAND 3 The Final Land Day 1
ดาวน์โหลดซับไตเติ้ลสำหรับวิดีโอ DMD LAND 3 The Final Land Day 1 เพื่อช่วยให้เข้าใจเนื้อหาได้ง่ายขึ้น และเพิ่มความสะดวกในการติดตามทุกช่วงเวลา เหมาะสำหรับผู้ชมที่ต้องการความชัดเจนและเข้าถึงข้อมูลอย่างครบถ้วน

Descarga Subtítulos para NARCISISMO | 6 DE COPAS - Episodio 63
Accede fácilmente a los subtítulos del episodio 63 de '6 DE COPAS', centrado en el narcisismo. Descargar estos subtítulos te ayudará a entender mejor el contenido y mejorar la experiencia de visualización.

Subtítulos para TIPOS DE APEGO | 6 DE COPAS Episodio 56
Descarga los subtítulos para el episodio 56 de la tercera temporada de 6 DE COPAS, centrado en los tipos de apego. Mejora tu comprensión y disfruta del contenido en detalle con nuestros subtítulos precisos y accesibles.

Download Subtitles for Your Favorite Videos Easily
Enhance your video watching experience by downloading accurate subtitles and captions. Enjoy better understanding, accessibility, and language support for all your favorite videos.

If you found these subtitles useful, consider buying us a coffee. It would help us a lot!