Why Use Instagram Carousels for Growth?
- Carousels reach your actual followers more effectively than reels, which Instagram initially tests on a small subset.
- High-performing carousels can be pushed to the Reels page, gaining reel-like exposure without posting reels.
- Carousels are low-impact content: no audio needed, easy to consume and share.
- They get more shares and saves than reels, increasing visibility on the Explore page.
- Instagram gives a second chance to show carousel posts by displaying subsequent slides if the first is skipped.
Types of Carousels: Informative vs. Revelational
- Informative Carousels: Teach or build authority on a subject (e.g., "5 tips to lose weight"). Use personal hooks like "How I lost 10 pounds" to increase relatability.
- Revelational Carousels: Each slide is a standalone thought that can be shared independently, increasing shareability and engagement.
- Carousels provide multiple opportunities (slides) to engage and capture audience attention compared to single-chance reels.
Design Essentials for Viral Carousels
- Use minimal text and strong imagery to keep content digestible and visually appealing.
- Include a human face or personal photo on the first slide to boost engagement.
- Maintain a clean, modern, minimalistic design style.
- Use Photoshop with a 2160x2700 px (4x5 aspect ratio) canvas for high-quality images.
- Organize layers into folders: images, adjustments, text, and textures.
Photoshop Editing Tips
- Apply a slight box blur (radius 2-4) and 15% noise filter to images for a film-like texture.
- Lower exposure and brightness slightly to make text pop.
- Use grid alignment (5 boxes down, 3 boxes in) for consistent text placement.
- Customize font kerning (letter spacing) to around -80 to -100 for a modern look.
- Add a paper texture overlay at the end to give a unique graphic design feel.
- Use content-aware fill to simplify busy backgrounds and improve text readability.
Efficient Carousel Creation Workflow
- Copy and paste images directly from Pinterest into Photoshop to save time.
- Duplicate artboards with all layers intact to quickly create multiple slides.
- Save your work as a template and manage file size to avoid high RAM usage.
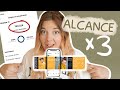
Proven Results
- Gained nearly 70,000 followers in 2025 using only this carousel strategy.
- Achieved over 11 million views in one month posting only carousels.
- One post reached over 1 million views, with significant traffic from the Reels page.
Additional Resources
- Free Photoshop carousel template linked in the video description.
- Recommended Photoshop alternative: Photop (free online tool).
- Personalized coaching program available for creators seeking brand strategy and content systems.
Final Advice
- Customize templates with your own fonts and branding to stand out.
- Focus on creating visually appealing, easily consumable content.
- Experiment with both informative and revelational carousel types.
- Consistency and quality design are key to viral growth on Instagram.
Start creating your own viral Instagram carousels today and watch your follower count soar!
For more insights on Instagram growth strategies, check out our guide on the Step-by-Step Instagram Growth Plan to Reach 10,000 Followers Fast and learn how to effectively leverage content creation with Unlocking Instagram Growth: Mastering Content Creation with Brock Johnson. If you're interested in photography tips, don't miss our article on How to Take Perfect Instagram Photos: Prep, Poses & Editing Tips.
Additionally, explore how carousels are transforming engagement in our piece on Cómo los Carruseles Están Revolucionando Instagram para Aumentar el Engagement.
These resources will provide you with a comprehensive understanding of Instagram strategies to enhance your growth!
I've gained nearly 70,000 followers on Instagram in 2025 using only this carousel strategy. And it's very simple.
So, I wanted to walk you through it. And I'm even going to build out one of my carousels for you in this video, too.
So, if you want to follow along and learn how I make my carousels and start growing for yourself, then watch this
video. So, first off, I want to talk through a little bit what the strategy is. If you're looking here, this is my
Photoshop document. And this document here uh accounts for over five million views. And it's all pretty simple stuff.
Overall, the designing is is practically just image and a tiny little bit of text. It's nothing crazy. It's nothing
wild. Um you're not going to see this in really great detail here because it is uh very zoomed in, I guess, um from a
screenshot. But overall, there's very minimal text in what I do. So, it's not about having a ton of information on
your carousels in order to get a lot of views. It's more about how you present that information in a way that is easily
digestible, easily consumable, and easily sharable. So, let's go through it. My secret growth strategy, and I
kind of stumbled upon this, but I had a good feeling that it would work. First off, why carousels? On Instagram,
carousels reach your actual followers. When you post a reel on Instagram, it honestly doesn't go out to very many of
your followers. It kind of does this little test out on a few of your followers to see if they'll engage
before Instagram decides to send it to more of your followers, which I think is just stupid. If somebody's following me,
send them my posts. Why are you doing this stupid test to try to see if you want to send it to more of my followers?
And the benefit of carousels as well is if they perform well, they'll actually push it to the reals page. You've
probably seen this yourself when you're scrolling on Instagram and all of a sudden there's a gallery that you can
swipe through. This is what Instagram does. It can post your your carousel to the reals page. So now you're getting
the benefit of reels without even posting a reel. Um, another reason carousels seem to get a lot more shares
and saves than um reals do. Mostly because I think they're a low impact form of content. And I say low impact
meaning anyone can really watch it. You don't need the audio. You don't need a listen. It's all about reading. So, you
can consume it kind of at your own pace and it's not really forced on you. And so, with that, it makes it very very
easy to consume and very easy to share. And then lastly, I find that carousels and and photo posts get shared to the
explore page a lot more than reals do, which allows your post to even get seen by people who might not be following
you. Also, this is why I think carousels are great. And all of it starts off obviously with having good design. And
if your carousel looks boring, no one's going to click on it. No one's going to swipe through it. So, I'm going to go
through my strategy of kind of making carousels that look good. Now, I want to give a little bit of the sauce. Uh, if
you haven't watched my last video, you can go watch that. There's some information again on all this topic as
well. Um, but I think there's really two types of carousels that people are generally going to make whether they
know it or not. I call these informative and revelational carousels. Can you can swap out revelational with inspirational
as well. I'm not even going to try to write that out. It's just annoying. Um, but the two types of carousels that I
see most people making are informative and revelational. Informative just meaning it's teaching something. It's
building authority in some sort of subject. And this lets you build kind of like a I mean, you can think of it as
like five things you should do if if you want to lose weight, right? Um, I would say though, I'll talk about this in a
different video, but I'm just going to bring it up now. If you're using a hook, try to make the hook more personal and
less preachy. So, everyone's used to hearing how to, how to, how to. Instead, if you flip the switch, flip the script
and say how I, how I lost 10 pounds, how I lost 15 pounds in three weeks. Now, it's it's a lot more I can relate to you
because I think you're a person that I can trust. And if you're talking about your story, it's easier for me to kind
of picture what it looks like. Now for me, instead of saying how to, I'm being told how to do stuff all the time. It
doesn't make me do it right. You remind people all the time and they still don't do things. But if you show them the way
that you've done it now, it makes me a little bit more interested because there's this there's this almost hero
story beginning in that that oh, I can relate to the hero and maybe I want to, you know, try it try along what they
did. Anyway, that was a little tangential. Informative posts, pretty self-explanatory. It gives you
information on a subject. Revelational posts, though, these are kind of where each slide is a standalone thought. It
can be shared on its own. You don't even need to know the prompt in order to get the message of what this this slide
means. The reason this doesn't happen on inform informational um carousels is because if it's like five things you
should do and you're like tip number four do this, no one's really going to share just tip number four. It doesn't
really make sense for them. But with this revelational slide, if it's a standalone thought, it's not really
connected to the prompt, although it is. If you know the prompt, it makes it easier to understand the the slide. Now
somebody can share that without there being this this thing tied to it that they must understand that to know what's
going on. So each sli each slide can be a standalone thought. It can be shared by
others as a series or as individual posts. And the way that I like to think about this is that it gives you many
times to engage your audience. When you make a reel and you spend four hours on it or however much time you spend making
this reel, you got one chance to gain attention. You get one chance to capture and hopefully have somebody share this
post. With carousels, if I have 10 slides, I I essentially have 10 chances to capture that audience and have them
share it out. Now, this isn't necessarily completely true. Somebody might get three slides in and get bored
with the information that you're sharing or the design is crappy so they don't want to continue scrolling. Which is why
it's important that we um make these slides look good. We make the information digestible so that they
continue to swipe through and as they're swiping through they can share out kind of you know somebody might relate to
slide three or somebody might relate to slide four and so they might share different slides.
whole thing here is that it gives us more chances to really capture the attention of our audience. Second thing
too, Instagram does this interesting thing where if you post a carousel, if it comes across your followers
profile like on their feed and they don't look at it, like let's say your first slide pops up and they don't
really look at it, they don't swipe through and they kind of just keep scrolling, right? Maybe they they didn't
see it so they scrolled past. Instagram is going to give them a second chance to see your post and show the next slide.
So now it's going to pop up on their feed twice. Your reel does not do that. Anytime you post a real, if it if it
shows up on their post or on their feed, if they don't watch it, they don't watch it. And you get no more chances. That
sucks. Honestly, that just sucks for the creator because now you get no extra chance to try to capture the attention
of your audience. So, this is why I think carousels do so well. And this is why it's done so well for me. If you
look at this, these are the results. January 2025, I had 180K followers. And then here in July 2025, I have sitting
at, and this is honestly, this is like from two weeks ago, not even. I think a week ago, I'm at like 247K
now or something like that. So, I've gained nearly 60,000 followers. And um you can look at the the analytics here.
These are just screenshots from uh my dashboard and one of my posts that got a million views. You can see here what I'm
talking about as it gets pushed to the reals page. That other 881,000 views, that other is the reals page because you
can see from the explore page, it's got 8,000. From profile, it's got another 6,000. From the homepage, this is my
followers. Um well, some of my followers and some not. But that other is coming from reals. Um and stories are blended
in there too. I get a lot of views from stories, from people sharing stuff. And then um you can see that just from
February to March alone, I had over 11 million views. And I was posting only carousels, only uh graphic posts, no
reals. And I gained over 50,000 followers in that month. 54,000 new followers, which is insane. In just one
month, I gained 54,000 new followers. So, this is a strategy that works and I want to show you how you can start
making your carousels. Now, I'm going to walk through it with you. If you want to find the file, by the way, I linked a
file down in the description if you want to follow along with me and create your own carousels. Cool. It is a Photoshop
file. Just saying if you don't have Photoshop, you can use I think there's a a Photoshop alternative online called
Photop. It's not exactly the same as the Photoshop that I use, but you can still follow along if you want the free
version. Otherwise, highly recommend. Invest the $10 into Photoshop and just use Photoshop. It's so so useful. I It's
pretty much the only Adobe product that I use. So, um, use it if you want to, but you can follow along with me. Now,
really quick here. If you're a creator who's been posting for a while and just isn't seeing the results that you want,
whether it's growth or turning your content into clients, I want to extend my program out to you. We build you a
clear brand strategy, a content system that actually converts, and a premium offer that reflects the value that you
bring. This isn't about posting more and growing faster. It's about building a business that aligns with who you are
and generates real revenue. So, if you're ready to stop feeling scattered and start building something
sustainable, DM me the word DACA on Instagram. So, this is the Photoshop file that I will be using to create my
graphics. Um, I keep the file size at 2160 by 2700, which is just a 1080 by350 or 4x5 aspect ratio, uh, but at a higher
quality so that I'll get the best quality photo that I can for my graphics. I don't know if this is
scientifically true or proven on Instagram, but I just like it gives me more comfort knowing that it's a higher
quality photo. Um, and I've noticed that with the designs that I make, it's usually better to have more pixels than
less. So, um, I recommend that if you're going to create this in Photoshop, use a 2160 by 2700 aspect ratio. If you're not
using my file, then do it yourself. And then I also create artboards. So, there's a little check box when you
create a new file. So, if I go to create a new file, there's a little uh check box here that says artboards. So, you
would check that and that's what gives you these little artboards. Originally, it'll just have one artboard, and if you
want to make more, you have to click on the top of it, and it'll have these little boxes that you can click to make
new artboards, but I'm going to delete that one because I don't want that. So, right away, I already have an image
placed in here that I work on. Um, I recommend if you're going to use something like a personal hook like
realizations I made following Jesus in my 20s, which is one of my best hooks that these seem to get a lot of views,
um, probably put a picture of yourself in it. And honestly, for most carousels, I would probably put a picture of a
person or some sort of human, if it's not you, on the first carousel. Why? Because people relate to people. And
it's proven that when people see people and people see faces, they engage more. So, you probably want to put your face
out there, a picture of you out there. Um, or if you're just having a picture of a random person through Pinterest or
something, um, take a picture of a person. So, I already have put this in here.
Your file probably won't have a picture of me, so sorry. Um, and it really wouldn't make sense for you to edit
pictures of me anyway. So, um, that's fine. But what I do to my photos, I I take a photo on my Fujifilm X100 6. Uh,
I love this camera. It's very good. It's got like a film style already built in as a digital camera, but you can use an
iPhone, whatever. I like to give it more of a film look, though. And right away, just out of camera, it doesn't have
enough of a film look for me. So, what I do is I add a little bit of a box blur. And as it pops up for my first slide for
my selfie, I don't want it to be super blurry. So I usually go with like a radius of two on my blur. And then
afterwards, I add a noise um effect as well or a noise filter. And I use the amount of 15% because I find that it's
not too much, but it's not too little. And it just gives me a nice bit of noise for my image. And then if you notice
within the file that I've given you, if you're in the Photoshop file, I kind of separate my um
elements out into these four kind of folders. You can be as customized with this as you want. This is just what I
do. So I have my images in the bottom. I have my adjustments, which you'll see um what kind of effects they have here. I
bring down the exposure about 1.2 2 just to let my text really pop out because the image isn't the focal point. It's
really the text. That's what's going to hook people in. Then I also go through and I bring the brightness down a little
bit too, which brightness only affects the brighter areas of a image. So if you have a lot of brightness in the
background, this is where the sun comes into my apartment, so sometimes it's brighter. Um, that's where I would apply
that brightness uh adjustment. Um, and then here in the text is where I just have my text. Uh, which is helpful.
Now, something that you're going to use all of the time, or at least that I use all of the time for my Photoshop editing
is the command, well, I'm on Mac, so it's command, u, not comma, command, apostrophe. Uh,
that's going to bring up this grid, which is really where I'm able to align things to very um consistent spots
within my carousels. So, I always go five boxes down from the top and three boxes in from the side or
five boxes up from the bottom, three boxes in from the side. The only time I get flexible on this is honestly the
first um post because sometimes things are arranged in the photo that it just wouldn't make sense for my text to be
there. Right now I'm putting it there. Why? Because there's a big open space here. It gets really hard to read this
text when there's lots of things in the background of it. Right away, I'm going to just lock my photo so that I can drag
over my text to make it a lot easier. If this wasn't locked and I try to drag, it's just going to drag the photo, which
is not helpful. I'm gonna hit command- Z so I undo that. Lock this and drag over this. Now, if I bring my graph back up
here and I drag this around, let's say I bring it down here, right? And there's just a bunch of stuff in the background.
Not that it's hard to read. You can definitely still make it out, but it's still very like it makes it way more
difficult than up here in this blank space. And I might even move this down a little bit more just so that it's out of
the way of this um where I have this light in my apartment. So now it's in this open space. I like that. I'm
probably just going to break my rule of where I place it inside my boxes. I'm still going to keep it three in from the
side just cuz I like it that way. It's less cluttered when it's in in a little bit and it makes it just look a little
bit more designed. So that's why I'm going to put my first text in my first um slide. But just showing you kind of
how I think about what I do here. And now you can see from my other two, these are kind of my typical layouts for my
posts. So I'll either have text at the top left and bottom left or I'll have text kind of centered up um on the left.
And practically these are the only two formats that I use. You can kind of get creative and make your own formats. I
just like the way that these look. I'm a very minimal, modern type of designer. Um, I wouldn't call myself a designer,
but that's the way that I like my text to be laid out. So, that's what I'm going to use here. And then
as I design this, I'm going to show you a few tricks that I do um to help make my designs kind of pop, to give it that
like texture, that graphic design feel that is not like something I designed in Canva, that sauce, if you will, um that
makes my things different than everybody else's. Right away, I've got all my work over here on the side. So, I'm just
going to copy and paste these as we work. So, um I'm bringing in one of my uh
sayings here. I act surprised by suffering, though I follow a crucified king. And
I'm going to capitalize my eyes. I like to keep everything else uh lowercase just because that's kind of trendy right
now. But this is what I do here. And then I'm going to center this up. Um, inside the Photoshop file, if you're
really trying to get customized with your fonts, you can notice here on the right side in the paragraph by your
characters. This is where you really change things around. So, here is the um line spacing, which I keep at 18. I feel
like that's a good line spacing. Some people think it's cramped. If that's you, you can make it longer, right?
Like, oh, I don't want the letters to hit each other. I don't really care that much. I care more about the vibe and I
like the vibe that this brings. And then you can also play around with the kerning um which is what this is called
or the letter spacing. It's really really called kerning. Um I like to put it at about negative
anywhere between negative 80 and 100 is a good amount for me. This is really where you can get customized. It makes
the font different than when anybody else is using because if you're normally using this font, it's going to be set to
zero. And for me, that just doesn't it doesn't hit. That doesn't hit for me. I'm like, uh, no, I don't like that.
It's not good enough. So, I like negative 80. I think it's a good modern minimal type of font. Um, or even
negative 100 is pretty good for me, too. So, that's probably what I would keep it there. And I like this here. I like the
spacing of it. Um, on the left hand side here, some of my other thoughts that I have written down here, I'm going to do
more in this format, which I don't do this this format all the time cuz it's a little bit harder to digest, but it's
still creative and I like it. So, something that you can do with your designs if you want is you can kind of
design out all of the fonts and all of your thoughts. So if I took my next one and I can put it into this text and
design it out without having an image in the background. You can do it that way or you can kind of go one by one and
find an image that applies to it. Right? So for this I could write out my thought and then what I do is I go to Pinterest
to find all of my images. People ask all the time where do you get your images? Where do you get your images? It's just
Pinterest. Um, and the cool thought the cool part about Photoshop is if I copy an image, I can just copy this image on
Pinterest and I can come back to Photoshop and I can just paste. So, what I'm going to do is I'm going to go down
to my images and I'm going to hit paste here. And so now I don't have to save the image and put it on my desktop and
find the image and drag it into my Photoshop. I can just copy and paste the image and that makes things so much
easier. So much easier. I can't even tell you how much time this saves, which is why I really love Photoshop. I think
Canva does this, too. So, if you're using Canva, go ahead. You can do it. And what I'm going to do is I'm going to
do the box blur, and I'm going to do Actually, I need to change this box blur because it's still at that two from
before. I want it to be four here. And add my noise. And there. Now, I have kind of the image that I might want this
image. just might it's kind of it's got this little angsty feel. You know, it's a dude that's maybe suffering. You can
kind of see it. Um, another thing too, I'm going to check my black and white. Even though this image is already in
black and white, I just want for any future images, I want them also to be black and white. So, I'm going to check
that off. And then the last thing I'm going to do here, you can see inside my um my template here, I have textures and
I say apply at the end. The reason I say apply at the end is because when we want to
potentially copy text effects, right? Like if I want to copy this, I'm going to hit option or
alt and drag over that. So now I have a new uh text layer and it's the same options as my other text layer and I can
type something out. Cool. But if I put this paper effect over and I try to now move around my text effect, I can't
really do that. Even if this is locked and I try to if I if I have this selected and I'm like, "Oh, I want to
copy this." Now, it's going to copy that paper effect and I don't want it to do that. So, I'm going to add the paper
effect at the end to really just kind of sell or give myself that texture that really, really helps my image stand out.
So, I'd say that's pretty decent. I might honestly, this is kind of a little bit too noisy in the background. So, I
might choose a different photo. Or what I can do here, um, actually, I'll just show this off for you. This is another
reason why Photoshop is is really, really great. if I like this image, but I think it's too too much for, you know,
what I'm doing right now, and maybe it's kind of minimal, but I just don't want there to be a ton of noise in the
background. What I can do here is select this, and I need to make sure that my image is selected here, and I can hit
content aware fill. And what this is going to do is it's going to try to read the pixels around it and see, oh, what's
the most natural framing or filling that I can do here? And so if I do this again, content aware fill,
and if you don't know what tool I'm using to select things, I just hit M on my keyboard and it brings up this uh
rectangular marquee tool. And so that'll allow me now to fill out an image that potentially wasn't like that before. So
now I turned that massive image that was fully on into this smaller image that is easier to read. And I might even bring
this up more and just have it up there. Break my own rule again of where I place things. Why? Because I can. I make the
rules of how I design my stuff. And then I'll place my paper um effect on top of it. And I would say that that's good.
That's a good image there. And I will use that. Let's go now to my second one. Let's
see. I'll use this one. Okay. So, I have spiritual ch spir oh my gosh, spiritual maturity looks less like
having answers and more like being comfortable with questions that have no earthly resolution.
So, what I might do here is um I might do answers
and I'm going to cut this. And I'm gonna put this in this text layer.
I'm gonna take away the answers and bring it here. And I might go like this instead. I like
to I like to put like one word on the side here, which allows me to kind of slide in this accent font. So now when
you're reading this, spiritual maturity looks less like having answers and more like being comfortable with questions
that have no earthly resolution. That's pretty good. I like that. And I'm going to look at my framing here and see where
this is at. So I got one, two, three, four, five boxes down. Good. One, two, three, four, five, four boxes up. So I
need to drag this one up. Boom. Cool. And that's pretty good for me. I like that design. That looks good.
Now I need to find an image that goes along with it. And you can see here on Pinterest, I just have a ton of these
kind of opened when I'm scrolling. This is my this is my Pinterest homepage. It just has like a bunch of different
things that are kind of like my moods, I guess, from pictures that I've clicked on. So, it it kind of knows it got it
has the vibe of the images that I like. And as I click on these, it's going to show me more with those similar vibes
like this one. This is a pretty good vibe. This is a pretty good vibe. This is a pretty good vibe. I like all of
these. Um, and as I click on these more and more and more, it just shows me more images that are like it. So now I can
find a bunch of images that have a very similar vibe instead of trying to find all these images on some sort of stock
photo website. I'm not selling any of these images, so it doesn't matter. Um, and I can just copy and paste these and
make my designs. So let's see, what was this again? Spiritual purity looks less like having answers.
H, sure. Let's just take this one for the heck of it. Copy and paste this over. And I'm going
to drag this back down into my images folder so that it's under my adjustments. You see there when it was
dragged above my adjustments, it doesn't have the one, it's not underneath the text, so you can't see the text, and
two, it's not darker so that you can read the text a little bit better. And then I'm going to box blur this again in
my filter and add noise again. Cool. And then I need to add my paper texture over top of it again. And there we go. That's
my second design made in less than a couple seconds. And what it's going to save you a ton of
time here as well is that while you are making these designs now, if I want to make another, I don't have to just like
go here and make another artboard and then copy and paste everything. Instead, I can click here. When this button comes
up, if I just hit option, if you're on Mac or alt and click here, now it's going to copy everything over. All of my
layers, everything is exactly the same, and I can just edit the information again. So, I can just type in here and
change my fonts or change my words, change the image, and just do that eight more times. and
everything will be finished. Then that's how I make these. So simple, right? So simple. And once it's made, you know,
you just hit save, come on to the next one, right? So, okay. Now I want to make my next
my next graphic. Cool. All right. Well, now I have my intro. I have my first slide. Let's come down here. Let's make
my second slide. Let's come down here. Let's make my third slide. And now I don't have to waste my time kind of
creating a whole new file when they're all just right here and I can just go into this warning, fair warning here, I
would probably not make once you get up and this file gets pretty big. It'll take a lot of RAM from your computer to
to function because there's a lot of different layers being processed at once. So, what I would do is I'd
probably save a file as a template and um you know, I might even save this with just these seven slides here. And as it
gets larger, I might close it every once in a while and open up that template just so that my computer can kind of
rest from how much RAM is being used and how much memory is being used by it. Just a fair warning, I've ran into that
problem a couple times and I don't want you to run into that either. But this is it. This is how you make graphics that
get viral millions of views. Um, get 30,000 followers in a month. Um, try it. Do it yourself. Again, if you want this
Photoshop file, it's in the description. You can find the template that you can use yourself. I would recommend
customizing some stuff to your own liking, using fonts of your own choosing, just so that it doesn't look
exactly the same as mine. Um, kind of choose your own branding. And other than that, play around with
this. Have a good time. Create some graphics that look great and get a lot of views. Until next video, I'll see
you.
Instagram carousels are effective for growth because they reach your actual followers more efficiently than reels and can gain reel-like exposure without needing to post reels. They are low-impact content that encourages sharing and saving, which increases visibility on the Explore page. Additionally, carousels provide multiple opportunities to engage users, as Instagram allows subsequent slides to be shown if the first is skipped.
To create an effective Instagram carousel, start with a clean, modern design that uses minimal text and strong imagery. Include a human face or personal photo on the first slide to boost engagement. Use Photoshop with a 2160x2700 px canvas for high-quality images, and organize your layers for easy editing. Remember to apply design techniques like slight box blur and customized font kerning to enhance visual appeal.
You can use two main types of carousels: informative and revelational. Informative carousels teach or build authority on a subject, while revelational carousels present standalone thoughts that can be shared independently. Mixing both types can increase engagement and shareability, allowing you to capture your audience's attention more effectively.
To enhance your carousel designs in Photoshop, apply a slight box blur and a noise filter for texture, lower exposure to make text pop, and use grid alignment for consistent text placement. Additionally, customize font kerning for a modern look and consider adding a paper texture overlay for a unique graphic design feel.
To streamline your carousel creation, copy and paste images directly from Pinterest into Photoshop and duplicate artboards with all layers intact for quick slide creation. Save your work as a template to manage file size and avoid high RAM usage, ensuring a more efficient workflow.
By implementing the carousel strategy, you can expect significant results, such as gaining nearly 70,000 followers in a year and achieving millions of views on your posts. For instance, one post may reach over 1 million views, demonstrating the potential for high engagement and traffic from the Reels page.
For more insights on Instagram growth strategies, check out the guide on the Step-by-Step Instagram Growth Plan to Reach 10,000 Followers Fast and learn about mastering content creation with Unlocking Instagram Growth. You can also explore photography tips and how carousels are transforming engagement in other linked articles.
Heads up!
This summary and transcript were automatically generated using AI with the Free YouTube Transcript Summary Tool by LunaNotes.
Generate a summary for freeRelated Summaries

30-Day Instagram Growth Challenge: Strategy & Algorithm Tips 2025
Discover a comprehensive 30-day Instagram growth plan designed for 2025, including content pillars, posting strategies, and deep insights into the Instagram algorithm. Learn how to create engaging, sharable content that attracts new followers while maintaining your mental well-being.

Step-by-Step Instagram Growth Plan to Reach 10,000 Followers Fast
Discover a detailed, day-by-day strategy to grow your Instagram from zero to 10,000 followers quickly. Learn how to optimize your profile, create engaging content, monetize your account, and master Instagram's algorithm for sustained growth.

How I Grew Instagram from 150K to 800K Followers in 5 Months
Discover the proven content and branding strategies that skyrocketed my Instagram following from 150,000 to 800,000 in just five months. Learn how to craft powerful hooks, create relatable content, and position yourself as a leader to grow your social media presence authentically and effectively.
Cómo los Carruseles Están Revolucionando Instagram para Aumentar el Engagement
Descubre por qué los Carruseles son la herramienta viral en Instagram y cómo puedes crear contenido que captura la atención.
Unlocking Instagram Growth: Mastering Content Creation with Brock Johnson
Discover expert strategies from Brock Johnson on Instagram growth, content creation, and turning followers into customers.
Most Viewed Summaries

A Comprehensive Guide to Using Stable Diffusion Forge UI
Explore the Stable Diffusion Forge UI, customizable settings, models, and more to enhance your image generation experience.

Kolonyalismo at Imperyalismo: Ang Kasaysayan ng Pagsakop sa Pilipinas
Tuklasin ang kasaysayan ng kolonyalismo at imperyalismo sa Pilipinas sa pamamagitan ni Ferdinand Magellan.

Mastering Inpainting with Stable Diffusion: Fix Mistakes and Enhance Your Images
Learn to fix mistakes and enhance images with Stable Diffusion's inpainting features effectively.

Pamamaraan at Patakarang Kolonyal ng mga Espanyol sa Pilipinas
Tuklasin ang mga pamamaraan at patakaran ng mga Espanyol sa Pilipinas, at ang epekto nito sa mga Pilipino.

How to Install and Configure Forge: A New Stable Diffusion Web UI
Learn to install and configure the new Forge web UI for Stable Diffusion, with tips on models and settings.

If you found this summary useful, consider buying us a coffee. It would help us a lot!