Download Subtitles for Lumen Explained - UE5 Captions
Lumen Explained - IMPORTANT Tips for UE5
William Faucher
SRT - Most compatible format for video players (VLC, media players, video editors)
VTT - Web Video Text Tracks for HTML5 video and browsers
TXT - Plain text with timestamps for easy reading and editing
Scroll to view all subtitles
hey everyone welcome back it's great to
see you again william foshe here today's
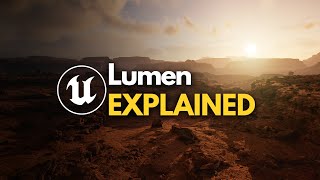
video is about lumen now this video may
come across as a little wordy long
dry and while lumen is fairly user
friendly and works very well out of the
box there are
several changes to the way you need to
make your models and materials moving
forward so i promise you your work will
improve if you just bear with me to the
end here this is quite possibly one of
the most important videos i've made in a
while i know i've made a video about
lumen back in may but that video was
made three days after ue5 dropped and
i've addressed a few issues there but
epic has since released additional
information making that earlier video a
bit outdated somewhat so in this video
i've gathered all of the latest and
greatest information available most of
which gathered from epic's amazing live
stream on the topic
that said their live stream is over two
and a half hours long and while they are
gold mines of information a lot of it
goes way deeper than necessary for the
average artist so that's where this
explained series of videos come in i
want to condense the info from those
live streams into a much more digestible
format but before we get started nistito
does have a sponsor so let's get that
integration done first as to not break
the flow of the video later so this
video is sponsored by skillshare and as
you all know by now skillshare is an
online learning platform with thousands
of classes for creatives artists or just
curious people to explore new skills and
dive deeper into existing hobbies or
passions
if you're curious about virtual
production shooting video filmmaking
skillshare offered a large variety of
classes on cinematography like this
short and sweet 30-minute class by zach
mulligan called cinematography basics
understanding filmmaking which covers
the key basics and fundamentals of film
the mood the tone and the feel
skillshare's classes are curated they
have really high production quality
they're ad free and there is a constant
stream of new classes for you to choose
from and since many of you watching this
channel are from all corners of the
globe it's worth mentioning that
skillshare's entire catalog of classes
now offers subtitles in spanish french
portuguese and dutch now because
skillshare is sponsoring this video the
first 1000 of you to click the link down
below we'll get a one month free trial
of skillshare so you can start learning
today so once again thanks so much for
skillshare for sponsoring this video and
with that out of the way let's dive
right in starting with the necessary
project settings for lumen now by
default lumen is active and you don't
need to change anything but in the event
that you've migrated a ue4 project over
to ue5
here's what you need to set it to
dynamic global elimination method set
the lumen reflection method set to lumen
generate mesh distance fields needs to
be on in editor lumen is controlled by
the following values the light
properties the material base color and
roughness and the exposure lastly you do
have some quality control settings in
the post process volume
final gather quality and lumen
reflection quality which we're going to
dive a little bit deeper into real soon
next let's talk about what lumen can do
the obvious and the not so obvious the
obvious being it achieves real-time
indirect lighting with rather surprising
accuracy and as we all know emissive
lighting does contribute to gi just to
be clear when i say gi moving forward i
mean global elimination so if you have a
large bright material it will light up
your scene there are several limitations
to this which again we will get into a
little bit later lumen also provides
reflections and integrates gi into the
reflections as well so what i mean by
this is you will see
all of the gi in the reflections
this is something that ray trait
reflection didn't really do very well in
ue4 lumen also supports clear coat
materials properly so that there are two
reflections not just one which is really
useful for car materials again this is
something that ray trace reflections
really can't do at the moment it also
supports fully shadowed skylight so drag
and dropping a skylight set to movable
will shadow everything automatically
with no additional input from the artist
it provides a dynamic gi and sky
shadowing on translucency and volumetric
fog
albeit at a lower quality lumen makes
things so much easier for artists
there's way less fiddling around with
hidden settings for lighting and shadow
detail
most of the heavy lifting is done under
the hood which is absolutely
awesome for us so
how does this all work in pure nerd talk
it is a hybrid ray tracing pipeline
which uses software ray tracing it
traces against the depth buffer first
which we call screen traces then it
traces against the distance field and
applies lighting to ray hits with the
surface cache
lumen relies heavily on mesh distance
fields but what's worth noting here is
that the mesh distance fields have been
completely rewritten in ue5 for youth
with lumens specifically and they are
way
way better than they ever were in ue4
the mesh distance fields now have
mipmaps they're streamed from disk based
on distance and they cost about half as
much in terms of memory compared to ue4
they also build 10 times faster than
before which is a massive upgrade if you
remember back in unifor
building mesh distance field took a very
long time that is no longer the case
here now while all this takes care of
shadows it can't determine material
color and lighting of a surface so
that's where the surface cache comes in
the surface cache essentially splits up
your meshes with a bunch of cards it
captures material properties of the mesh
color and roughness at very low
resolution into an atlas which does work
especially well with nanite meshes it
also constantly updates its atlas as you
fly around your scene it's worth noting
however that these recaptures are very
slow on non-nanite meshes so if you
notice your frame rate just tank for no
apparent reason try and see if your
environment has some non-nanite models
lying around they could be the culprit
especially if those meshes don't have
proper lods set up you can visualize the
surface cache with the following console
command right here
tldr if you're going to use lumen with
any high poly assets they pretty much
need to be nanite if you want good frame
rates now that was a whole lot of boring
talk why should artists care about this
crap the surface cache has one
major major limitation and this is
what's going to affect how you create
your assets and your models
only simple meshes and interiors can be
supported and what i mean by this is you
can't simply just use one large combined
mesh for an interior for example walls
floors ceilings
all of these need to be separate
individual models
if you're trying to light a scene and
things just look
odd or lighting is only screen space
this could be one of the reasons why and
while having separate walls and floors
and ceilings sounds like a pain in the
butt thanks to nanite you can simply
bring all of these separate models into
a single blueprint asset and from there
it's going to be good to go it's a great
little trick to combine the convenience
of having both a single assembled asset
and the quality benefits of lumen the
reason i bring this up segues into my
next topic the lumen scene which is
arguably the most important view mode
for lumen because if your lumen scene
doesn't roughly match what's on your
main screen there's going to be view
dependent artifacts in the gi if you've
ever noticed that lumens gi is sometimes
screen space that is why something is
wrong the lumen scene is your number one
tool
for seeing what is lumen doing why is
there an artifact you can maybe compare
this between viewports and make sure
they look roughly the same lighting wise
color wise etc it's really convenient to
use the g shortcut especially if you're
seeing meshes or objects that are black
like this in the lumen scene
something is wrong and that object is
not contributing to gi black models in
the scene means that they are only going
to show up in screen traces which is why
the lighting will appear and disappear
in a screen space fashion but now let's
talk about some of lumen's limitations
and the very important things to know
for now only static mesh and instant
static meshes are supported meaning
there is no landscape support for this
at the moment but it is coming in 5.0
world position offset causes artifacts
so anything wind related can be
problematic translucent materials are
also not yet supported for lumen
reflections or dynamic gi so glass is
not going to look right
the interesting thing is that subsurface
scattering does not work with lumen but
subsurface profile does it's what i use
to give the snow on the ground here a
subtle subsurface scattering look lumen
also happens to rely heavily on temporal
super resolution which is similar to
nvidia's dlss
this means that it calculates in 1080p
and it upscaled everything to 4k
resolution all while looking nearly as
good as a native 4k
temporal super resolution tsr is really
the key to making lumen possible in real
time lumen does allow hardware ray
tracing which offers the highest quality
but also the highest cost as well
and it only has partial support in early
access such as raytrade reflections
shadows and it is part of the final
gather hardware ray tracing traces
against the nanite proxy geometry only
so you may need to raise the proxy
triangle percent if you're running into
artifacts or bad shadows in the nanite
settings of a given static mesh if
you're using hardware ray tracing try to
avoid kit bashing too much or have too
many overlapping meshes
the performance impact is going to be
massive so if you do have a lot of kid
bashing maybe stick with software ray
tracing instead next when you use the
movie render queue you may notice that
the first few frames look frankly
horrible and noisy and this is because
lumen is intended for real time usage
and it needs several frames to converge
so you need to use a high amount of
warm-up frames which you can add here in
the movie render queue under the
anti-aliasing tab i often use around 250
to 500 warm-up frames just to err on the
side of caution it's probably overkill
but it works by default the lumen scene
is only active to about 200 meters past
200 meters lumen goes screen space so
for all intents and purposes you can't
really tell because things are so far
away at that point but it is worth
noting if you're using a very long focal
length on your camera that said lumen
can be optimized a little bit and the
default is to trace mesh distance fields
for the first two meters which is detail
tracing but you can choose to skip the
meshes and field tracing entirely with
what we call global tracing
this can give you a handy fps boost in
scene with a lot of overlapping geo now
i've saved one of the major drawbacks of
lumen for last and that's the fact that
lighting channels are not supported and
they won't be supported at all primarily
because of how lumen is designed and how
it works this really
sucks but it is what it is it is a very
small price to pay for the incredible
lighting that we get now this part here
is going to be a favorite for archviz
artists you may have noticed that in
many cases reflections are just kind of
the kind of bleh especially if you're
used to the gorgeous sharp and crisp ray
trace reflections of ub4
i'm going to tell you all about the
magic sauce to get the rage rate
reflections and lumen combined together
in just a second
by default reflections use a surface
cache which is
great for performance but as you know it
doesn't look so hot most people seem to
think that you can either use only
hardware ray tracing or lumen not both
unfortunately you can get the best of
both worlds so first open up your
project settings and in the rendering
section you need to make sure use
hardware raytracing when available and
support hardware ray tracing are turned
on next search for default rhi and make
sure this is set to directx 12 then
restart unreal lastly you need to set
the lumen reflection quality setting in
the post process volume to four that is
the magic number and that solves our
issue
now you can get both lumen lighting and
rate rate reflection to work together in
harmony now for the last part of this
video i want to talk about the best
practices using lumen so this is a very
important part of the video first off
you cannot use lumen and emissive meshes
to replace light sources you're going to
have a bad time if you do results are
going to be noisy and inconsistent and
possibly even screen space in many cases
lumen does pick up emissive materials as
we've seen before but the smaller and
brighter that emissive source is the
noisier the result will be
so if you're using emissive materials
with lumen keep those sources large and
dim for best quality and then go ahead
and add an actual light to give your
scene the brightness you want use a red
light or a point light spotlight
whatever just don't rely on only using
emissive materials it's going to look
bad very small and bright material
sources like particles or small lights
on the walls of a sci-fi scene are going
to be notably problematic
next the base color has a huge impact on
gi now for those of us coming from an
offline rendering or a vfx background
this is obvious
dark and busy base colors are going to
have a poor impact on gi while bright
albedo values will bounce the light
around more again obviously of course it
does but it is important to never use an
albedo of one or pure white a perfectly
bright albedo means it reflects 100
percent of the light's energy and that
simply never happens in real life all
surfaces absorb a small portion of light
even the purest snow on the top of the
himalayas we'll have an albedo 0.8 or
0.9 or so so even though it's very very
bright it's still absorbed 10 or 20
percent of the light
it's important to keep this in mind when
setting up your base colors it's also
important to not use a material that's
too dark as well and that's just going
to suck away
all of that lovely indirect lighting in
your scene so taking a look at this
example right here you're going to see
just how impactful a brighter albedo can
be again you want to turn on the lumen
scene to visualize what's going on in
your scene if you have objects that are
black or things don't look similar to
your main scene here you're going to get
screen space gi this is a problem a lot
of people have run into and they just
write it off at oh lumens of the screen
space effect
no
no it's not
lumen is not just screen space but if
you're seeing a setup wrong it will be
just to give you a classic example in my
previous environment i made here i have
some snowman from mega scans and they
were showing up as black in the lumen
scene the reason for this wasn't the
model the reason was because of the
master material it was using it was by
default using the megascan transmission
master material as opposed to the
default vanilla mega scan material and
the transmission one here is the one
that broke lumen on these assets that
transmission material was automatically
created by quixote bridge so pay
attention to the materials if not just a
mesh that could trigger a black mesh in
the lumen scene here like combined walls
and ceilings and floors
unsupported materials can break lumen 2.
so keep an eye on the lumen scene view
mode and be sure it stays in sync with
your main scene
yes these content requirements really
suck but it is so much better than
authoring light map uvs and baked
lighting god i hate baked lighting that
would painful
and that's it for today folks thank you
so much for watching if you did find
this video helpful do consider
subscribing and hitting the like button
down below and as always
happy rendering
Full transcript without timestamps
hey everyone welcome back it's great to see you again william foshe here today's video is about lumen now this video may come across as a little wordy long dry and while lumen is fairly user friendly and works very well out of the box there are several changes to the way you need to make your models and materials moving forward so i promise you your work will improve if you just bear with me to the end here this is quite possibly one of the most important videos i've made in a while i know i've made a video about lumen back in may but that video was made three days after ue5 dropped and i've addressed a few issues there but epic has since released additional information making that earlier video a bit outdated somewhat so in this video i've gathered all of the latest and greatest information available most of which gathered from epic's amazing live stream on the topic that said their live stream is over two and a half hours long and while they are gold mines of information a lot of it goes way deeper than necessary for the average artist so that's where this explained series of videos come in i want to condense the info from those live streams into a much more digestible format but before we get started nistito does have a sponsor so let's get that integration done first as to not break the flow of the video later so this video is sponsored by skillshare and as you all know by now skillshare is an online learning platform with thousands of classes for creatives artists or just curious people to explore new skills and dive deeper into existing hobbies or passions if you're curious about virtual production shooting video filmmaking skillshare offered a large variety of classes on cinematography like this short and sweet 30-minute class by zach mulligan called cinematography basics understanding filmmaking which covers the key basics and fundamentals of film the mood the tone and the feel skillshare's classes are curated they have really high production quality they're ad free and there is a constant stream of new classes for you to choose from and since many of you watching this channel are from all corners of the globe it's worth mentioning that skillshare's entire catalog of classes now offers subtitles in spanish french portuguese and dutch now because skillshare is sponsoring this video the first 1000 of you to click the link down below we'll get a one month free trial of skillshare so you can start learning today so once again thanks so much for skillshare for sponsoring this video and with that out of the way let's dive right in starting with the necessary project settings for lumen now by default lumen is active and you don't need to change anything but in the event that you've migrated a ue4 project over to ue5 here's what you need to set it to dynamic global elimination method set the lumen reflection method set to lumen generate mesh distance fields needs to be on in editor lumen is controlled by the following values the light properties the material base color and roughness and the exposure lastly you do have some quality control settings in the post process volume final gather quality and lumen reflection quality which we're going to dive a little bit deeper into real soon next let's talk about what lumen can do the obvious and the not so obvious the obvious being it achieves real-time indirect lighting with rather surprising accuracy and as we all know emissive lighting does contribute to gi just to be clear when i say gi moving forward i mean global elimination so if you have a large bright material it will light up your scene there are several limitations to this which again we will get into a little bit later lumen also provides reflections and integrates gi into the reflections as well so what i mean by this is you will see all of the gi in the reflections this is something that ray trait reflection didn't really do very well in ue4 lumen also supports clear coat materials properly so that there are two reflections not just one which is really useful for car materials again this is something that ray trace reflections really can't do at the moment it also supports fully shadowed skylight so drag and dropping a skylight set to movable will shadow everything automatically with no additional input from the artist it provides a dynamic gi and sky shadowing on translucency and volumetric fog albeit at a lower quality lumen makes things so much easier for artists there's way less fiddling around with hidden settings for lighting and shadow detail most of the heavy lifting is done under the hood which is absolutely awesome for us so how does this all work in pure nerd talk it is a hybrid ray tracing pipeline which uses software ray tracing it traces against the depth buffer first which we call screen traces then it traces against the distance field and applies lighting to ray hits with the surface cache lumen relies heavily on mesh distance fields but what's worth noting here is that the mesh distance fields have been completely rewritten in ue5 for youth with lumens specifically and they are way way better than they ever were in ue4 the mesh distance fields now have mipmaps they're streamed from disk based on distance and they cost about half as much in terms of memory compared to ue4 they also build 10 times faster than before which is a massive upgrade if you remember back in unifor building mesh distance field took a very long time that is no longer the case here now while all this takes care of shadows it can't determine material color and lighting of a surface so that's where the surface cache comes in the surface cache essentially splits up your meshes with a bunch of cards it captures material properties of the mesh color and roughness at very low resolution into an atlas which does work especially well with nanite meshes it also constantly updates its atlas as you fly around your scene it's worth noting however that these recaptures are very slow on non-nanite meshes so if you notice your frame rate just tank for no apparent reason try and see if your environment has some non-nanite models lying around they could be the culprit especially if those meshes don't have proper lods set up you can visualize the surface cache with the following console command right here tldr if you're going to use lumen with any high poly assets they pretty much need to be nanite if you want good frame rates now that was a whole lot of boring talk why should artists care about this crap the surface cache has one major major limitation and this is what's going to affect how you create your assets and your models only simple meshes and interiors can be supported and what i mean by this is you can't simply just use one large combined mesh for an interior for example walls floors ceilings all of these need to be separate individual models if you're trying to light a scene and things just look odd or lighting is only screen space this could be one of the reasons why and while having separate walls and floors and ceilings sounds like a pain in the butt thanks to nanite you can simply bring all of these separate models into a single blueprint asset and from there it's going to be good to go it's a great little trick to combine the convenience of having both a single assembled asset and the quality benefits of lumen the reason i bring this up segues into my next topic the lumen scene which is arguably the most important view mode for lumen because if your lumen scene doesn't roughly match what's on your main screen there's going to be view dependent artifacts in the gi if you've ever noticed that lumens gi is sometimes screen space that is why something is wrong the lumen scene is your number one tool for seeing what is lumen doing why is there an artifact you can maybe compare this between viewports and make sure they look roughly the same lighting wise color wise etc it's really convenient to use the g shortcut especially if you're seeing meshes or objects that are black like this in the lumen scene something is wrong and that object is not contributing to gi black models in the scene means that they are only going to show up in screen traces which is why the lighting will appear and disappear in a screen space fashion but now let's talk about some of lumen's limitations and the very important things to know for now only static mesh and instant static meshes are supported meaning there is no landscape support for this at the moment but it is coming in 5.0 world position offset causes artifacts so anything wind related can be problematic translucent materials are also not yet supported for lumen reflections or dynamic gi so glass is not going to look right the interesting thing is that subsurface scattering does not work with lumen but subsurface profile does it's what i use to give the snow on the ground here a subtle subsurface scattering look lumen also happens to rely heavily on temporal super resolution which is similar to nvidia's dlss this means that it calculates in 1080p and it upscaled everything to 4k resolution all while looking nearly as good as a native 4k temporal super resolution tsr is really the key to making lumen possible in real time lumen does allow hardware ray tracing which offers the highest quality but also the highest cost as well and it only has partial support in early access such as raytrade reflections shadows and it is part of the final gather hardware ray tracing traces against the nanite proxy geometry only so you may need to raise the proxy triangle percent if you're running into artifacts or bad shadows in the nanite settings of a given static mesh if you're using hardware ray tracing try to avoid kit bashing too much or have too many overlapping meshes the performance impact is going to be massive so if you do have a lot of kid bashing maybe stick with software ray tracing instead next when you use the movie render queue you may notice that the first few frames look frankly horrible and noisy and this is because lumen is intended for real time usage and it needs several frames to converge so you need to use a high amount of warm-up frames which you can add here in the movie render queue under the anti-aliasing tab i often use around 250 to 500 warm-up frames just to err on the side of caution it's probably overkill but it works by default the lumen scene is only active to about 200 meters past 200 meters lumen goes screen space so for all intents and purposes you can't really tell because things are so far away at that point but it is worth noting if you're using a very long focal length on your camera that said lumen can be optimized a little bit and the default is to trace mesh distance fields for the first two meters which is detail tracing but you can choose to skip the meshes and field tracing entirely with what we call global tracing this can give you a handy fps boost in scene with a lot of overlapping geo now i've saved one of the major drawbacks of lumen for last and that's the fact that lighting channels are not supported and they won't be supported at all primarily because of how lumen is designed and how it works this really sucks but it is what it is it is a very small price to pay for the incredible lighting that we get now this part here is going to be a favorite for archviz artists you may have noticed that in many cases reflections are just kind of the kind of bleh especially if you're used to the gorgeous sharp and crisp ray trace reflections of ub4 i'm going to tell you all about the magic sauce to get the rage rate reflections and lumen combined together in just a second by default reflections use a surface cache which is great for performance but as you know it doesn't look so hot most people seem to think that you can either use only hardware ray tracing or lumen not both unfortunately you can get the best of both worlds so first open up your project settings and in the rendering section you need to make sure use hardware raytracing when available and support hardware ray tracing are turned on next search for default rhi and make sure this is set to directx 12 then restart unreal lastly you need to set the lumen reflection quality setting in the post process volume to four that is the magic number and that solves our issue now you can get both lumen lighting and rate rate reflection to work together in harmony now for the last part of this video i want to talk about the best practices using lumen so this is a very important part of the video first off you cannot use lumen and emissive meshes to replace light sources you're going to have a bad time if you do results are going to be noisy and inconsistent and possibly even screen space in many cases lumen does pick up emissive materials as we've seen before but the smaller and brighter that emissive source is the noisier the result will be so if you're using emissive materials with lumen keep those sources large and dim for best quality and then go ahead and add an actual light to give your scene the brightness you want use a red light or a point light spotlight whatever just don't rely on only using emissive materials it's going to look bad very small and bright material sources like particles or small lights on the walls of a sci-fi scene are going to be notably problematic next the base color has a huge impact on gi now for those of us coming from an offline rendering or a vfx background this is obvious dark and busy base colors are going to have a poor impact on gi while bright albedo values will bounce the light around more again obviously of course it does but it is important to never use an albedo of one or pure white a perfectly bright albedo means it reflects 100 percent of the light's energy and that simply never happens in real life all surfaces absorb a small portion of light even the purest snow on the top of the himalayas we'll have an albedo 0.8 or 0.9 or so so even though it's very very bright it's still absorbed 10 or 20 percent of the light it's important to keep this in mind when setting up your base colors it's also important to not use a material that's too dark as well and that's just going to suck away all of that lovely indirect lighting in your scene so taking a look at this example right here you're going to see just how impactful a brighter albedo can be again you want to turn on the lumen scene to visualize what's going on in your scene if you have objects that are black or things don't look similar to your main scene here you're going to get screen space gi this is a problem a lot of people have run into and they just write it off at oh lumens of the screen space effect no no it's not lumen is not just screen space but if you're seeing a setup wrong it will be just to give you a classic example in my previous environment i made here i have some snowman from mega scans and they were showing up as black in the lumen scene the reason for this wasn't the model the reason was because of the master material it was using it was by default using the megascan transmission master material as opposed to the default vanilla mega scan material and the transmission one here is the one that broke lumen on these assets that transmission material was automatically created by quixote bridge so pay attention to the materials if not just a mesh that could trigger a black mesh in the lumen scene here like combined walls and ceilings and floors unsupported materials can break lumen 2. so keep an eye on the lumen scene view mode and be sure it stays in sync with your main scene yes these content requirements really suck but it is so much better than authoring light map uvs and baked lighting god i hate baked lighting that would painful and that's it for today folks thank you so much for watching if you did find this video helpful do consider subscribing and hitting the like button down below and as always happy rendering
Download Subtitles
These subtitles were extracted using the Free YouTube Subtitle Downloader by LunaNotes.
Download more subtitlesRelated Videos

Download Subtitles for Lighting in Unreal Engine 5 Tutorial
Enhance your understanding of lighting techniques in Unreal Engine 5 by downloading accurate subtitles for this beginner-friendly tutorial. Captions help you follow along easily and grasp complex concepts effectively.

Download Subtitles for Lighting Interiors in Unreal Engine 5
Enhance your learning experience by downloading accurate subtitles for the Lighting Interiors in Unreal Engine 5 tutorial. Captions help you follow along with detailed lighting techniques and improve comprehension, making complex concepts easier to grasp. Get your subtitles now for more effective and accessible video content.
Download Subtitles for The 2025 Guide to Rendering in Unreal Engine 5
Enhance your learning experience with downloadable subtitles for The 2025 Guide to Rendering in Unreal Engine 5 video. Accurate captions make it easier to follow complex rendering techniques and ensure accessibility for all viewers. Get your subtitles now to master Unreal Engine 5 effectively.
Download Subtitles for Lighting a NIGHT-TIME Exterior in Unreal
Enhance your understanding of lighting techniques in Unreal Engine by downloading accurate subtitles for this night-time exterior tutorial. Subtitles help you follow detailed instructions and improve learning efficiency, making this video accessible for all skill levels.
Download Subtitles for Unreal to DaVinci Resolve Workflow Video
Enhance your understanding of the Unreal to DaVinci Resolve workflow with downloadable subtitles. Follow along easily as you learn about ACES and sRGB color management techniques to improve your video projects.
Most Viewed

Untertitel für 'Nicos Weg' Deutsch lernen A1 Film herunterladen
Laden Sie die Untertitel für den gesamten Film 'Nicos Weg' herunter, um Ihr Deutschlernen auf A1 Niveau zu unterstützen. Untertitel helfen Ihnen, Wortschatz und Aussprache besser zu verstehen und verbessern das Hörverständnis effektiv.

ดาวน์โหลดซับไตเติ้ล DMD LAND 3 The Final Land Day 1
ดาวน์โหลดซับไตเติ้ลสำหรับวิดีโอ DMD LAND 3 The Final Land Day 1 เพื่อช่วยให้เข้าใจเนื้อหาได้ง่ายขึ้น และเพิ่มความสะดวกในการติดตามทุกช่วงเวลา เหมาะสำหรับผู้ชมที่ต้องการความชัดเจนและเข้าถึงข้อมูลอย่างครบถ้วน

Descarga Subtítulos para NARCISISMO | 6 DE COPAS - Episodio 63
Accede fácilmente a los subtítulos del episodio 63 de '6 DE COPAS', centrado en el narcisismo. Descargar estos subtítulos te ayudará a entender mejor el contenido y mejorar la experiencia de visualización.

Subtítulos para TIPOS DE APEGO | 6 DE COPAS Episodio 56
Descarga los subtítulos para el episodio 56 de la tercera temporada de 6 DE COPAS, centrado en los tipos de apego. Mejora tu comprensión y disfruta del contenido en detalle con nuestros subtítulos precisos y accesibles.

Download Subtitles for Your Favorite Videos Easily
Enhance your video watching experience by downloading accurate subtitles and captions. Enjoy better understanding, accessibility, and language support for all your favorite videos.

If you found these subtitles useful, consider buying us a coffee. It would help us a lot!