Introduction
Creating a logo is an art form that combines creativity and technology. In this guide, I will show you how to design a striking lion logo with a crown using AI tools and graphic design software like Photoshop and Adobe Illustrator. This process will not only enhance your workflow but also ensure that your final product remains unique and tailored to your vision.
Conceptualizing the Lion Logo
When starting a logo design project, it’s crucial to have a clear concept in mind. For my design, I aimed to create a stylized lion logo that exudes strength and elegance. The crown symbolizes royalty, making it perfect for a logo that stands out.
Gathering References
Traditionally, logo designers would gather photo references from the internet. However, with AI at our disposal, we can generate unique reference images tailored to our specific needs. I used Stable Diffusion to create images of a lion with a crown. Here's a breakdown of my process:
- AI Image Generation: I entered prompts into Stable Diffusion, such as "a photo of a lion in a side view with a crown on a white background."
- Experimentation: Generating multiple images allows me to choose the one that best fits my vision.
Sketching the Logo in Photoshop
Once I have my reference image, the next step is sketching my initial ideas in Photoshop. Here’s how I approached it:
Preparing the Image
- Insert Reference: I imported the generated lion image into Photoshop and reduced its opacity.
- Sketching: Using a black brush, I started outlining the key features of the lion, focusing on interesting shapes and shadows.
Techniques for Sketching
- Play with Shapes: I began with the contours, added and deleted shapes intuitively, using tools like liquefy and warp to refine my design.
- Black and White Version: It’s essential to create a black and white version first to ensure clarity before adding colors later.
Enhancing the Sketch with AI
With my sketch in place, I utilized AI tools again to enhance it:
- Image to Image Update: I uploaded my sketch into Stable Diffusion and prompted it with terms like "vector logo, modern, and minimalist" to generate clean shapes.
- Adjusting Denoise Strength: I set the denoise strength to 6 for a balance between maintaining my original vision and receiving good results.
After several iterations, I was pleased with the outcome.
Vectorizing the Logo in Adobe Illustrator
Once I have a satisfactory image, it’s time to vectorize the logo using Adobe Illustrator:
- Image Trace Function: I imported the sketch into Illustrator and used the Image Trace function to convert it into vector shapes.
- Settings Adjustments: Fine-tune the trace settings to achieve the desired level of detail. Typically, I select the presets for logos and silhouettes.
Finalizing the Vector Design
- Clean Up the Design: After vectorization, I check for open paths and stray points and simplify as needed to keep it manageable.
- Compound Paths: I created compound paths for complex shapes to ensure the robot was cohesive.
- Color Preparation: Once happy with the vector shapes, I began adding colors.
Mock-ups using Photoshop and AI
After finalizing the logo, I created mock-ups to visualize its application in real-world settings.
Designing with Mock-ups
- Creating Mock-Ups: I designed mock-up images with one featuring a white square sign in a jungle setting. This adds context and flair to my logo presentation.
- Layering Techniques: I manipulated blending modes and opacity in Photoshop to ensure the logo integrated smoothly into the mock-up setting.
Tips for Effective Mock-Ups
- Adjust Blending Modes: Setting the logo layer to multiply can help it blend into a white background effectively.
- Use Clipping Masks: This technique helps in fitting the logo within another design perfectly, ensuring it retains visual appeal.
Conclusion
In this comprehensive guide, we explored the process of creating a unique lion logo with a crown, utilizing both the power of AI and traditional graphic design methods. By merging these two worlds, designers can work more efficiently and maintain a personal touch in their creations.
Keep experimenting with AI as a useful tool in your design workflow. The satisfaction of creating something uniquely yours will amplify your creative journey.
Thank you for following along, and I hope you found this guide useful in your own logo design endeavors!
today I want to share another idea with you on how to use AI to create a logo symbol I'll begin by sketching it out in
Photoshop then I'll use AI to enhance that sketch afterward I'll vectorize it in Adobe Illustrator and finally I'll
create mock-ups using both Ai and Photoshop I want to create a Lon logo with a crown so I used to search for
references on Google and Pinterest for ideas but since we have access to AI we can simply generate a photo reference
with AI I am using stable diffusion Forge and for the prompt I will input something like a photo of a lion in a
side view with a crown on a white background you can generate a few times to get multiple references or one that
looks best for what I have in mind you might ask why I don't create the logo directly well you can do that but it
gives what it wants and I want to bring my ideas to life not random AI stuff I added the photo of the Lion in Photoshop
and reduced the opacity then with a black brush I started sketching out the ideas I'm aiming for a stylized lion
logo similar to those sport logo mascots so I'm using the photo as a guide and I typically begin with the Shadows or
Contours and edges striving to create interesting shapes I used to create a lot of logos
from around 2008 to 2014 but now I don't take on custom projects anymore instead I create graphics for sale on various
markets I always create a black and white version of the logo to to ensure it works well in a single color and for
print later I add colors to enhance its appearance for social media and the internet once I have the basic shapes in
place I hide the image and just go with the flow I add and delete shapes to see what looks better continuously playing
around until something seems like it could work sometimes I use liquefy or warp to
adjust the shapes if something doesn't work for me I just erase it and try something new it's like digging to find
treasure you keep digging until you find it for this example I'm just doing a sketch but when I used to create logos I
would make a lot of sketches sometimes 20 to 30 sketches and then choose the best three to
vectorize I played around with the sketch for about 8 minutes and this is the final
result in stable diffusion I navigate to image to image where I upload or paste the sketch then in the prompt I describe
the logo using words like vector logo modern and minimalist I aim for similarity but still leave a little room
for adjustment so I set the Deno strength to 6 and generated a few times since I wasn't satisfied with how it
depicted the crown I included Specific Instructions for the crown and the prompt I also experimented with changing
the order of the words to see if I could get better results eventually I found one that had interesting shapes you can
copy and paste the result into photo Photoshop and make any adjustments you think it might need for example you
could tweak the contrast or adjust some shapes to make them look better then I paste the sketch again into stable
diffusion and generate it again to obtain clean shapes I can adjust the denoy strength to 0.5 to make it even
more similar to my original sketch once I have a good image it's time to vectorize it um I paste the sketch into
Adobe Illustrator then I use the image Trace function you can choose between logo or um Silhouettes presets and
adjust the settings values like I have here um making sure ignore white is active I play around with the sliders
until it looks good I experiment with the threshold paths and Corner settings to achieve the desired result once I'm
satisfied with the look I click expand to convert it into uh Vector shapes as you can see we now have Vector shapes
created for points and paths if there are too many points you can go to object then path and choose simplify to reduce
the number of points making it easier to work with for the crown I wanted those round parts to be perfect circles so I
added an actual circle on top to make it look better then I make it a compound path to
be just a single shape I check for errors and points to ensure there are no open paths or stray points then I Center
the logo and save the vector source file to have it for later use then I import the logo into Photoshop either as a PNG
or as a shape below it I add an orange color and then I add the light with a lighter color this doesn't need to be
perfect I do this to provide a guide for the AI to understand what I have in mind it helps the AI generate different ideas
for lighting shapes based on this color sketch then I return to stable diffusion and navigate to the imageo image tab I
paste the color sketch and create a similar prompt ensuring I include the color orange and words like sport logo
and modern I want a little variation so I set the denoy strength to 0.6 and hit generate I generate it a few times until
I get a generation that has interesting shapes for the light then I copy the image and paste it
into illustrator positioning it under the logo next I use the eyedropper tool to
pick up the colors from the reference image and um I reduce the opacity so I can see better while working on it I use
the paint tool to create all those shapes typically I utilize the pen tool to create the entire logo instead of
relying on live Trace working with the pen tool and basic shapes can produce a cleaner design with fewer points and a
more polished appearance however for this video it was okay to use live Trace so that viewers can see different
methods in action for the darker orange back shape uh I decided to use the Contour of the LI
there are multiple ways to do this in illustrator uh you can doubleclick on the shape and copy only the exterior
path alternatively you can leave the shape as it is and remove the interior holes you could also create the shape
with the pen tool or use the live paint bucket tool among other options illustrator offers flexibility all o you
to achieve the same outcome using different methods I didn't spend too much time thinking about the lighting I
simply copied what AI suggested however if you aim for better lighting consider how the shapes will look in 3D and
adjust accordingly in this case I can't say the lighting is accurate but it's believable I created compound paths for
each different color to make it easier to work with if you want you can even add gradients to these colors to create
a nice effect I added a gradient to the light part but you can also add a dark gradient to the Shadows if you prefer I
created a prompt for a white square sign mockup with some jungle leaves in the background using one of my saved art
styles then I sent it to image to image maintaining the same art style and prompt but making it
bigger after generating the result I copied it into Photoshop as you can see it's big enough for a mockup
presentation now I paste the logo onto the mockup if the logo comes on a white background
you can set its blending mode to multiply I also reduce the opacity slightly since when it's printed it
won't have such strong contrast in colors I'll quickly create another mockup for the back view of a man in a
white T-shirt since the AI placed the leaves randomly I removed them from the prompt mockups with people are usually
harder to do and may have more visible errors once generated I'll copy and paste it into Photoshop I scale down and
add the logo into position on the mockup image then I duplicate the mockup image and add it as a clipping mask on the
logo layer I use one layer with the blending mode set to screen and another layer set to multiply so it can pick up
the Shadows and Light from the T-shirt texture I adjust the opacity of each layer to control how strong the effect
is if you found something useful in this video please leave a like I hope I've given you some ideas on how you can use
AI as a tool to speed up your workflow without relying solely on it to do all the work this way the satisfaction is
greater the work is more unique uh and you have more control over it thank you for watching and have a great day
[Music] [Music]
Heads up!
This summary and transcript were automatically generated using AI with the Free YouTube Transcript Summary Tool by LunaNotes.
Generate a summary for freeRelated Summaries

Creating Vectors from AI-Generated Silhouettes in Adobe Illustrator
Learn how to create stunning vector silhouettes using Adobe Illustrator and AI-generated images from Stable Diffusion and DALL-E.
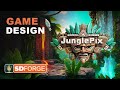
Creating Game Designs with Stable Diffusion and Photoshop: A Comprehensive Guide to Jungle Piics
Learn how to design a match-three game using Stable Diffusion and Photoshop, from logo creation to game assets.
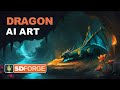
Creating a Stunning Dragon Digital Painting with Ai and Photoshop
Explore my process for creating a dragon digital painting using Ai and Photoshop in just 70 minutes!

Mastering Logo Design: Key Insights and Techniques
This video delves into essential aspects of logo design that are often overlooked, emphasizing the importance of understanding the target audience and the emotional impact of logos. It also introduces innovative tools for creating stunning mockups and offers practical tips for presenting designs effectively to clients.
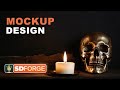
Creating Stunning Mockups with Stable Diffusion and Photoshop
Learn how to design impressive mockups using Stable Diffusion and Photoshop. Perfect your designs with ease!
Most Viewed Summaries

A Comprehensive Guide to Using Stable Diffusion Forge UI
Explore the Stable Diffusion Forge UI, customizable settings, models, and more to enhance your image generation experience.

Kolonyalismo at Imperyalismo: Ang Kasaysayan ng Pagsakop sa Pilipinas
Tuklasin ang kasaysayan ng kolonyalismo at imperyalismo sa Pilipinas sa pamamagitan ni Ferdinand Magellan.

Mastering Inpainting with Stable Diffusion: Fix Mistakes and Enhance Your Images
Learn to fix mistakes and enhance images with Stable Diffusion's inpainting features effectively.

Pamamaraan at Patakarang Kolonyal ng mga Espanyol sa Pilipinas
Tuklasin ang mga pamamaraan at patakaran ng mga Espanyol sa Pilipinas, at ang epekto nito sa mga Pilipino.

How to Install and Configure Forge: A New Stable Diffusion Web UI
Learn to install and configure the new Forge web UI for Stable Diffusion, with tips on models and settings.

If you found this summary useful, consider buying us a coffee. It would help us a lot!