Introduction
In the world of game development, creating appealing designs is crucial for attracting players. This article will guide you through the process of designing a match-three fictional game named Jungle Piics using two powerful tools: Stable Diffusion and Photoshop. We will cover everything from logo creation to designing in-game assets, including loading bars, backgrounds, buttons, and game items. Let’s dive into the step-by-step process and unleash your creativity!
Getting Started with Tools
Overview of Software Used
- Stable Diffusion: An AI text-to-image generator used to create high-quality artistic images.
- Photoshop: A powerful graphics editing software to refine and edit images.
For this tutorial, we will be using the Stable Diffusion Forge UI, installed locally on Windows, and the Juggernaut XL model from Civit AI.
Setting Up Stable Diffusion
- Download Stable Diffusion Forge: Make sure to have the latest version of the Juggernaut XL model (Version 10). Version 9 can also work, but newer versions will typically provide better outputs.
- Install ControlNet: Download the Coya Control Light XL canny model and place it in the appropriate folders within the Stable Diffusion directory to enable more controlled image generation.
- Configuration: Use DPM++ 2M Caris sampler with around 30 sampling steps and set the image dimensions at 1024 pixels. Enable ControlNet during your session.
Designing the Logo
Initial Sketch and Prompting
- Drawing the Logo: Start by drawing the logo using Photoshop. Use a black brush on a white background and activate symmetry for assistance. Choose a font that complements your design.
- Image Generation: To create a stylized logo, prompt Stable Diffusion with keywords related to your concept. After several iterations, refine the prompt to emphasize a white background and any specific design elements.
- Finalizing the Logo: Once satisfied, apply a high-resolution fix to enhance details. Use Photoshop’s tools (like the remove tool and selection tools) to clean up the logo, then save it as a PNG.
Tips for Logo Creation
- Experiment with different seeds in Stable Diffusion to see varying results.
- Use consistent styles that align with the game’s theme for cohesion.
Designing the Loading Bar
Creating a Visual Concept
- Sketch the Loading Bar: In Photoshop, create a rough sketch of a loading bar with related shapes.
- Prompting for Design: Use the sketch to prompt Stable Diffusion, applying a consistent art style (3D game asset) and specifying desired elements in the prompt.
- Enhancements and Upscaling: After obtaining your initial design, upscale it in Stable Diffusion and refine the colors in Photoshop for a polished look.
Crafting the Game Background
Building the Scene
- Initial Concept Sketch: Draw out a basic landscape scene that captures the essence of a Mayan jungle: walls, a waterfall, and exotic plants.
- Coloring for AI Recognition: Add colors using Photoshop to aid AI in generating a better result. For instance, paint the waterfall blue and plants green to enhance visual output.
- Image Generation: Using the colored sketch, input it into Stable Diffusion with ControlNet enabled and specify you want a lush background scene.
Refinement of the Landscape
- Iterate: Generate multiple versions to find the best one, adjusting prompts or denoise values as needed for desired results.
Creating Game UI Elements
Designing Game Items
- Utilizing Shapes: Create simple shapes (square, triangle, hexagon) in varying colors in Photoshop.
- Image to Image Prompts: Upload the shapes to Stable Diffusion using the app's image-to-image feature along with detailed prompts to generate various game items like gems.
- Continuous Experimentation: Adjust prompts to receive a variety of item designs that fit the game’s theme. This involves exploring different denoise values and creative prompts to motivate varied outputs.
Designing Game Buttons
- Basic Button Shapes: Use round rectangles for buttons in Photoshop. Position them strategically for aesthetics and usability.
- Creative Prompting: After creating the button outlines, upload the buttons and apply a similar art style to maintain uniformity across UI elements.
Finalizing Game Design
Bringing It All Together
- Incorporate Elements: In Photoshop, arrange the logo, loading bar, background scene, buttons, and game items on a unified canvas.
- Test and Iterate: Conduct tests by altering placements, colors, and sizes to achieve a balanced design that conveys the game’s theme.
- Final Adjustments: Make any last-minute tweaks or enhancements to polish the final output before considering it complete.
Conclusion
Creating captivating game designs requires creativity, technical skills, and the right tools. By combining the power of Stable Diffusion and Photoshop, you can bring vibrant game concepts like Jungle Piics to life. This guide has provided valuable insights into the process from logo creation to game assets and UI elements. Don’t forget to experiment and have fun as you develop your projects!
I hope this comprehensive guide has inspired you and equipped you with the knowledge to design your own stunning game artwork!
today I will show you how I use stable diffusion and Photoshop to create the design for a match three fictional game
named Jungle piics where players need to match three or more similar objects to score points and clear them from the
board I will start first with a logo but probably I should have designed it at the end after the game design so I can
get it to match better with the game I am using Photoshop with a black brush and symmetry activated to draw on a
white background you can use any font for text and in stable diffusion I will get a style that matches the prompt I am
using stable diffusion Forge UI installed locally on Windows for the model I will use Juggernaut XL which you
can find on the civit AI website I will use the latest version number 10 the one with the Roman numeral X but other
versions work okay too I still sometimes use Version 9 you can download this model or any other model you like and
place it in the web UI folder then in the models folder and finally in the stable diffusion folder as you can see I
already have both Version 9 and 10 here um I will also use control net so you need a canny model that you can get from
this page the one I use is the Coya control light XL cany model it has a download button and you can download it
and uh put it in the web UI folder then in the models folder and specifically in the control net folder you can put all
the control net models you downloaded here if your stable diffusion was open you can refresh it from here and choose
it from the list you also have a refresh for the control net model if you click on canny
it should add it to the model list for the sampler I am using DPM plus plus 2m Caris with 30 sampling steps and 1024
pixels enable control net it should have that enable check mark when it's enabled drop your sketch here then click on
canny for the control type it should automatically put canny in the pre-processor for the model use the one
I just showed you the rest of the settings can work on default but you can play around with sliders for control
weight and for control mode you can choose other options depending on the image and prompt you are using for the
prompt um I mention keywords like logo and the text you want to appear on the first try I got something like this
I will use a fixed seed so I can play around with the prompt and see what changes um I will use one of the saved
art styles you can find them in my other video with 260 art styles I will use the 3D game asset style and generate again I
didn't like that it didn't put a white background it added some mask in the background too so I will select that
part in The Prompt and add more weight to it so it knows that part it's more important press control and the up Arrow
a few times now when I generate I get what I wanted once you are happy you can use the high resolution fix to make it
larger you can either use a fixed seed and activate it from here I use the d8 X2 upscaler with a denoy strength of
0.3 and upscale by two if it's inactive it will still use those settings um but you can click on on this button with the
star and that will upscale the current Generation Um and you will get a bigger version very similar to your original
image depending on the denoy strength you have set now you can open the logo in Photoshop you know I like to use the
remove tool to uh to fix the imperfections things that look like they should not be there um I will not spend
too much time on this since it's not a real project uh just for fun but you get the idea then since it's on a white
background you can use all kinds of tools to cut it out from the background uh the object selection tool and select
object work okay um or you can drag around the subject to make a selection then if you apply a mask you can mask
out that background you can then add a color background behind to check how good the cutout is I missed this little
hole during recording um and fixed it later uh then you you can apply that mask and trim it so your document has
the same size as your image now uh it can be saved as a PNG and you can have a nice big logo
that could work for a game by the way if you have no idea what to design you can ask chat GPT look at what it suggests um
to create for Logos menus backgrounds and so on uh it can be quite useful back to photoshop I wanted to you know create
a loading bar so I quickly um added some uh you know round rectangles to get the shape of the loading bar on the left I
wanted something like a Mayan sculpture I didn't know exactly what to draw so I just did some shapes there that could
look like a side view statue or something um just enough information so AI can get the general shape and create
something interesting from it back to stable diffusion I will enable control net
and upload the sketch I made I'll enable canny and make sure it's the right model um then for the
prompt I'll describe what I want to appear I will hit generate and get a nice bar I will use the same art style
with the 3D game asset so it's more consistent and I got this version and now I can upscale it to get a bigger
version back in Photoshop I I remove uh the background again for the full loading bar I need some color to show
its full so I was thinking to paint in green on those feathers from the wings that is for the loading bar um you can
use the empty loading bar and then a mask to reveal the full bar I placed the logo and uh loading bar
and I started sketching a landscape that I wanted behind I wanted a torch um some walls and some exotic plants with a
Mayan jungle look um now you still have to make the sketch recognizable ible my sketch was too simple and AI didn't see
the waterfall in the right too well so it added some walls instead since there there are so many things in the scene
it's hard to get it all so I decided to add some colors so uh AI can identify better what is there I painted the torch
in Orange uh the waterfall in blue and some greens for the plants uh it's still a simple sketch of course I can let AI
generate how it wants things but I want it to be guided by me um to take my ideas so it's more unique this time
since it has colors I will use the image to image tab I will upload the image and for the image size I will use a similar
ratio to my sketch and for denoy strength I am using 0.75 I will select the same uh 3D game
asset art style from the Styles the result is completely different because I didn't enable control net uh and the
denoise is too big so I will keep the denoise but this time enable control net with canny uh just like before and now
we get an error a nontype error epic fail it worked before and and now it doesn't why well it must be a bug with
the forge but um the solution in this case is to make sure the width and height are divisible by
64 in this case 720 divided 64 is is 11.25 so we can take the closest number which is either 11 or
12 um and multiply it by 64 we get a number that will work and we can use that for the size now when we generate
uh we get something nice based on the ugly sketch I made of course since the sketch is so rough you can get a lot of
versions um you can either change the prompt um denoise strength or generate a few versions until you get something you
like um like in this case I have a nice waterfall and torch now what I like to
do sometimes is to drag the result back to image to image then I will try a lower denoise value and disable the
control net now I can use the exact ratio I want since it works when the control net is disabled my my video card
can handle it so I will go with full HD I hit generate and I get a similar version in full HD and you can play
around with um denoy strength and generate a few versions until you get something that works for
you I think I will stop at this version I will probably do some inpainting in some parts of the image and the final
result is this one for the background I am using a software called DP Animation Maker um to animate parts of the image
like the torch the waterfall and some lava I also need a grid where you know the gems will stay on the main play
window so um I did something quick from shapes making sure the thin lines have contrast um the first time I had the
lines in dark gray and they didn't show up well um I will use the same imageo image process as before with the same
control net settings and a doo strength of 0.72 the result was too black and white
so I added more words in the prompts especially golden hour uh to give it a a warm color now to upscale it I need to
send it to to the extras tab using that triangular icon here you can choose an upscaler and the resize value I will use
two and the result is this grid um I can use Photoshop to cut it out and test it on the background uh to see how it looks
uh later I did some um tests with actual gems on it so I added a dark rectangle so the gems stand out better
um for the buttons uh I created two round rectangles with contrasting text so it's easier for control net to detect
The Contours U I placed all the buttons on the same image to maintain a consistent style and this time I'm
using um image to image so it can pick up a hint of the colors I want I will use a prompt generated with chat GPT for
it and uh same game art style and I upload the buttons image with a denoise strength of 0.72 uh
I hit generate the result is too similar to to my image I need it to be more 3D so I
increased the denoise strength now it has more effects on the buttons but it it messed up the text so
I will enable control net with canny so AI can see the Contour of that text and now the result is how I expected some
nice buttons that look like they were crafted by Mayans long time ago in Photoshop you can cut it out from the
background using the object selection tool however in this case um some of the white
Blends um with the button Edge so a better solution would have been to add a round rectangle and clip that image
inside it so it would have a a clean Edge uh the menu screen is starting to come alive now it's time to work on the
you know the game items in Photoshop I created three shapes a square a triang triangle with rounded corners and a
hexagon all in different colors then in stable diffusion again with a long prompt from chat GPT and with that image
with the shapes uploaded in the imageo image tab um using the same art style um with a denoise of 0.75 and control net
and cany enabled I hit generate and got my first gems um you can then adjust the prompt and try to see what different
variation you get the cool thing is that um it's all in the same style and fits the shape you gave if you increase the
dooy strength uh you can get even more variation uh but what I like is that you can uh change the prompt and you can get
another set of icons change the prompt again and get another one and so on until you get enough items for your game
so uh the secret is to have a set of shapes in your image then use cany to get the Contour of that um if you have a
hint of color you can influence the outcome um but the prompt is also very important as is the Deno strength to
have more control you can sketch out each icon for example next I will do the uh cursor
icon so in um in Photoshop I will do a a quick sketch of how I want the cursor to look I want it to be um like a stone
spear or something um then since I didn't add any color I will just use text to image um with control net to to
generate it I got a mouse instead because I didn't add the sketch on the control net so I am adding that and
generating um again I will hit generate until I get a version that could work for
me then in Photoshop I remove the background and then I test it on the menu screen to see how it would
look that's all for today I hope you enjoyed uh the video uh leave a like if you found something useful um thank you
for watching and have a great day [Music]
Heads up!
This summary and transcript were automatically generated using AI with the Free YouTube Transcript Summary Tool by LunaNotes.
Generate a summary for freeRelated Summaries
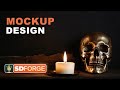
Creating Stunning Mockups with Stable Diffusion and Photoshop
Learn how to design impressive mockups using Stable Diffusion and Photoshop. Perfect your designs with ease!
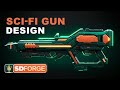
Creating Sci-Fi Gun Design Concepts Using AI and Photoshop
Learn how to design sci-fi gun concepts with Stable Diffusion AI and Photoshop in this comprehensive guide!
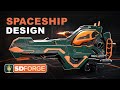
Creating Spaceships Using Photoshop and Stable Diffusion: A Step-by-Step Guide
Learn how to design impressive spaceships with Photoshop and Stable Diffusion. Enhance your digital art skills!
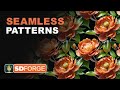
How to Create Seamless Textures with Stable Diffusion Forge
Learn to create seamless textures for games using Stable Diffusion Forge UI.
Mastering Prompting in Stable Diffusion: Tips and Tricks
Learn how to create effective prompts in Stable Diffusion for stunning artwork. Discover methods to enhance your AI-generated images.
Most Viewed Summaries

A Comprehensive Guide to Using Stable Diffusion Forge UI
Explore the Stable Diffusion Forge UI, customizable settings, models, and more to enhance your image generation experience.

Kolonyalismo at Imperyalismo: Ang Kasaysayan ng Pagsakop sa Pilipinas
Tuklasin ang kasaysayan ng kolonyalismo at imperyalismo sa Pilipinas sa pamamagitan ni Ferdinand Magellan.

Mastering Inpainting with Stable Diffusion: Fix Mistakes and Enhance Your Images
Learn to fix mistakes and enhance images with Stable Diffusion's inpainting features effectively.

Pamamaraan at Patakarang Kolonyal ng mga Espanyol sa Pilipinas
Tuklasin ang mga pamamaraan at patakaran ng mga Espanyol sa Pilipinas, at ang epekto nito sa mga Pilipino.

How to Install and Configure Forge: A New Stable Diffusion Web UI
Learn to install and configure the new Forge web UI for Stable Diffusion, with tips on models and settings.

If you found this summary useful, consider buying us a coffee. It would help us a lot!