Introduction
Creating sci-fi gun design concepts can be an exciting endeavor, especially with the help of modern technology. In this article, we explore how to utilize Stable Diffusion AI combined with Photoshop to develop intricate and innovative gun designs. Whether you're a seasoned artist or a beginner, this process allows you to generate creative designs efficiently, maximizing your artistic potential. Let’s dive into the detailed steps and techniques for bringing these futuristic concepts to life.
Getting Started with Photoshop
Initial Sketching
To kick off your design process, start by opening Photoshop and selecting a square document with a white background. Using a solid black brush, begin sketching contours of your gun design. At this stage:
- Focus on exploring different shapes and forms.
- Ensure the design looks functional, integrating essential elements such as:
- A grip
- A trigger
- A barrel
Remember, don’t get bogged down by details! Just create several small shapes and holes to add interest.
Preparing Your Sketch for AI
After finalizing your sketch, it’s time to prepare it for AI processing. I am working with the Stable Diffusion Forge UI on Windows, particularly utilizing the Juggernaut version 10 model, although you can use your preferred model with appropriate settings. Pay special attention to the following:
- Enable ControlNet.
- Enable Canny for edge detection.
Once set, upload your sketch to the AI.
Prompting the AI
Crafting Your Description
To generate a stunning result, you'll need to describe what you're envisioning. For instance, a prompt could be:
"Sci-Fi futuristic black metal gun with orange and green accents."
This level of detail helps the AI understand your creative intentions and produces more relevant outputs. After hitting generate, observe how the Canny pre-processor interprets your sketch, revealing the contour lines, which are critical for further design steps.
Experimenting with Styles
Exploring Different Art Styles
Choosing the right style can greatly impact your design. Here's a breakdown of the styles I've used:
- Game Concept Painting: Excellent for dynamic designs.
- 3D Styles: Particularly the Game Asset style for creating assets suited for in-game environments.
- Hard Surface Styles: Ideal for achieving a realistic look.
In this scenario, I opted for the Icon version style to generate cleaner results.
Improving Image Resolution
Once you’ve found a style you like, consider using high-resolution fix tools to enlarge your generated image for more detail. Alternatively, utilize the image-to-image generation feature, which captures the prompt but might require manual style adjustments.
Generating Diverse Concepts
Exploring Variations
With each prompt, feel free to explore variations. For instance:
- Try a cyberpunk style with neon colors.
- Generate a design for a plasma gun featuring energy coils.
- Experiment with an alien look using iridescent materials.
Creating Final Designs in Photoshop
Enhancing the Design with Color
Next, we want to increase the complexity of the sketch by introducing color cues. With a black background, use a hard transfer brush to add a golden texture with orange accents. Maintain good edge definition to ensure the Canny tool captures contours effectively.
- Use a Denoise strength of 0.45 for a balance between detail and variance in your outcomes.
Modify and Finalize Your Concept
Upon generating results, utilize Photoshop’s tools to tweak elements:
- Copy parts of the design that need alterations, such as adding holes or texturing elements.
- Employ the remove tool to erase unwanted features or adjust colors for better alignment with your overall aesthetic.
Crafting the Thumbnail Design
In addition to creating gun designs, think of practical applications like a video thumbnail. Using existing colors can help unify the visual identity while still focusing on aesthetic appeal.
- Use brushes and layers to create contours and refine placements to fit the thumbnail space effectively.
Adjusting Colors and Final Touches
Once your design has taken shape, refine it further by tweaking the color saturation and removing any floating artifacts that may disrupt the design coherence.
Conclusion
Exploring the world of sci-fi gun design using Stable Diffusion AI and Photoshop can transform your artistic process. By combining sketching with precise AI prompts and utilizing Photoshop's powerful tools, you can create intricate designs that resonate with your artistic vision. Whether you’re aiming for a sleek futuristic gun or a rugged sci-fi weapon, the combination of these tools makes the creative journey enjoyable and efficient. With practice, time invested in mastering these tools will yield stunning and original designs in the realm of sci-fi art. Happy designing!
in today's video I want to show you how I create sci-fi gun Design Concepts using stable diffusion Ai and Photoshop
let's start with a quick sketch in Photoshop I'm using a square document size with a white background with a
black solid brush I begin painting Contours at this stage you don't have to think too much just explore different
shapes and see what looks interesting it still has to look functional so include a grip a trigger and some kind of barrel
indicating where bullets or ammunition would be stored you don't need too many details just some small shapes and holes
here and there and you can quickly create something interesting I'll be using the stable diffusion Forge UI
installed on windows with the Juggernaut version 10 model however you can use your favorite model with the recommended
settings make sure to enable control net and then enable canny for the model I'm using COA control light XL canny now
upload your sketch or you can paste it directly there if you copied it from Photoshop for the prompt describe what
you want to see like a Sci-Fi futuristic black metal gun with orange and green accents and then hit generate next to
the result you can see how the canny pre-processor interpreted your sketch displaying the contour lines I usually
play around with the Styles I've created which you can find in my other video on art styles for what I need Styles like
game concept painting work okay but I also like the 3D Styles such as the game asset style which produces nice results
I also like the hard surface and 3D icon Styles I found that the icon version gave me cleaner results so for this
video I'll stick with that style once you've selected a a version you like uh you can use highres fix to
make it larger uh alternatively you can try another method by sending it to image to image using the photo icon uh
it will pick up the prompt for you but not the art style so you'll need to add that manually and depending on your
video cards capabilities try different sizes I usually go for the maximum size for denoise strength I use 0.45 so it
can add more details while maintaining similarity after about 20 seconds I get a bigger image with better quality let's
go back to text to image and try a different prompt we could try a cyberpunk style with neon pink and blue
colors or maybe a plasma gun with energy coils and electric arcs another idea could be an alien look with iridescent
metallic material which could be interesting we can play around with all kinds of ideas like a steampunk design
or one with a rugged industrial look there are so many possibilities to explore moving on to the next example
this time I want the AI to see more than just Contours I want to give it a hint of what colors to use and we so I've
decided decided on a black background and for the gun colors I want a golden texture with orange accents using a hard
transfer brush I'm trying to give it some form it still needs a good Edge so the canny can pick up the Contours but
if you squint your eyes you should be able to see it now go to the image to image tab here you can upload or paste
your sketch then I'll choose the 3D icon style for the prompt I'll describe the weapon and the colors including the
background for Deno I'll use 0.75 because I don't want the result to look like a sketch I want it to have a more
3D look so it needs more freedom if I hit generate I'll get something like this but it might not be very similar
because I didn't enable control net so just like in the previous example I'll enable cany with the Coya model and try
again look at that how similar and clean it looks now I'll drag the result to image to
image then disable control net for the size I'll go with the maximum size and for denoy strength I'll use
0.45 the result is a bigger image and it seems to have picked up some nice extra texture pretty cool I would say for just
a few minutes of work sometimes I want to modify small parts of the design I usually just copy
the image and paste it into Photoshop then I use the remove tool to fix fix or remove Parts I don't want for
instance I decided I wanted some holes in the bottom part of the gun so I painted two circles with a round brush
using the color of the background now I can paste the result back into image to image and generate a new version where
those holes are Blended better and look like they belong there see it looks good now for the last example I decided to
create a gun with a purpose designing the thumbnail for this video with a gun that fits well in the thumbnail I'm
using the existing colors green and orange to paint the form of the gun I'm trying to create a shape that looks
interesting but also fits well in the empty space between the text um just brushing and erasing to give it nice
Contours then you know I added some uh orange accents to make it pop a little and not be too boring it's a it's a
relaxing process you just go with the flow and let the sketch come to life before AI I used to do a lot of quick
sketches then choose the best looking one and uh improve upon it but now with AI you just need that basic um sketch
and AI can improve it and get a lot of you know variation it saves a lot of time AI is a tool that can be incredibly
useful allowing you to guide it to bring your ideas to life efficiently now I'm going back to the stable diffusion image
to image Tab and I'll paste or upload the image I'll choose the 3D icon style for the size I'm using 1920 by
1088 you might ask why not 1080 well because 1080 is not divisible by 64 so it will crash when I use control net I'm
using 0.7 for the Deno and I have a long prompt that describes the color and details of the
weapon I hit generate and of course it's different because I forgot again to enable control net so I'll enable and
use the Coya model and generate again now I noticed that part of the gun grip is missing so I checked the canny
result um as you can see I'm missing some parts of the weapon in certain areas because
there wasn't enough contrast on the edges to be able to see them um you can uh play with the settings in control net
to adjust that or you can add better Contours in the sketch or the lazy version I chose was to generate again
until I get a weapon with that part then I drag the result back to image to image and now canny can see the Contours
of that and this is the result now I copy the image and paste it into Photoshop I activated the text layers to
see how it looks I decided to move it down a little to avoid it being too close to the text and I reconstructed
the top part with content aware fill then I noticed that the orange color in the weapon was too strong so I wanted it
to be more similar to the text color I used selective color to adjust it so it matches better additionally I found a
floating piece that doesn't belong there so I removed it now the thumbnail is ready thank you for watching if you
found something useful please leave a like have a great day [Music]
Heads up!
This summary and transcript were automatically generated using AI with the Free YouTube Transcript Summary Tool by LunaNotes.
Generate a summary for freeRelated Summaries
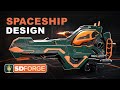
Creating Spaceships Using Photoshop and Stable Diffusion: A Step-by-Step Guide
Learn how to design impressive spaceships with Photoshop and Stable Diffusion. Enhance your digital art skills!
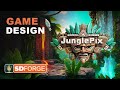
Creating Game Designs with Stable Diffusion and Photoshop: A Comprehensive Guide to Jungle Piics
Learn how to design a match-three game using Stable Diffusion and Photoshop, from logo creation to game assets.

Creating Vectors from AI-Generated Silhouettes in Adobe Illustrator
Learn how to create stunning vector silhouettes using Adobe Illustrator and AI-generated images from Stable Diffusion and DALL-E.
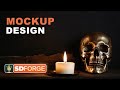
Creating Stunning Mockups with Stable Diffusion and Photoshop
Learn how to design impressive mockups using Stable Diffusion and Photoshop. Perfect your designs with ease!
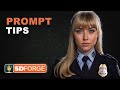
Mastering Prompting in Stable Diffusion: Tips and Tricks
Learn how to create effective prompts in Stable Diffusion for stunning artwork. Discover methods to enhance your AI-generated images.
Most Viewed Summaries

A Comprehensive Guide to Using Stable Diffusion Forge UI
Explore the Stable Diffusion Forge UI, customizable settings, models, and more to enhance your image generation experience.

Kolonyalismo at Imperyalismo: Ang Kasaysayan ng Pagsakop sa Pilipinas
Tuklasin ang kasaysayan ng kolonyalismo at imperyalismo sa Pilipinas sa pamamagitan ni Ferdinand Magellan.

Mastering Inpainting with Stable Diffusion: Fix Mistakes and Enhance Your Images
Learn to fix mistakes and enhance images with Stable Diffusion's inpainting features effectively.

Pamamaraan at Patakarang Kolonyal ng mga Espanyol sa Pilipinas
Tuklasin ang mga pamamaraan at patakaran ng mga Espanyol sa Pilipinas, at ang epekto nito sa mga Pilipino.

How to Install and Configure Forge: A New Stable Diffusion Web UI
Learn to install and configure the new Forge web UI for Stable Diffusion, with tips on models and settings.

If you found this summary useful, consider buying us a coffee. It would help us a lot!