Introduction to Razorpay Integration in Laravel
This video tutorial demonstrates how to integrate the Razorpay payment gateway into a Laravel application using Laravel Livewire. It includes creating a product listing, setting up payment buttons, and handling payment callbacks.
Setting Up the Laravel Project
- Created a new Laravel project with Livewire and default authentication.
- Configured MySQL database connection in the
.envfile. - Ran migrations to set up default tables.
- Registered a new user to verify authentication.
Creating Product Model and Seeder
- Generated a
Productmodel with migration includingname(string) andprice(integer) fields. - Created a seeder to insert dummy products: Gold (₹500), Silver (₹300), and Platinum (₹100).
- Seeded the database and verified product entries.
Building Product Listing and Detail Views
- Created a
ProductControllerwithindexmethod to fetch and display all products. - Designed product listing page using Tailwind CSS for a clean UI.
- Added a 'View' button linking to a detailed product page.
- Created a
showmethod and view to display individual product details with a 'Pay' button.
Integrating Razorpay Payment Gateway
- Registered a developer account on Razorpay and generated API key and secret.
- Stored Razorpay credentials securely in the
.envfile. - Added Razorpay's checkout script to the product detail page.
- Configured the payment button to trigger Razorpay checkout with dynamic product price and currency.
Handling Payment Callbacks
- Created a POST route for Razorpay callback to handle payment status.
- Disabled CSRF token verification for the callback route to avoid 419 errors.
- Implemented callback method in
ProductControllerto capture payment response. - Installed Razorpay's official PHP composer package to fetch payment details using payment ID.
- Verified payment status; if authorized, redirected to a success page.
Final Touches and Testing
- Tested payment flow using Razorpay test cards.
- Displayed payment success message on a dedicated success page.
- Suggested storing payment details and status in the database for admin management.
Conclusion
This step-by-step guide provides a complete workflow to integrate Razorpay payment gateway in Laravel applications, including product management, payment processing, and callback handling. The tutorial emphasizes practical implementation with code snippets and best practices.
For more Laravel tutorials and code snippets, check the creator's GitHub and subscribe to the channel.
For further reading on securing your payment processes, see our guide on Securing Your APIs in Azure API Management with OAuth.
If you're interested in expanding your knowledge on managing transactions, check out How to Generalize Transactions in Integrated Accounting Books.
For those looking to enhance their entrepreneurial skills, consider reading Mastering the Lean Startup Approach: Your Guide to Successful Entrepreneurship.
Additionally, if you're developing applications that require innovative solutions, explore Building the Ultimate Auto Space Parking Application.
Lastly, for insights on creating a sustainable business model, refer to How to Create a Profitable Local Business Directory Website.
Hi guys, today's video I'm going to show you how to implement Razer Pay payment gateway in Laravel application. So let's
get started with an example but before this started example I want to show you the demo what I have implemented. So let
me go and I have already installed Laravel live wire and go to the products page. Okay and I have just list of three
products and I have set up the price and for example if I want to buy the gold then if I click on view you can see the
detail pay and you just need to pay. So you need to click on the pay and here we implemented Razer pay payment. So here
I'm going to use the test card. So let me go to the test card and just copy this card and paste it over here and add
any expiration. So 1 2 3 and click on continue and maybe later and just wait for a moment and I'm just adding the
random. So it's just for the testing. So that's why. So yeah, just let wait. Okay. And
uh yeah, you can see that payment has successful. And let's wait for 1 second and it's redirect to the success page.
You can see that payments received successfully. This is very simple and basic example for now. And let's imp
implement same thing with our new application from the scratch. Okay. So let me go and go to my terminal and
clear this. Okay. And then I will just remove this one. Okay. And just clear it.
Okay. Yes. Now create the new application Laravel new. Okay. And we need to give the project name. So I will
say Laravel dash roser pay. Okay. And hit enter. And they are asking for the starter kit. I'm
going to choose live wire. And then keep default Laravel authentication and keep the default framework for the testing.
So let's wait a moment to download fresh Laravel application. So, let's wait. Yes. Now, it is also asking for
npm install. I will say yes. Okay. And let's wait a moment to install all npm dependencies. Okay. Great. And now let
me go Laravel Roser P. Okay. So yeah, this is our project and clear
it. Go to my VS code editor and yeah, let me just open that project. Okay. Open folder. And if I go Laravel and
Roser Pay and hit open, you can see that now project is open over here. and go to the env by default database is SQLite.
I'm going to change to the MySQL. Okay. And just uncomment this all the other configuration and database is Laravel
demo. So that I already created demo and username is root and password is also root. Save it. Now let
me run the migration. PHP artisan migrate. Okay. And go to the table plus and just refresh. Okay. Okay.
And you can see that all the tables default tables has created. Now let me run the application PHP artisans and go
to the browser local host and you can see that our fresh Laravel application is running
and if I click on register and use the fake filler for the field the information and just create an account
you can see that it's working perfectly fine. Now what I'm going to do I will create product table model and create
some dummy product. So that way we can list the product and you can pay based on the product. Okay. So let me go here
and create new migration for it. So PHP mac model product and with migration. So
that way model also create and also migration will be created. So you can see that model and migration created. So
let me go here and go to the migration. Here I will take string for name
and then I'm going to take a string for the price. Sorry, price for the integer. Okay, just two column I'm going
to take right now. Okay, image I will put it from the dummy image. But right now I'm just taking for name and price.
Okay, that's it. And let me run the migration. PHP artisan migrate. Okay, migration is running. Okay. And let me
go to the model. And here let me define the column. Okay.
Protected filable. And here I will just say name and price that what we have already taken from on the migration.
Okay. Save it. Okay. Now I will create the dummy product using the cedar. So let me create the cedar. PHP artisan mac
cedar and I will say product cedar okay and it's created a product cedar and now let me go here and go to the cedar
product cedar here let me create two three product so I just say product colon colon
create and first I will set up name will be gold product and price will be 500. Okay. And same
thing I will copy this and I will create a new product and that's called silver and price will be 300 and
same thing I will copy and I will create another product that's called platinum. Okay. And price will be
100. Okay. Save it and let me run this seder to create dummy product. So let me clear it. PHP
artisan db seed product ceder okay and you can see that now let me go to the table plus hit
refresh products you can see over here there is a gold silver platinum that is the products okay now what I'm going to
do I will create a new methods that call uh you know get method and list all the products okay so let me go and create a
controller for it first php artisen Mac controller and product controller. Okay. And you
can see that it's created product controller. Now let me go create new route for it. And it only access if you
are a login. So I will create route get products and I will
use product controller column class and use the index method. Okay. And just save
it. Okay. And go to the product controller. Now go to the https product controller. Here I'm going to create
new function. Okay. And I will get all the products from the table. product colon all okay and then return
view and I will just say products and I will pass the product variable as well
so products just save it okay and now let me go to the resource view and here create new file that's
called products dot bladphp Okay. And here I'm going to just use my snippets be bootstrap HTML. So I don't want to
use the bootstrap instead of I want to use uh tileb CSS. So let me go here and go to the header and use the white
configuration. Okay. So let me just paste it. So autogenerated that file and just display here like uh H1 tag
and products. Okay. That's great. And let me add some tailwind CSS class. So I will use the class for like a font u
will be bold. Okay. And then text will be gray 800. Okay. And then MB bottom will be 8. Okay. Same thing for the
container because this is bootstrap class. So I'm going to use px4 and py add. So
made added some spacing over here. Okay. and save it. Okay. Now, let's run the application. Okay. PHP artisans.
Okay. Yeah, this is great. Okay. Now, let me go here and just go to the products first. Okay. You can see that
product. So, that's great. But you can see that that's not added any CSS or anything. So, I need to keep running npm
rundev. So, let me go here. npm rundev. So, that means it generated a
CSS file. Okay. You can see that now bold and all the things. Okay. So this is fine for now. Okay. Now what I'm
going to do I'm just using for each attribute and list of all the products I'm going to
display products product. Okay. and unorder list right now I'm using and
just home and just in alli I'm just displaying this dollar product name okay and save
it and if I refresh you can see over here gold silver and platinum but this is not very good that what we expected
actually okay so what I'm going to do here I want to make it proper design okay so here also I am going to Add max
size or okay save it. Yeah, this is great. Some spacing for the product listing is not very good design. So I'm
going to use my snippet because uh tailwind CSS has lots of class you need to remember. So I'm going to just say
product card and this is the card they have designed. You can see over here with the like product image and product
name, pricing and the view button. Okay. So if you want to use this snippet and get this code then you can just go to my
GitHub profile and just go like uh snippets okay custom snippets I already published so you can take the code or
you can configure your own config snippets in VS code editor as well okay so you can just take a look there okay I
will also add this link to the description okay so now you can see so what I'm going to do next just this
product and looping this DIV. Okay. And make it proper design. Okay. So, just paste it. And same
thing, Ctrl X. And here save it. Okay. And remove this unorder
list. Yeah, you can see that gold, silver, platium still here. Say product. So, I want to change that as well. Okay.
And also display the dynamic pricing. Okay. and put a name and price also I'm going to change that's called price and
price is INR so I will keep this INR okay save it and you can see that much beautiful design over here you can see
that okay now what I'm going to do I will create the view page inside that page there will be a pay button okay so
what I will do just create a new route okay so let me close some files over here yeah and yeah go to that and just
say / id. I'm just passing the id and method will be show and I will also define the route
name products dot show. Okay, save it. Okay, this route I'm going to use for view button. So let me go and use
that route and product ID. Cool, right? And let me
go here and you can see there 1 2 and three. So this is perfect. Okay. Now let me go and go to the
controller. Here I will use show method and it's taking ID column. So first I will get the
product product colon find and find from the id return view. So I will create a new
view for it. So product show. Okay. And I will pass product
variable save. Okay. And now let me create blade file for it. So go here and just new file product dot
show. Save it. Okay. And same thing I'm not going to you know define right now theme integration. So just copy this.
Okay. And go to the product show and paste it over here. And just I will remove this.
Okay. And keep. Yeah. And here I will say just pay button. Okay. Save it. And let's see the design. If I click on
view, you can see that gold and with 500. Let me go back. And if I click silver, you can see that silver and pay
button over there. Okay. Now what I'm going to do now next, I need to integrate u uh the you know roser pay.
Okay. So what I need to do first of all I need to generate the key. Okay. So first of all which uh composer package
I'm going to use is razer uh officially composer package okay and also let me go first we get the API key and secret so
let me go to the website and you can see that after registration I have just created developer account okay and go to
the settings and go to the developer control and here you can see that I have already
register key but you can generate your own keys over here like click on the generate key so that's what I'm going to
show you but uh you can generate from there and let me set up in env file. Okay, because here just showing key that
is a secret also they are providing. Okay, so let me go and go to the env. And here I will be define. Okay, so
let me go here and just say reser pay key. Okay, equal to I will
define the key that I have over here. Save. And same thing for the secret. Yeah. So I will put the secret over
here. I'm not going to show you. So let me put it. So I have set up the secret and key. And now let me go here and go
to the documentation again. And they already provided a checkout payment gateway and we are going to use that
one. So let me go here. And you can see that they already provided pay button and you can see that script code. So I'm
going to use that one. Okay. So how can I do? So just uh first copy this script. Okay. and copy this and go to our view
page product show page and put at the end. Okay. And then copy this script. Okay. That's entire script I need to
copy it. Okay. And paste it over here. And what I need to change is let me go and you can see that for the button I
need to just define the ID. So we already created a pay button. So let me go and remove the hrf. Okay. And save it
and call it button. Okay, cool. Okay, save it. Okay, now you can see that we need to define your key
that we already saved. So I'm just getting from env that
reser pay key. Okay, that's key I'm taking from there. And then you can see that currency I need to pass and I can
get the currency from the product price and I need to divide 100 okay it's not from here just here because it's taking
from pesa okay so that's why and I will keep the INR name I will be keep okay and I think name I can change business
name I will be keep description keep image logo I'm not going to set up and also order ID is not generating okay and
call back URL we need to set up properly. So let me set up the call back URL. So let me go here to the
documentation and if I go check out options and handle the payment successful failure. So that means the
call back URL and they have already mentioned about that we need to create post call back URL. So let me go and
create new route and that's route out of o. So colon post. Okay. And then I will
just say Roger pay call back. Okay. And then I will
keep use the product controller. Product controller column class and then
call call back method. Okay. You can create the separate controller for it. That would be a best way. But uh right
now for this demo example, I'm going to use in same method. Okay. Same controller sorry name
and razor pay dot call that just save it. Okay. and uh go to the product controller and
here I will create new method call and just DD dollar
request all just debug all request what we are getting that's important save it okay
and yeah that's cool and you copy this route name and show method and here let me define
that route route and then roser pay call back and here is the name of user so I'm going to
take from the o user name same thing I will get the
email address from the o email and let me remove the contact number keep same as it is for now Okay,
save it. Okay, this is perfect. Now, let me go and just refresh it. So, go to the refresh. And this is silver. If I click
on pay, it's nothing. Why? Let me go here and just see what we made a mistake.
Refresh it. And if I click on check out, you can see that now it's working. And you can see that with the 300 and you
need to card information. Right now, it's a test mode. So, I'm going to use test card. Okay. So copy
this and I will say 2022 25 and 1 2 3. Okay. And click on continue. Maybe do it later. And sending the RTP. Right now
it's all dummy. So just add 1 2 3 4 5 6. Click on continue. Yeah. Let's wait a moment to confirm the payment. After
confirmation, it should redirect to the call back URL. So yeah, 1 3 4 2 1. And yeah, you can see that. But you can see
pay is expired and roser pay call back. You can see that we already created route for it and it is working like it's
redirected on that URL. But you can see they have like 419 page expire. So that means CSRF token because we are using
the post method. So what I need to do go to the bootstrap app and here I need to
exclude from the token checking. Okay. Because every time post request they are checking CSRF token. So let me ignore
this for checking. Okay. So I will use middleware and validate CSRF token. Okay. And I
will just say expect. Okay. And here as a area argument we
need to give. Okay. And here we need to pass the URL. Okay. So yeah this is cool. Okay. And let me go here. And this
is our URL. Save it and just paste it. Okay. So that means we have just expect like uh uh you know accept. Okay. Not
expect. Yeah. Save it. Okay. And now let's see. Okay. So let me go here and let me try again with the payment.
Okay. So refresh it. Yeah, there is a problem. Let me go. What happens? Yeah, there is
a problem with expect variable parameters. So [Music]
maybe this is all done. This is not expect except Okay, just save it. Okay, and now it should work. Okay, now let me
go and run it again our application. Yeah, it's running. And refresh it. And let me try again with the gold. So pay
it. Okay. And let's wait a moment. And again, I need to use the test card. So, same thing. I'm going to copy this and
just 1 2 5 1 2 3. Okay. Click on continue. Maybe do it later. And sending the RTP.
1 2 3 4 5 6. Click on continue. Now, it should work. So, let's wait a moment. Yep. 3
2 Yeah, you can see that and it's redirect properly and also like uh you know they are not checking the CSRF
token for this URL and you can see over here we are getting the payment roer payment id right now we are not able to
access like our what is our payment status but we need to get payment status from this ID. So how can we do this?
Okay, so I need to use roser payment gateway. Okay. So you can see this is the composer package for PHP. So I'm
going to use this. Okay. And install this package. Okay. So just uh yeah, you need to run this command to install the
roser. So let's wait a moment. Yeah, it's installed. And let me run the again application and go to the documentation.
They already provide how to create and use. So copy this. Okay. name space and go to the controller and here I will say
roserp API and create the object. So here I'm going to create the object and API key I need to pass and we already
set up that key. So from the envir pay key okay and same thing secret here
we need secret. Okay so here I will say secret. So that means they have created API object for riser pay. And now let me
scroll down there is a payment option over here. If you click on it and if you search fetch payment ID
okay we just need to pass payment ID. Okay. So I will just copy and here I will be pass the payment ID and payment
ID I will I'm going to get from this request. Okay. So request and payment ID
and home response. Okay. And
just debug it and let's see what payment information we are getting. Save it and let's try again. Okay. So go to the
products, go to the gold and let's payment again. Okay. Click on it and go to the method and just adding
dummy card. 25 1 2 3 1 2 3 4 5 6 for the OTP. And let's
wait a moment. Let's see the payment information. and what information they
have provide. Yeah, you can see that we are getting the array and with the payment
ID and payment like was the 500 and status is authorized. They have also written in the documentation authorized
that means payment done after some time they have make it captured. Okay. So you can see that we can check with the
status here all the details you have with the like email and name and all the things. Okay. But right now information
important for us to status. Okay. So just copy this and here what I'm going to
do if response status equals equal
to authorized then it should be done. return view and product success. Okay, just I'm
create a blend file over here. Success page. You can make it beautiful or any design whatever you want. But right now
I am just creating blend file. You can create the route as well. And just copy this. Go to the success. Paste it. And
let me remove the rest of all the things. And here I will just say success alert that I have already created a
session and I don't want a session or anything. Just display the message. Okay, this is already I have created a
snippet. So just say payment
made fully. Okay, that's great. Simple message there is nothing. Save it. Okay. And if anything goes wrong with the
payment, then I'm just debugging the response. Okay. So, let's see. Okay. If success, that means it's redirect to the
success page. Okay. Save it. Okay. And now, let me go and try again
products. Go to the gold and pay. Now, let's again use the dummy card. 1 2 5 1 2 3 click on continue
maybe later and sending the OTP 2 3 4 5 6 and click on continue okay it's taking time to
confirming just wait yeah you can see that here is the payment made successfully so you can see
that you can create proper success page and payment has successfully. Right now you can see over here I have just
written the code like get fetch the payment detail from the id but you can store in database and the status also
you can store in database and you can write your own logic over here like uh you know
store database. Okay so that way you can display in the admin side as well. So I hope guys you understand how easily we
can do razer payment gateway step by step like this way. At the end if you like this video then don't forget to
like, share and subscribe my channel for more videos about Laravel. Thank you so much for watching. See you in the next
video guys.
To set up a Laravel project for Razorpay integration, start by creating a new Laravel project with Livewire and default authentication. Configure your MySQL database connection in the .env file, run migrations to set up the default tables, and register a new user to verify authentication.
To create a product model and seeder in Laravel, generate a Product model with a migration that includes name and price fields. Then, create a seeder to insert dummy products like Gold (₹500), Silver (₹300), and Platinum (₹100), and seed the database to verify the product entries.
Integrating Razorpay involves registering for a developer account to obtain your API key and secret, which should be stored securely in the .env file. Add Razorpay's checkout script to your product detail page and configure the payment button to trigger the Razorpay checkout with the dynamic product price and currency.
To handle payment callbacks, create a POST route for the Razorpay callback and disable CSRF token verification for this route to avoid 419 errors. Implement a callback method in your ProductController to capture the payment response and verify the payment status using Razorpay's PHP composer package.
You can test the payment flow by using Razorpay's test cards to simulate transactions. Ensure that you display a payment success message on a dedicated success page and consider storing payment details and status in the database for better management.
Best practices for securing payment processes include using HTTPS for your application, validating payment responses thoroughly, and storing sensitive information like API keys securely in environment files. Additionally, consider implementing OAuth for API security and regularly updating your dependencies.
For more resources on Laravel and payment integration, check the creator's GitHub for additional tutorials and code snippets. You can also explore related guides on securing APIs, managing transactions, and enhancing entrepreneurial skills through various linked articles in the video description.
Heads up!
This summary and transcript were automatically generated using AI with the Free YouTube Transcript Summary Tool by LunaNotes.
Generate a summary for freeRelated Summaries
Build a Full-Stack LMS with React, Node.js, MongoDB & Stripe
Learn to create a comprehensive Learning Management System where educators upload courses, students enroll and watch online, featuring Clerk authentication and Stripe payments. This tutorial covers frontend React integration with backend Node.js APIs, including course management, user enrollment, progress tracking, and payment processing, all deployed on Vercel.

Securing Your APIs in Azure API Management with OAuth
Learn how to protect your APIs in Azure API Management using OAuth. Secure your APIs effectively with our detailed guide!

Ultimate Git and GitHub Tutorial: Version Control & Collaborative Workflows
Master Git basics and GitHub collaboration with this comprehensive course by Sumit Saha. Learn Git's core concepts—tracking, staging, committing, branching, merging—and how to effectively use GitHub's remote repositories and pull requests through practical examples and clear explanations.

Building the Ultimate Auto Space Parking Application
Learn how to create an advanced parking application with Auto Space using modern technologies.
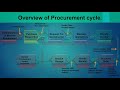
Complete SAP Procurement Cycle (P2P) Explained Step-by-Step
This video provides a detailed walkthrough of the SAP Procurement Cycle, also known as the Procure-to-Pay (P2P) process. Learn how to manage purchase requisitions, request for quotations, vendor selection, purchase orders, goods receipt, and invoice processing within SAP MM module.
Most Viewed Summaries

A Comprehensive Guide to Using Stable Diffusion Forge UI
Explore the Stable Diffusion Forge UI, customizable settings, models, and more to enhance your image generation experience.

Kolonyalismo at Imperyalismo: Ang Kasaysayan ng Pagsakop sa Pilipinas
Tuklasin ang kasaysayan ng kolonyalismo at imperyalismo sa Pilipinas sa pamamagitan ni Ferdinand Magellan.

Mastering Inpainting with Stable Diffusion: Fix Mistakes and Enhance Your Images
Learn to fix mistakes and enhance images with Stable Diffusion's inpainting features effectively.

Pamamaraan at Patakarang Kolonyal ng mga Espanyol sa Pilipinas
Tuklasin ang mga pamamaraan at patakaran ng mga Espanyol sa Pilipinas, at ang epekto nito sa mga Pilipino.

How to Install and Configure Forge: A New Stable Diffusion Web UI
Learn to install and configure the new Forge web UI for Stable Diffusion, with tips on models and settings.

If you found this summary useful, consider buying us a coffee. It would help us a lot!