Introduction
Are you struggling to develop Flutter applications on a slow computer? If so, Genymotion can be a game-changer for your development process. In this article, we will explore how to set up and use Genymotion with Flutter, ensuring you have a smoother experience without needing to invest in a new machine.
Genymotion is an Android emulator that offers excellent performance, especially on low-end systems. It allows you to run your Flutter apps in a virtual Android environment, which is particularly helpful if your hardware is limiting. This guide will cover everything from downloading Genymotion to linking it with Visual Studio Code and Android SDK.
Why Choose Genymotion?
Using Genymotion provides several advantages for Flutter developers:
- Performance: It is optimized for speed, making it suitable for less powerful machines.
- Ease of Use: With a user-friendly interface, setting up and running an emulator is straightforward.
- Free Version: For personal use, the free version offers ample features for development needs.
Getting Started with Genymotion
Step 1: Download Genymotion
To begin, you need to download Genymotion. Follow these steps:
- Open your preferred browser and search for "Genymotion free."
- Click on the official link to navigate to the download page.
- You will see options to download Genymotion with or without VirtualBox. If you already have VirtualBox installed, choose the former; otherwise, opt for the latter.
- Make sure your system meets the requirements:
- 400 MB free disk space
- Minimum of 4 GB of RAM
- Enable VTX in BIOS settings (if not already enabled)
- Click on the download link to start the process.
Step 2: Install Genymotion
Once the download completes, proceed with the installation:
- Locate the downloaded file and run the installer.
- Follow the installation prompts until completion.
- After installation, make sure to launch Genymotion and select personal use.
Step 3: Setting Up Virtual Device
After installation, set up a virtual device:
- Open Genymotion and click on the ‘+’ icon to add a device.
- Choose an Android version (e.g., Samsung Galaxy S10).
- Configure any required settings as you prefer and start the download of the virtual device.
Step 4: Integrating Genymotion with Android SDK
For Genymotion to work properly with Flutter, you need to connect it with the Android SDK:
- Open Genymotion and navigate to settings.
- Under the ADB (Android Debug Bridge) section, input the path to your Android SDK.
- To find the correct path, open Android Studio and go to Tools > SDK Manager; the location will be displayed there.
- Once set, enable developer options in your virtual device settings and turn on USB debugging.
Step 5: Running the Emulator in Visual Studio Code
- Launch the virtual device from Genymotion.
- Open Visual Studio Code and check if the device is recognized.
- You should see the device listed under available devices.
- Try running your Flutter application; it should now load seamlessly in the Genymotion emulator.
Troubleshooting Common Issues
While setting up Genymotion, some common issues might arise:
- VirtualBox Compatibility: Sometimes, Genymotion may not support the latest version of VirtualBox. If you encounter this, revert to version 6.0.4, as it is known to work well with Genymotion.
- Performance Settings: Ensure that your emulator settings are optimized. Adjust RAM and CPU settings if your emulator seems to lag.
- Updating Settings: Always restart Genymotion after making changes to settings for them to take effect.
Conclusion
Genymotion is a powerful tool for Flutter developers, especially for those working on less powerful machines. By following the steps outlined in this guide, you can easily set up and integrate Genymotion with your Flutter development workflow. This setup not only enhances performance but also helps you unleash your creativity by making development smoother and more efficient.
If you found this guide helpful, consider subscribing to my channel for more tips and tutorials to help you in your app development journey!
welcome guys this is sleek on here in this video I am going to show you how to use genie motion with your flutter
development so for those who are having slow computers Genie motion is definitely a good option it is something
you should try before getting a new computer if you feel if you fell short of budget and if you are unable to
purchase a new computer Genie motion is something you should try and I highly recommend try Genie motion for
developing your flutter apps so in order to download Genie motion go to your favorite Google search engine or Bing
wherever and then search for Ginni motion free and then press enter and you will find the link Genie motion for fun
free Android just open it it takes you to this page and then like go through it and then download the Genie motion okay
so it says download Genie motion desktop three point one point zero with virtual box without VirtualBox okay so let me
like I already have a virtual box installed and I will go with the second option if you are not having a
VirtualBox install this is something which you should try and here are the system requirements mentioned okay so it
okay so it's okay to go with 32 or 64 bit okay with the VTX should be enabled so these are the basically the settings
that were required for VirtualBox to be up and running okay so I will leave these things for you to figure out and
then something needs to be enabled in BIOS settings if it is not enabled or did
okay so 400 MB of this space 4 GB of RAM ok VirtualBox explained for family so let's just go ahead and download this
okay you can see the files have started downloaded but it is showing some plans right now I'm not going to choose any
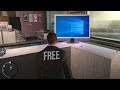
plan because I want to continue using it for free well the file is downloaded now just
goes with installation no it's just a regular installation installation is finished now okay just take launch in
emotions click on finish it provide the username and password and click on next okay I'm you selecting personal use here
okay accepting the license okay and then I'm going to click on plus button here so it is asking me to select a device so
okay let's go with yes ten so if you want to change any settings just go out and change it it's going to take a while
to finish the download okay so the download is done now so let's try to start it
yeah here you go you can see right so it's coming up now okay so it's up now okay see it's it's highly responsive
because my system is quite faster this highly responsive before checking whether Jeanne motion is working with
the visual studio code we have to link jeanne motion with Android SDK so for that you need to go to jeanne motion
settings and abd and you have to provide the Android SDK path here so in order to know this path you need to what you need
to do is you need to go to Android studio tools SDK manager and you can get the SDK location path here
so then close it and then once the settings are updated go to settings and then enable developer options okay
so in developer options enable debugging USB debugging and then start the emulator in the meantime what we'll do
is we'll open the visual code and see if it is getting dejected okay so once this is up in devices you'll be able to see
that Samsung Gallegly stone is available okay so our artists and I will just takes you with this
you can see that app is loading now and it is up okay so so this is how well you use a genie motion with the visual
studio code so like while actually well going to this process one of the issues what I have faced was like it doesn't
support the latest version of visual like VirtualBox okay it doesn't support the latest version of VirtualBox and we
have to go to six point zero point four version I think okay so that's it this is the ocean which I am using here okay
six point zero point four is a version which you should be using okay and then apart from that we need to upload the
settings over here okay so if these two things are not meeting like it might not work as expected but once after updating
this you need to restart the immediate transfer hope this video is helpful to you guys thank you so much for watching
this video if you really like my videos just go ahead and subscribe to my channel for more videos like this thank
you so much bye
Heads up!
This summary and transcript were automatically generated using AI with the Free YouTube Transcript Summary Tool by LunaNotes.
Generate a summary for freeRelated Summaries

Exploring the Benefits of Touch Screen Styluses and Input Devices
Discover the advantages of touch screen styluses and alternative input devices for tablets and laptops.

Ultimate Guide to Installing Forge UI and Flowing with Flux Models
Learn how to install Forge UI and explore various Flux models efficiently in this detailed guide.

Unlocking the Unlimited Power of Cursor: Boost Your Productivity!
Discover how to harness Cursor for ultimate productivity, from controlling apps to optimizing workflows!

Getting Started with Svelte: The Ultimate Beginner's Guide
Learn the best starting points to get started with Svelte, including tutorials and tips for beginners.
25 Must-Have Free PC Programs for All Gamers
Discover 25 essential free programs that enhance gaming on your PC, from launchers to utilities for modding and system management.
Most Viewed Summaries

Kolonyalismo at Imperyalismo: Ang Kasaysayan ng Pagsakop sa Pilipinas
Tuklasin ang kasaysayan ng kolonyalismo at imperyalismo sa Pilipinas sa pamamagitan ni Ferdinand Magellan.

A Comprehensive Guide to Using Stable Diffusion Forge UI
Explore the Stable Diffusion Forge UI, customizable settings, models, and more to enhance your image generation experience.

Mastering Inpainting with Stable Diffusion: Fix Mistakes and Enhance Your Images
Learn to fix mistakes and enhance images with Stable Diffusion's inpainting features effectively.

Pamamaraan at Patakarang Kolonyal ng mga Espanyol sa Pilipinas
Tuklasin ang mga pamamaraan at patakaran ng mga Espanyol sa Pilipinas, at ang epekto nito sa mga Pilipino.
Pamaraan at Patakarang Kolonyal ng mga Espanyol sa Pilipinas
Tuklasin ang mga pamamaraan at patakarang kolonyal ng mga Espanyol sa Pilipinas at ang mga epekto nito sa mga Pilipino.

If you found this summary useful, consider buying us a coffee. It would help us a lot!